Rack Installation Guide
1-15
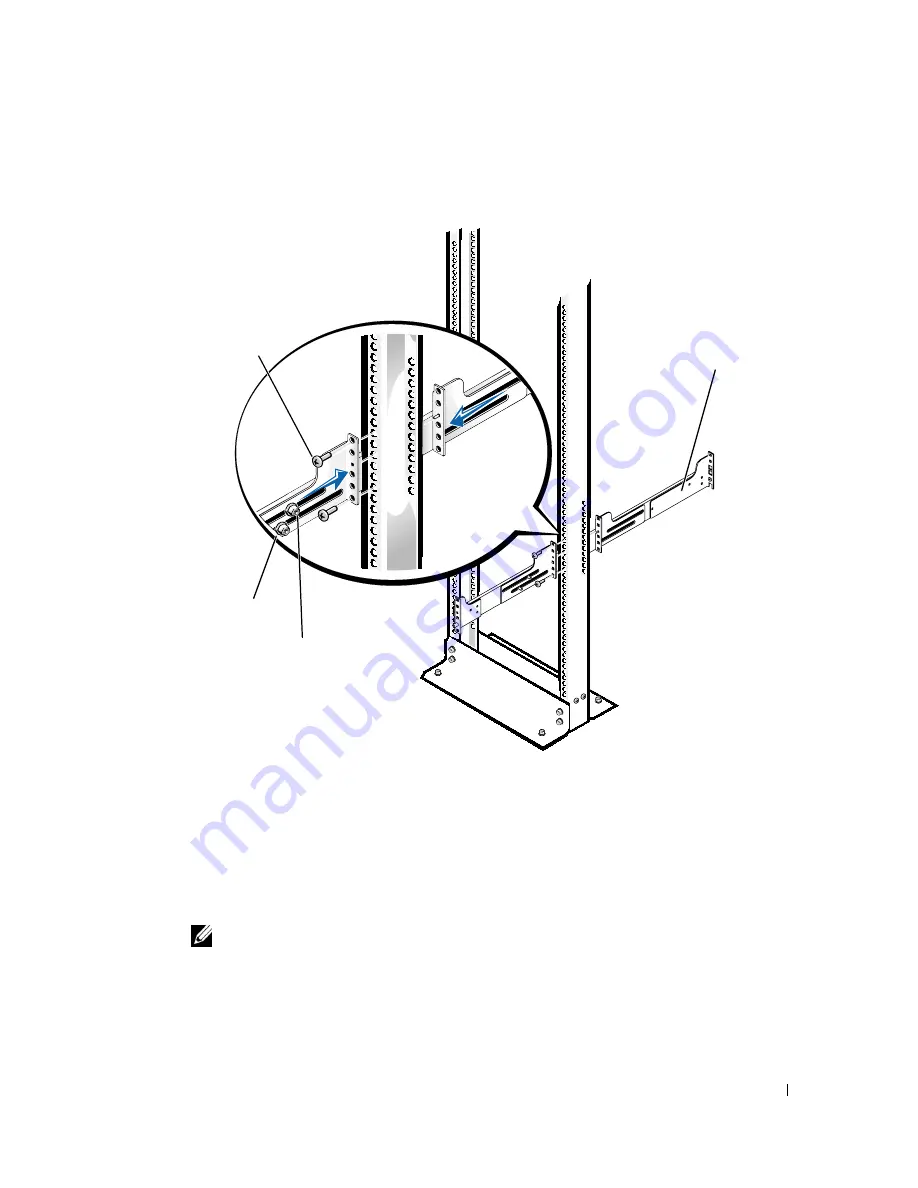
F i g u r e 1 - 1 1 . I n s t a l l i n g t h e S l i d e A s s e m b l i e s f o r C e n t e r - M o u n t
C o n f i g u r a t i o n
Flush-Mount Installation
To prepare the RapidRails slide assemblies for flush-mount installation in the 2-post rack,
perform the following steps:
1
Locate the left slide assembly and place it on a smooth work surface. Place the right
slide assembly to the right of the left slide assembly. Position both rails so that the
center brackets are facing upwards.
NOTE:
The slide assemblies are factory configured for center-mount use. For flush-mount
installation, you must remove, rotate 180 degrees, and reinstall the mounting bracket on
the opposite slide assembly.
2
Remove two locking nuts and two shoulder washers from each center bracket.
12-24 x 0.5-inch
Phillips screw
(2 per bracket)
right slide
assembly
shoulder
washer
(2 per bracket)
locking nut
(2 per bracket)


