5. Place the system board that you just removed next to the replacement system board.
Replacing the System Board
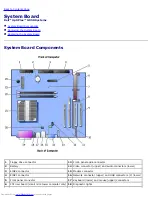
1. Transfer components from the existing system board to the replacement system board.
2. Remove the memory modules and install them on the replacement board.
CAUTION:
The microprocessor package and heat-sink assembly can get hot. To avoid burns, be sure that
the package and assembly have had sufficient time to cool before you touch them.
3.
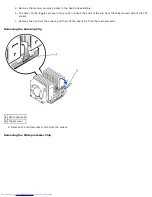
Remove the cooling fan/heat-sink assembly and microprocessor
from the existing system board and transfer them to
the replacement system board.
4. Configure the settings of the replacement system board.
5.
Set the jumper
on the replacement system board so it is identical to the one on the existing board.
NOTE:
Some components and connectors on the replacement system board may be in different locations than the
corresponding connectors on the existing system board.
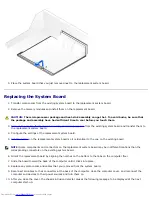
6. Orient the replacement board by aligning the notches on the bottom to the tabs on the computer floor.
7. Slide the board toward the back of the computer until it clicks into place.
8. Replace any components and cables that you removed from the system board.
9. Reconnect all cables to their connectors at the back of the computer, close the computer cover, and reconnect the
computer and devices to their power sources and turn them on.
10. After you close the cover, the chassis intrusion detector causes the following message to be displayed at the next
computer start-up:
Содержание OptiPlex GX50
Страница 17: ...Small Desktop Computer ...
Страница 26: ......
Страница 30: ...To replace the I O panel follow the removal procedures in reverse Back to Contents Page ...
Страница 45: ...1 Power cable 2 Audio cable 3 CD drive cable 4 CD drive connector Small Mini Tower Computer ...
Страница 65: ...Back to Contents Page ...
Страница 78: ...ALERT Cover was previously removed 11 Reset the chassis intrusion detector Back to Contents Page ...


