38
Communication Cards
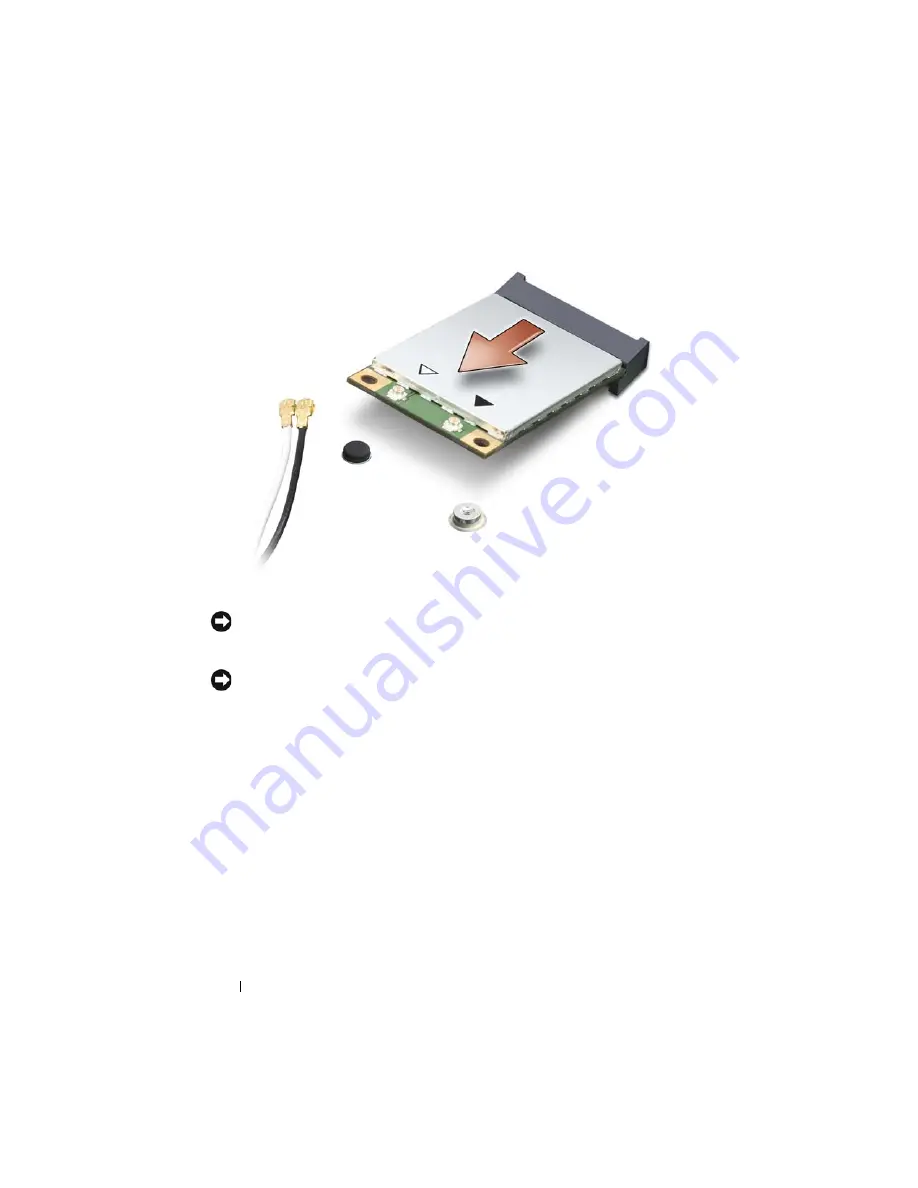
Replacing a WLAN Card
NOTICE:
The connectors are keyed to ensure correct insertion. If you feel
resistance, check the connectors on the card and on the system board, and realign
the card.
NOTICE:
To avoid damage to the WLAN card, never place cables under the card.
1
Insert the
WLAN
card connector at a 45-degree angle into the system
board connector labeled "WLAN."
2
Press the other end of the
WLAN
card down into the slot on the system
board until the card clicks into place.
3
Replace the M2 x 3-mm securing screw.
4
Connect the appropriate antenna cables to the
WLAN
card you are installing:
If the WLAN card has two triangles on the label (white and black),
connect the white antenna cable to the connector labeled "main" (white
triangle), and connect the black antenna cable to the connector labeled
"aux" (black triangle).
If the WLAN card has three triangles on the label (white, black, and gray),
connect the white antenna cable to the white triangle, connect the black
Содержание M1530 - XPS laptop. TUXEDO
Страница 1: ...w w w d e l l c o m s u p p o r t d e l l c o m Dell XPS M1530 Service Manual Model PP28L ...
Страница 12: ...12 Before You Begin ...
Страница 24: ...24 Memory ...
Страница 27: ...Processor Thermal Cooling Assembly 27 1 thermal cooling assembly 2 captive screw 6 3 M2 5 x 5 mm screw 2 3 1 ...
Страница 30: ...30 Processor Thermal Cooling Assembly ...
Страница 34: ...34 Processor ...
Страница 48: ...48 Hinge Covers and Center Control Cover ...
Страница 54: ...54 Battery Latch Assembly ...
Страница 58: ...58 Keyboard ...
Страница 62: ...62 Button Board ...
Страница 72: ...72 Display Assembly ...
Страница 76: ...76 Palm Rest 9 Turn the computer top side up and remove the single screw from the top of the palm rest ...
Страница 80: ...80 Palm Rest ...
Страница 88: ...88 Speaker ...
Страница 92: ...92 Hard Drive Cage ...
Страница 98: ...98 System Board ...
Страница 102: ...102 S Video Board ...
Страница 112: ...112 Coin Cell Battery ...


