


of the firmware on the digitizer will remain unchanged and will be compatible for
Windows 7. To revert the firmware to the default version, you have to rollback
the application
•
Installing Windows 7 bundle over Windows Vista/Windows XP
– If you have upgraded the operating system to Windows 7 from Windows Vista/
Windows XP, without uninstalling the N-Trig bundle, the firmware will remain
unchanged and will be compatible for Windows Vista/Windows XP. The
Windows 7 bundles already contains the firmware rollback application. It will run
the rollback tool and then continue to install the Window 7 bundle installation.
Performance Issues
•
No multi touch functionality
a.
Check if the N-trig bundle is installed.
b.
Open Control Panel and the N-trig DuoSense Digitizer Settings icon must be
displayed. If the bundle is not installed. Install the relevant bundle for the
operating system installed on the computer.
c.
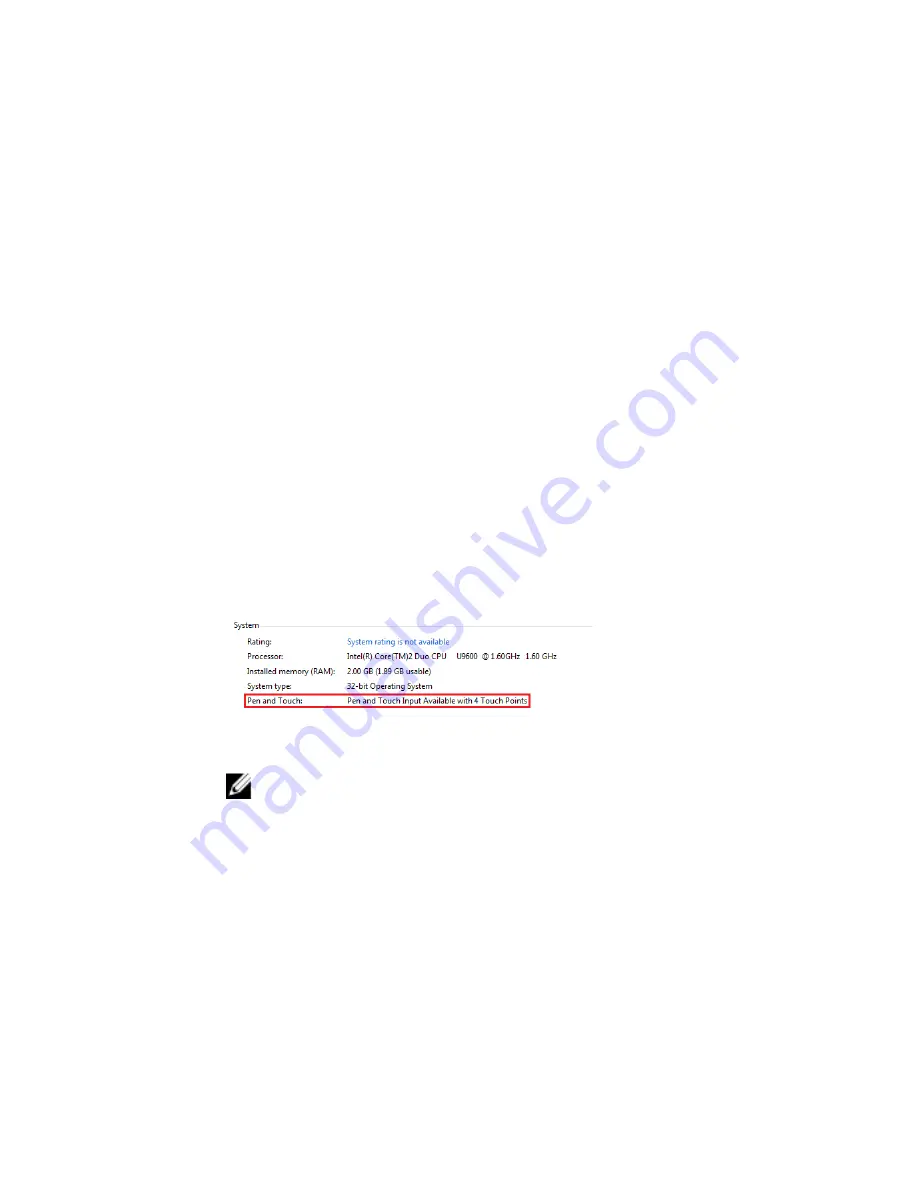
Check the system information to see how many touch points are detected.
1.
Click on Start.
2.
Right click on Computer and select Properties from the menu.
3.
Number of touch points should be written in the information window .
Figure 11. System Information — Touch Points for Pen and Touch Input
NOTE: In Windows Vista and Windows XP bundles there are no 4 points
multi touch after bundle installation. The Vista/XP bundles support single
touch and gestures (two fingers).
•
Bundle is installed but touch functionality is missing
a.
Open the Device Manager and check that the Digitizer is recognized by the
computer.
29
Содержание Latitude XT3
Страница 1: ...Dell Latitude XT3 Owner s Manual Regulatory Model P17G Regulatory Type P17G001 ...
Страница 32: ...32 ...
Страница 42: ...42 ...
Страница 60: ...60 ...
Страница 64: ...64 ...
Страница 68: ...68 ...
Страница 71: ...11 Follow the procedures in After Working Inside Your Computer 71 ...
Страница 72: ...72 ...
Страница 75: ...11 Follow the procedures in After Working Inside Your Computer 75 ...
Страница 76: ...76 ...
Страница 84: ...84 ...
Страница 90: ...90 ...
Страница 92: ...92 ...
Страница 96: ...96 ...
Страница 100: ...100 ...
Страница 102: ...102 ...
Страница 106: ...106 ...
Страница 112: ...112 ...
Страница 114: ...5 Flip the power board 6 Disconnect the cable from the display power board 7 Remove the display power board 114 ...
Страница 116: ...116 ...
Страница 120: ...120 ...
Страница 124: ...124 ...
Страница 128: ...128 ...


