


Before installation
After installation
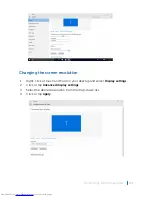
Changing the audio settings
1
On the taskbar, click or tap the search box, and then type
Dell Audio.
2 Click or tap
Dell Audio
and change the audio settings as required.
Camera
The Inspiron 22-3265 is shipped with an integrated 0.92 megapixel high-speed
camera with a maximum of 1280 X 720 HD resolution at 30 FPS.
NOTE:
You must replace the camera module if you encounter any issues with
the built-in microphones.
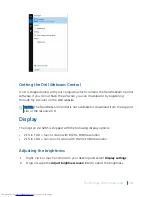
Identifying the webcam in device manager
1
On the taskbar, click or tap the search box, and then type
Device Manager.
2 Click or tap
Device Manager
.
The
Device Manager
window is displayed.
3 Expand
Imaging devices
.
Starting the camera application
1
On the taskbar, click or tap the search box, and then type
Camera.
2 Click or tap
Camera
.
Technology and components
99
Содержание Inspiron 22 3000 SERIES
Страница 1: ...Inspiron 22 3000 Series Service Manual Regulatory Model W17B Regulatory Type W17B001 ...
Страница 25: ...1 stand riser 2 stand base Removing the stand assembly 25 ...
Страница 28: ...1 back cover Removing the back cover 28 ...
Страница 32: ...1 optical drive bezel 2 optical drive 3 optical drive bracket 4 screws 2 Removing the optical drive 32 ...
Страница 36: ...1 screws 3 2 hard drive bracket 3 hard drive Removing the hard drive 36 ...
Страница 39: ...1 system board shield 2 screws 4 3 display assembly base Removing the system board shield 39 ...
Страница 42: ...1 memory module 2 securing clips 2 3 memory module slot Removing the memory module 42 ...
Страница 49: ...3 Replace the stand Replacing the wireless card 49 ...
Страница 54: ...1 microphone cable 2 display assembly base 3 microphone module Removing the microphone 54 ...
Страница 58: ...1 tab 2 camera cable 3 camera frame Removing the camera 58 ...
Страница 61: ...1 coin cell battery 2 battery socket 3 plastic scribe Removing the coin cell battery 61 ...
Страница 64: ...1 fan 2 screws 2 3 display assembly base 4 fan cable 5 system board Removing the fan 64 ...
Страница 67: ...1 screw 2 heat sink 3 captive screws 5 Removing the heat sink 67 ...
Страница 70: ...1 speaker cable 2 routing guides 3 speakers 2 4 screw 5 tape 6 rubber grommets 4 Removing the speakers 70 ...
Страница 81: ...1 display assembly Removing the display assembly 81 ...
Страница 87: ...12 Replace the optical drive 13 Replace the back cover 14 Replace the stand Replacing the display cable 87 ...
Страница 91: ...12 Replace the back cover 13 Replace the stand Replacing the rubber feet 91 ...
Страница 104: ...2 Click or tap Display 3 Change the display settings as required Technology and components 104 ...


