Connecting ES40 shelves
The cabling diagrams in this section show maximum configurations. Not all systems will have all the disk shelves shown in the
diagrams.
When connecting ES40 shelves, all the cables have HD-mini-SAS connectors at both ends.
Add shelf-to-shelf cables between shelves in a loop and to the controller as shown in the diagrams.
CAUTION:
When connecting SAS cables to the SAS cards, ensure there is sufficient slack in the cable to avoid
unnecessary strain on the cable connector and the SAS card when the controller is fully extended from the rack.
DD6400 with ES40 cabling
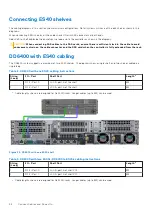
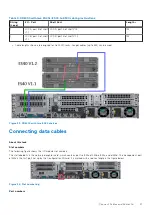
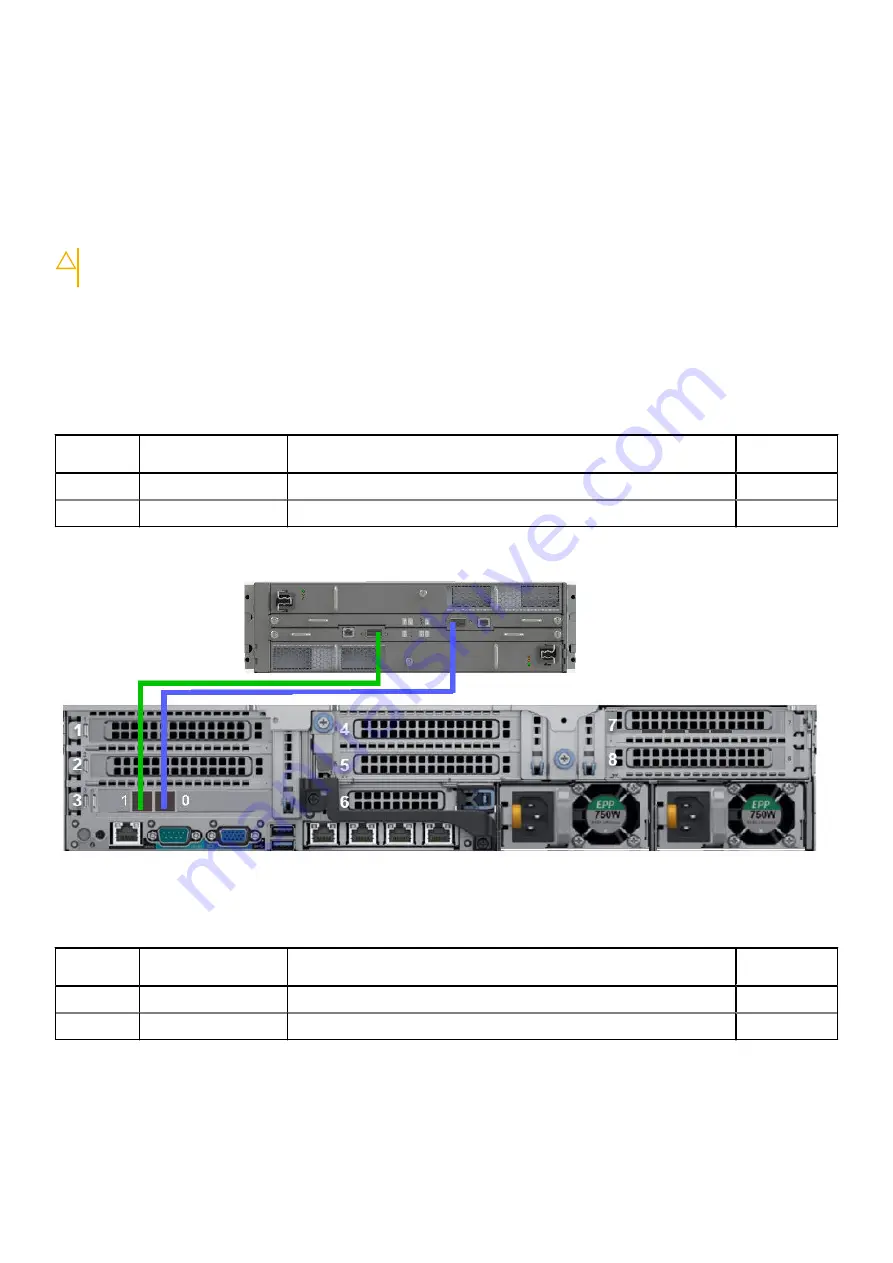
The DD6400 system supports a maximum of two ES40 shelves. The diagrams show a single shelf, and two shelves cabled in a
single loop.
Table 2. DD6400 with one ES40 cabling instructions
String
(Loop)
I/O - Port
Shelf Port
Length
1
I/O 3 - Port 0
LCC B, port A of the shelf
3M
1
I/O 3 - Port 1
LCC A, port A of the shelf
3M
a.
Cable lengths shown are designed for Dell EMC racks. Longer cables (up to 5M) can be used.
Figure 22. DD6400 with one ES40 shelf
Table 3. DD6400 with two ES40s: DD6400 to ES40s cabling instructions
String
(Loop)
I/O - Port
Shelf Port
Length
1
I/O 3 - Port 0
LCC B, port A of shelf V1.2
3M
1
I/O 3 - Port 1
LCC A, port A of shelf V1.1
3M
a.
Cable lengths shown are designed for Dell EMC racks. Longer cables (up to 5M) can be used.
26
Connect Cables and Power On


