Replacing the processor-cooling
assembly
WARNING: Before working inside your computer, read the safety
information that shipped with your computer and follow the steps in
Before working inside your computer
computer, follow the instructions in
. For more safety best practices, see the Regulatory
Compliance home page at
www.dell.com/regulatory_compliance
Procedure
1
Slide the radiator and fan assembly into the radiator and fan cage.
2
Align the screw holes on the radiator and fan assembly with the screw holes
on the radiator and fan cage.
3
Replace the screws that secure the radiator and fan assembly to the
radiator and fan cage.
4
Align the screw holes on the processor cooler with the screw holes on the
system board.
5
In sequential order (indicated on the processor cooler), tighten the captive
screws that secure the processor cooler to the system board.
6
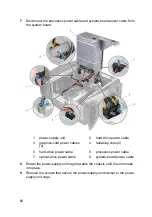
Connect the processor-cooling assembly cables to the system board.
7
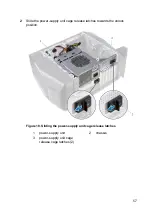
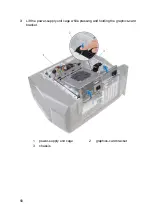
Follow the procedure from step 10 to step 11 in "
8
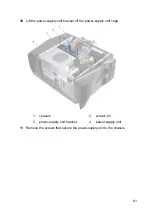
Replace the screws that secure the radiator and fan assembly to the
chassis.
Post-requisites
1
Replace the
.
2
Replace the
.
3
Replace the
67
Содержание Aurora R6
Страница 39: ...8 You are left with top bezel and top cover Figure 10 Top cover and top bezel a top bezel b top cover 39 ...
Страница 143: ...4 Click Apply Rotating the display 1 Right click on your desktop 143 ...
Страница 162: ... The F2 Setup prompt appears at the top right corner of the screen during boot 162 ...


