Procedure
1
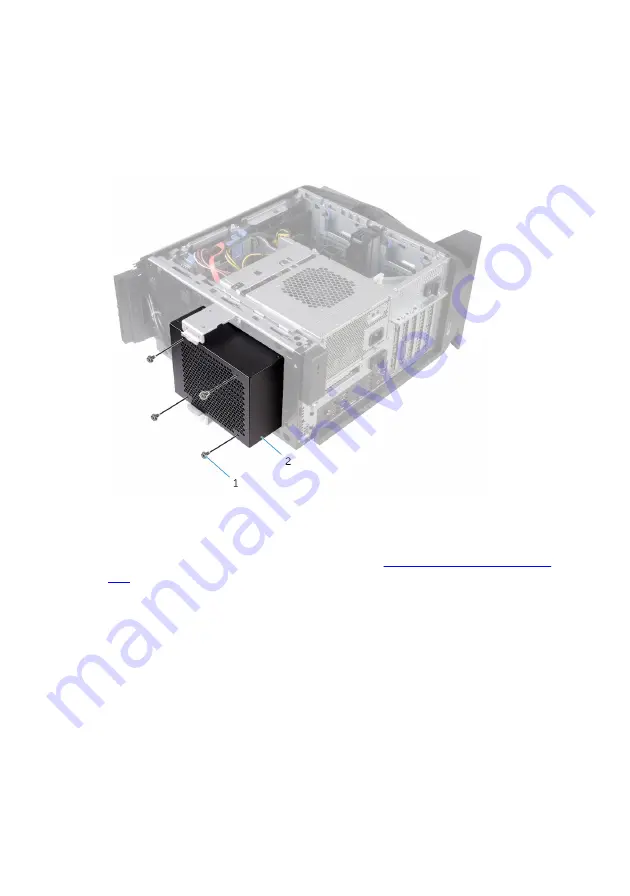
Remove the screws that secure the radiator and fan assembly to the
radiator and fan cage.
Figure 19. Removing the processor-cooling assembly
1
screws (4)
2
radiator and fan cage
2
Follow the procedure from step 1 to step 4 in "
3
Disconnect the processor-cooling assembly cables from the system board.
4
In sequential order (as indicated on the processor cooler), loosen the
captive screws that secure the processor cooler to the system board.
65
Содержание Aurora R6
Страница 39: ...8 You are left with top bezel and top cover Figure 10 Top cover and top bezel a top bezel b top cover 39 ...
Страница 143: ...4 Click Apply Rotating the display 1 Right click on your desktop 143 ...
Страница 162: ... The F2 Setup prompt appears at the top right corner of the screen during boot 162 ...


