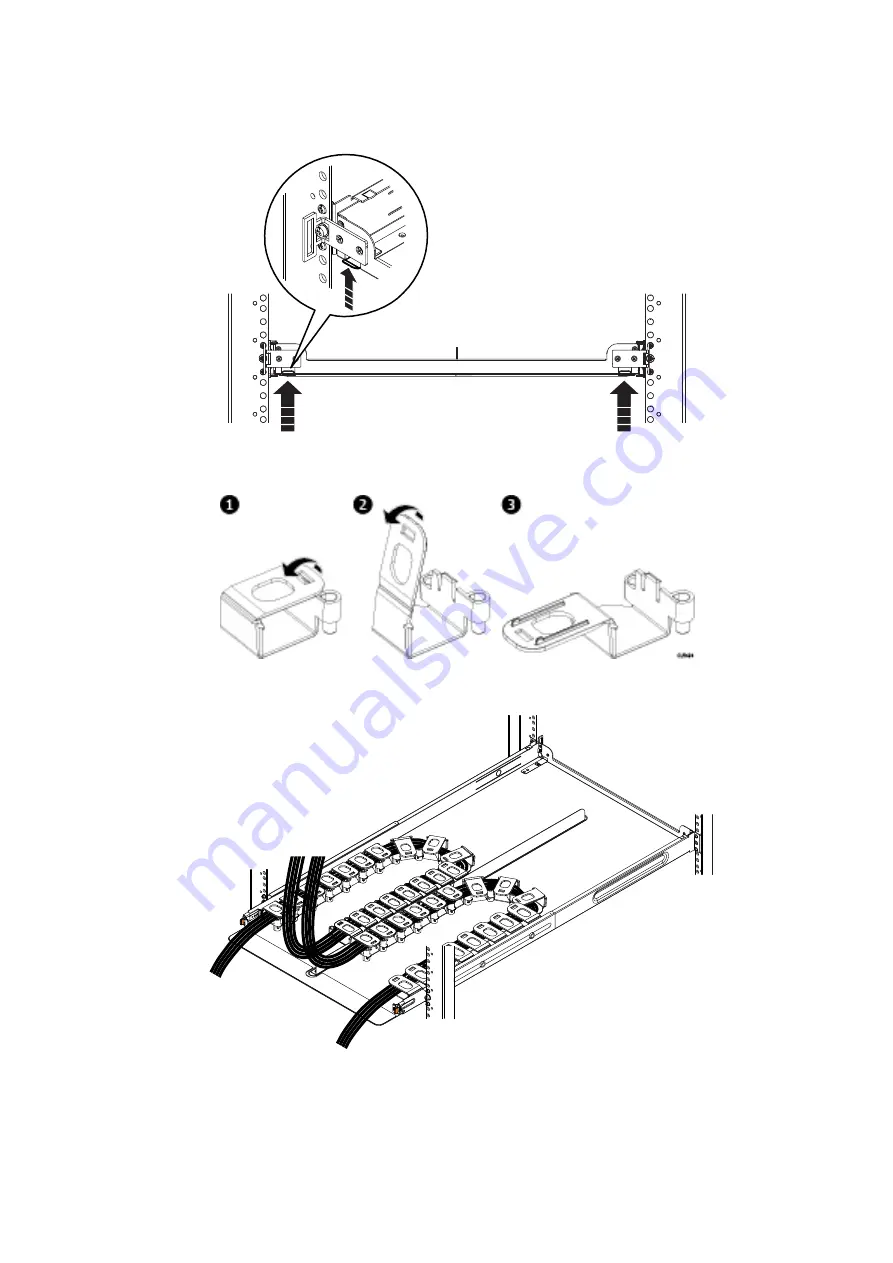
3. Orient the tray so that the UP arrow is pointed up and the end of the tray that is labeled FRONT is to the front of the rack.
Slide the tray into the rails until it locks into place with an audible click. To release the tray, press the spring clips up and pull
the tray towards the front of the rack.
CL5523
Figure 32. Spring clips—push up to release tray
Figure 33. Opening the cable chain lids
4. Unclip and open all lids on the cable chains.
CL5505
Figure 34. Cable positioning in cable chains
5. Refer to the application guide for the shelf you are installing. Using the 1-inch graduations on the back edge of the tray,
route the cables through the cable chains to their suggested lengths, keeping in mind the correct pig-tail lengths. The two
38
Install the Disk Shelves in the Rack


