5
6
7
8
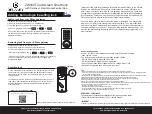
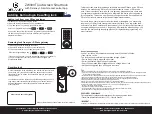
6. Mark the Outline of Latch Faceplate
Insert the latch (D) and ensure it is parallel to
the door face.
Mark the outline of the faceplate, then
take out the latch (D).
7. Chisel Space for Latch Faceplate
Chisel 5/32" (4 mm) deep along the outline
to allow the faceplate to be aligned with
the door edge.
Note: It is not necessary to chisel the door
edge for the faceplate installation if
you use the drive-in latch.
8. Install Latch
Insert the latch (D) into the door.
(Make sure the cross is on the bottom of the
latch.) Use 2 wood screws (K) to secure latch.
Please do not fully tighten the screws until
lock is completely installed.
Hardware Used
K
Wood screws x2
D
D
K
ASSEMBLY INSTRUCTIONS
You need to stay
this way up when
inserting the latch.
Make sure the cross in the
latch is on the bottom.


