9
L6112
HS-130RC
Silver Crush-Proof Hose*
This additional hose is a straight suction hose to help
make cleaning even easier.
•
Works well for garages, small cleanups, and
vehicle cleaning.
•
To be used with WPH219 straight wands, WPO-
218 curved wand, and accessory tools.
The “tear-drop” style handle has 360°
rotation to minimize kinks, effort, and
in-hand weight. Its unique “tear-drop”
designed handle allows the hose to
IMPORTANT:
Make sure power is turned off before removing the hose
and handle from the wand. Arcing or damage to the electrical contacts can
occur if the wand is removed while brush power is on.
Hose Handling:
Hold the hose and handle in any way you find to be the most
comfortable. With this new style handle, numerous hand positions are offered
and reduce strain and increase ease of use.
Also, for added ease while vacuuming, try keeping the hose behind you rather
than out in front of you. Use one hand to hold the handle and the other hand
to hold and guide the hose. Again, do what feels comfortable to you.
Three-Position Switch:
Allows vacuum to be
controlled from the handle.
• Vacuum off, Brush off
• Vacuum on, Brush off
• Vacuum on, Brush on
drape to the floor reducing the weight supported in your hand. For use with
the electric brush.
GSH-630X
Tear Drop Style 30’ Crush-
Proof 4-Wire Swivel Hose
*Not intended to be used with EB250AT or other electric powerheads.
*EP31-Direct connect wall-end--
Must be used with an
electric inlet valve such as the Electravalve.
To insert hose cuff into valve:
Lift valve door, insert
cuff into hole.
*EP32-Pigtail cord wall-end--
Use with standard pin-
jack valve.
To insert hose cuff into valve
: Lift valve door, insert
cuff into hole, and plug cord into 110 electrical outlet.
6
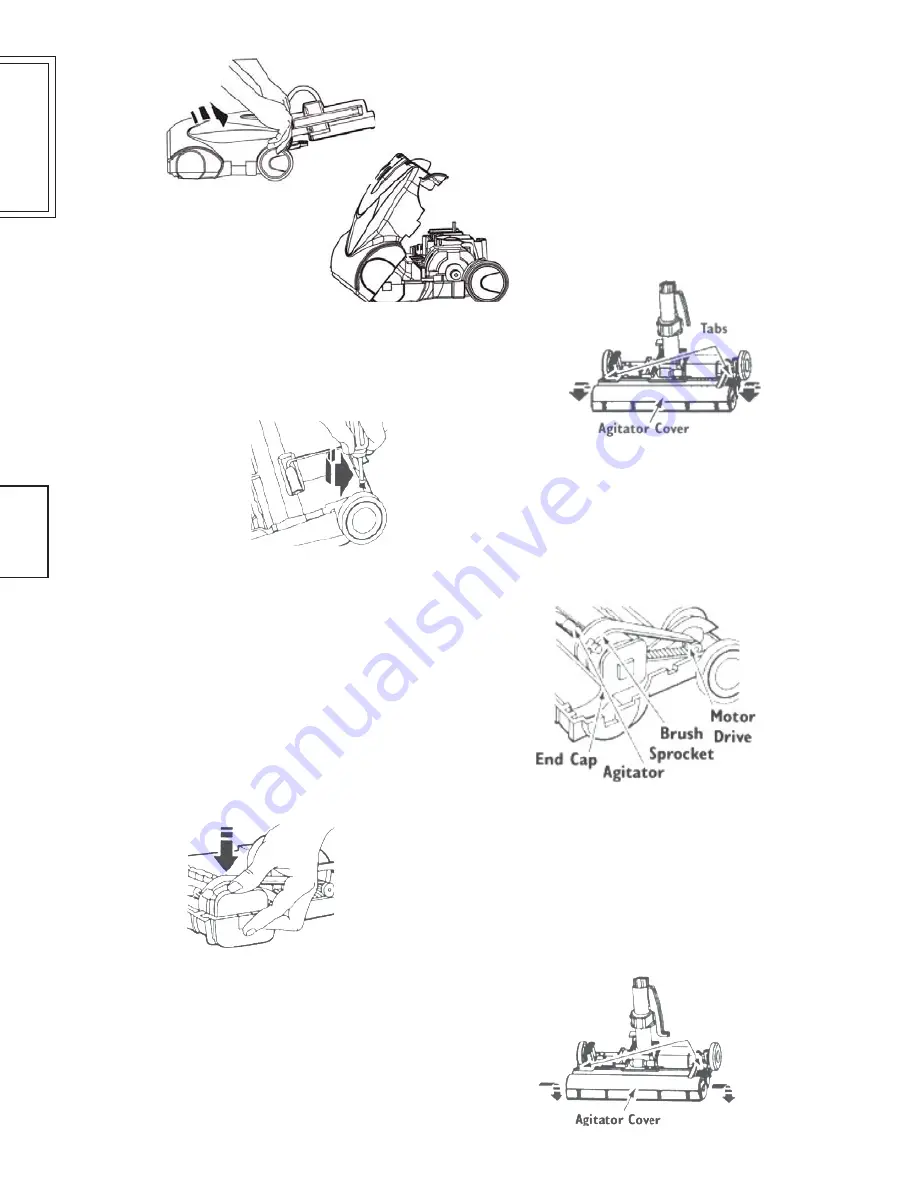
5. Depress tabs on rear of agitator cover and ro-
tate forward to release from the electric brush
base.
6. Lift agitator assembly out and re-
move worn belt.
T
T
T
T
To R
o R
o R
o R
o Reeeeeplace Belt:
place Belt:
place Belt:
place Belt:
place Belt:
1. Install new belt over motor drive,
then over brush sprocket. NOTE:
NOTE:
NOTE:
NOTE:
NOTE: belt
replacement number for is EB29010.
2. Replace agitator assembly back into the elec-
tric brush.
3. Reinstall agitator cover by lining
up the front tabs and slots and rotating
downward until the latches snap into
place.
4. Lift rear latches up and tilt cover forward
from back until front snaps free.


