background image

4


EN

Introduction

Thank you for having chosen our product.

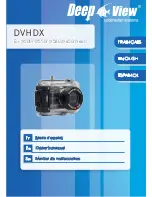
Deepview has created a housing for Fuji Finepix JX500/ JX550/ JX580/JX650/X660. 

This housing allows to control all commands on the camera:

• 

power on /off

• 

shutter release

• 

zoom 

(W / T)

• 

mode

• 

play

• 

multi selector buttons

• 

ok - button

• 

menu

• 

delete

We suggest to read that instruction for a correct use of case.

Technical features

Housing material: transparent polycarbonate

Maximum depth at which it can be used: 80mt/262 ft

Dimensions: . W. 13 x H. 9 x L. 7

Accessories supplied:

• 

1 main o-ring

• 

1 box silicon grease

• 

1 strap

• 

LCD Hood

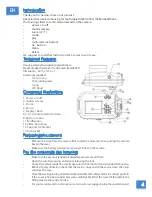
Command Illustration

1. Power on /off

2. shutter release

3. Zoom

4. Zoom

5. Display / back

6-7-9-10. multi selector buttons

8. button / menu

11. Notification

12. Vidéo Recording

13. Support for bracket

14. for bracket

Preparing the camera

• 

Remove the strap from the camera (this could be a nuisance when putting the camera 

back in the case).

• 

Make sure the battery and memory card are fitted in the camera.

Put the camera in the housing

• 

Make sure the previously listed standard accessories are all there.

• 

Open the case by pressing on fastener releasing the lock.

• 

House the camera inside the case. Make sure it is fitted in the “lane” provided for housing.

• 

Before of every utilization check that the main o-rings and all the case is clean, than you 

can close the case.

• 

Close the case by pressing on fastener lock and verify that safety catch is in a correct position.

• 

If the cover is free but is under pressure, carefully check that the travel of the slide in the 

fitting lane reaches end of stroke.

• 

For your security and to not lose your case in water we suggest using the special lanyard.

Содержание DVHDX

Страница 1: ...FRANÇAIS ENGLISH ESPANOL DVHDX For JX500 JX550 JX580 JX650 JX660 Owner s manual Mode d emploi Manual de instrucciones En Fr Sp ...

Страница 2: ...m 5 Lecture 6 7 9 10 Multi sélecteur 8 Ok Menu 11 Notification 12 Enregistrement vidéo 13 Support pour vis 14 Fermeture de sécurité Préparation de l appareil Enlever la sangle de l appareil numérique S assurer que la batterie et la carte mémoire sont bien dans l appareil Mise en place de l appareil Ouvrir le caisson en pressant sur le verrouillage de sécurité et en tirant sur le loquet Insérer l a...

Страница 3: ... joint faire attention de ne pas détériorer le caisson en ôtant le joint car cela peut provoquer une infiltration d eau Nos caissons étanches sont testés à 80m de profondeur et recommandés pour une utilisation plongée loisir à 60m Si le caisson n est pas utilisé pendant une longue période nous vous recommandons d enlever le joint principal et de laisser le caisson ouvert Conditions de garantie Les...

Страница 4: ...ation 12 Vidéo Recording 13 Support for bracket 14 for bracket Preparing the camera Remove the strap from the camera this could be a nuisance when putting the camera back in the case Make sure the battery and memory card are fitted in the camera Put the camera in the housing Make sure the previously listed standard accessories are all there Open the case by pressing on fastener releasing the lock ...

Страница 5: ...sing parts to change the main o rings or anything else If it is not done properly it could cause the housing to flood All Deepview housings are tested at max depth of 80 mt 262 ft and 60mt 196 ft recomanded If you think to not utilize the case for many times we suggest taking out the principal o ring and making sure that the fastener lock is open Guarantee conditions Deepview covers its products w...

Страница 6: ...1 parasol Ordenes de ilustraciones 1 On off 2 Disparador 3 Zoom 4 Zoom 5 Lectura 6 7 9 10 Multi selector 8 Ok Menú 11 Notificación 12 Registrarse video 13 Trípode tornillo 14 Borrar Preparación de la cámara Quitar la correa de la cámara Asegurarsedequelabateríaylatarjetadememoriaestánenlacámara Mise en place de l appareil Abrir la cáscara estanca presionando el bloqueo de seguridad A y tirando del...

Страница 7: ...e la eliminación de la junta ya que esto puede causar la infiltración del agua Nuestras cajas estancas pueden ir a una profundidad de 80 metros y se recomienda su uso en el buceo recreativo a 60m Si el cuadro no se utiliza durante mucho tiempo se recomienda retirar el sello principal y dejar la caja abierta Garantía Productos DeepView reciben una garantía de 1 año en los siguientes términos e inev...

Страница 8: ...DX For JX500 JX550 JX580 JX650 JX660 www deepview fr DEEPVIEW EUROPE 2791 chemin de St Bernard 06220 VALLAURIS FRANCE DEEPVIEW USA 4652 Oak Hill Ln Fruitville Sarasota FL 34234 USA www deepview godive com ...

Отзывы: