4
COMPUTER INSTALLATION
The DDTi is a Plug-and-Play device so there is no driver or special software
installation required. When the DDTi is connected to a computer, it will automatically
be recognized as an available USB device.
How to connect and use the DDTi with a software application:
1.
Connect a USB cord from the USB port of the DDTi to the USB port of your
computer.
When the DDTi is connected to a computer using a USB cord, the
computer’s USB bus will provide power to the unit. If you would like to use
an alternate power source, plug in a 9v AC power adapter.
2.
Press the power switch on the back panel of the DDTi. The display will turn
on to let you know that the DDTi is on.
!
Tip
It is a good idea to connect and turn on the DDTi before starting
any software applications with which you intend to use the DDTi.
Otherwise the software program will not recognize the DDTi as
being connected.
3.
Open up your software application.
4.
Next, select the DDTi as a MIDI input device. Usually, this is done in the
Preferences menu of the software application.
If you are using Windows XP, you will notice that the DDTi may appear as
‘USB Audio Device’ or ‘USB Audio Device (Emulated)’. Please make sure
that this MIDI input is enabled and active.
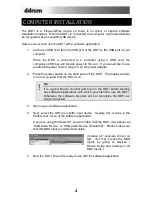
(Cubase LE example shown on
left. You may access the MIDI
inputs by going to Devices |
Device Setup and clicking on All
MIDI Inputs.)
5.
Now the DDTi should be ready to use with the software application.
Содержание DDTi
Страница 1: ...REFERENCE MANUAL...
Страница 2: ......
Страница 4: ......
Страница 31: ......
Страница 32: ...MANUAL REVISION C...
Страница 33: ...www ddrum com...
Страница 34: ......


