ROIP302 Series User menu
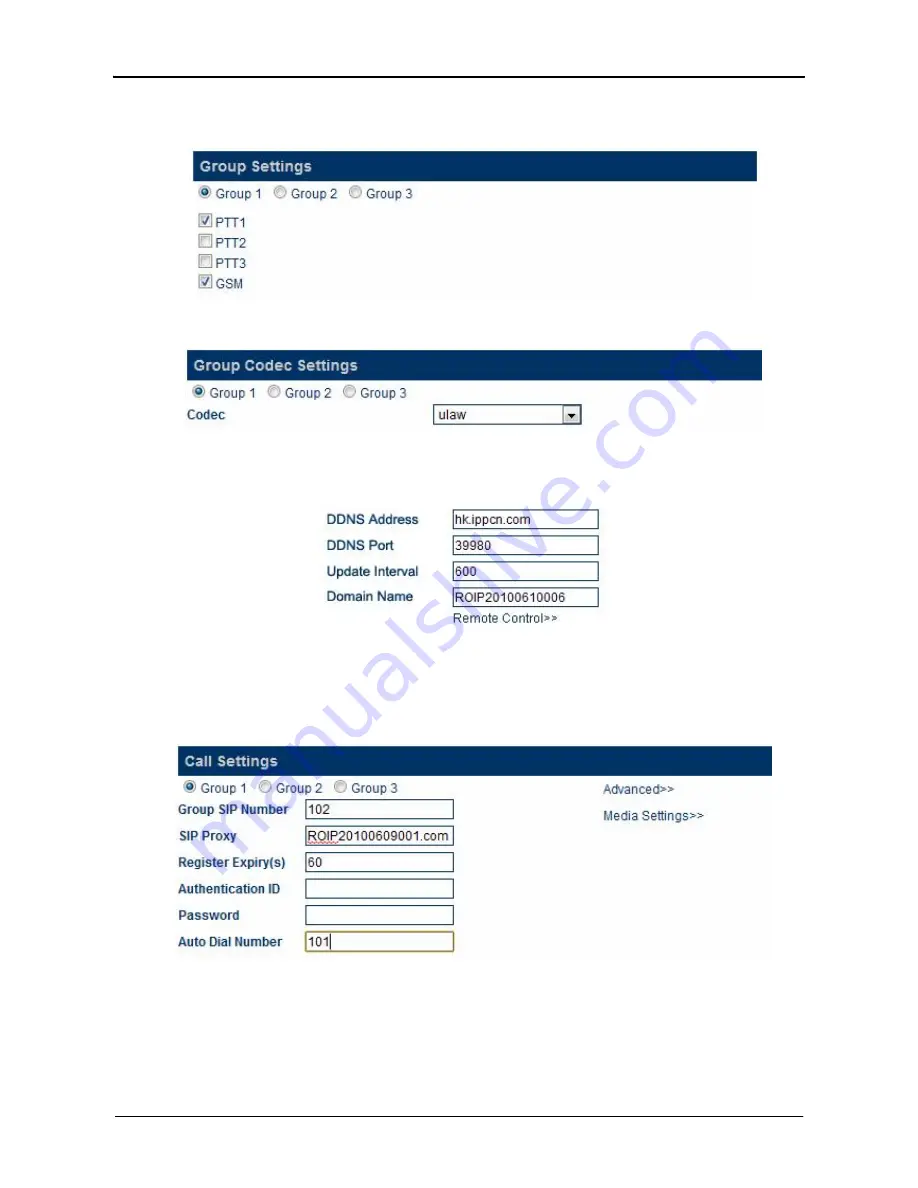
the RoIP302 at location B should have the same Group Settings as the one at location A.
This means that the PTT1 port is assigned to Group 1 for both RoIP302s.
11. The last thing to configure is the Codec Settings. Choose a-law or
μ
-law for best voice
performance. Please make sure that both RoIP302s use the same codec.
12. Next configure the RoIP302 at location B. First, go to the Preference Page to enable the
DDNS feature. If the serial number of the RoIP302 is RoIP30220100610006, then the
DDNS settings are shown below.
13. Next configure the Call Settings page as shown below. Please note that it has a different
Group SIP Number as the one in location A. Please note that the SIP Proxy address is set
to the DDNS of the RoIP302 at location A. The Auto Dial Number is set to the Group
SIP Number of the one at location. This means that 102 calls 101 automatically
whenever the PTT control is active (transmitting voice from 102 to 101).
14. Please note that the Network Settings, Group Settings and Codec Settings should be similar
to those described for the RoIP302 at location A.
15. At last, the two RoIPs are setup and ready to use. Just push the PTT button at one radio
terminal, voice is transmitted to the other radio terminal automatically. If the volume
level is not correct, please tune the 2K Potentiometer that is located at the PTT Interface
www.dbltek.com


