


Using the SCOUTutp
Note: Before switching your computers on, please configure non PS/2 computers
emulation type in the OSD!
The SCOUTutp provides three possibilities to select the desired computer. You may use either the
Select button on the unit, the keyboard Hot Key commands or take advantage of the OSD (On-
Screen-Display).
You may notice that the mouse cannot be used for around 1 second when the SCOUTutp switches to
another computer. This is normal and is caused by the synchronization process which ensures that
the mouse operates correctly.
Keyboard Hot Key commands
To send Hot Key commands to the SCOUTutp switch, press and release the
Ctrl
key twice within 2
seconds. Press a command key for the desired effect. The following commands are supported:
First Key
Second Key
Command Key
Confirmation Key
Command Result
Ctrl
Ctrl
Port number
Enter
Switches to the desired PC
In Auto-Scan mode, the image shown on the monitor will automatically switch to the next computer.
The delay is user definable
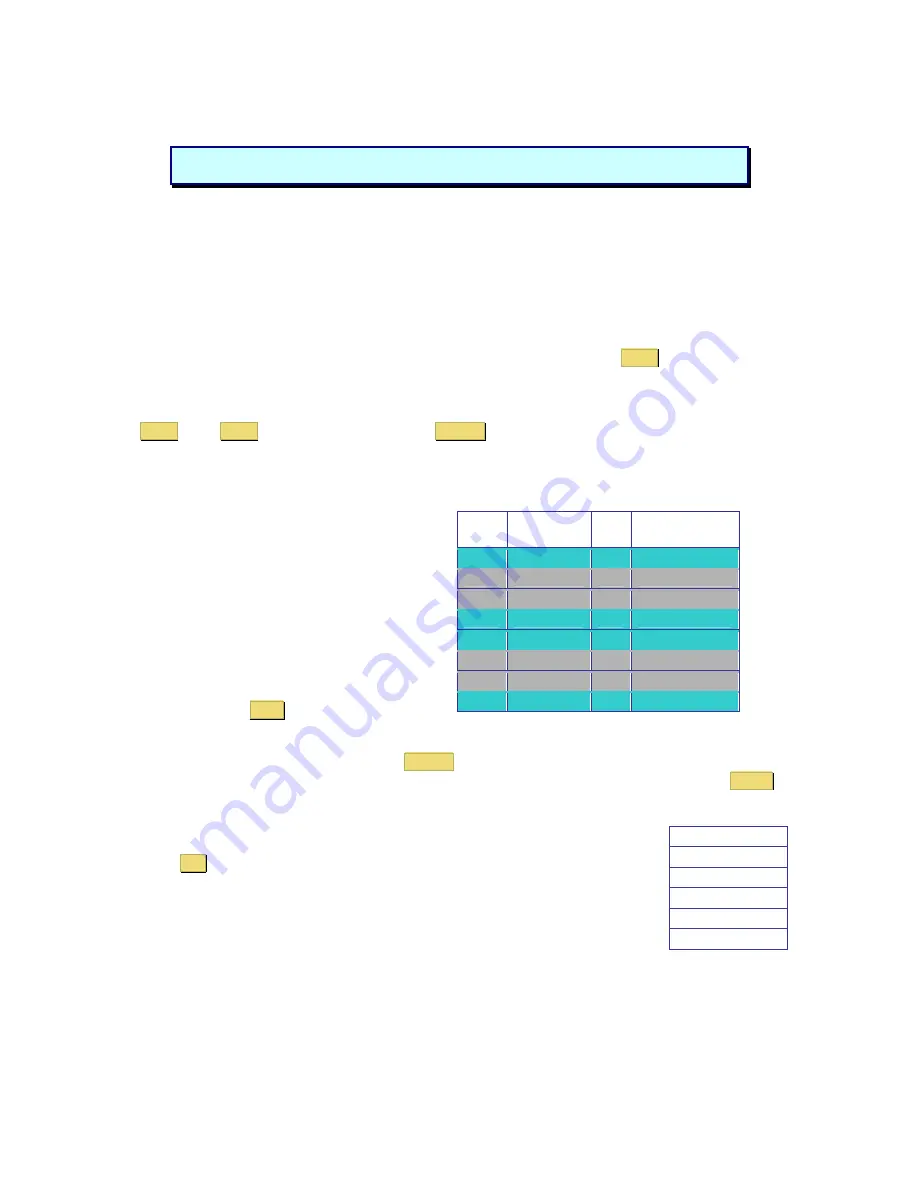
Port
No.
Computer
Name
No.
C = computer
S = switch
01
SUN
01
C
blue
02
PS/2 1
02
C
grey
03
SCOUT
03
S
grey
04
SUN
04
C
blue
05
PS/2 3
05
C
blue
06
USB
06
C
grey
07
USB
07
C
grey
08
PS/2 4
08
C
blue
OSD (On-Screen-Display)
To access the OSD, press the Hot Key twice
and the OSD window appears:
Lines with blue text show active computers, lines
with grey text show inactive computers.
To navigate up and down use the UP and
DOWN arrow keys.
To jump from one column to another (in
Settings) use the
Tab
key.
After you have selected a computer press
Enter
. A confirmation label appears showing which
computer you accessed. To exit the OSD or return to a previous window within the OSD press
ESC
.
Note
: When you use the OSD you can’t use the keyboard Hot Keys at the same time.
OSD Settings
General
Ports
Time
Users
Security
OSD Settings
Press
F2
and the setting window will appear.
When the OSD is password protected only the administrator has access to this
window.
Содержание SCOUTUTP -
Страница 1: ...Installation guide...


