Installation
(for qualified installers only)
47
© Travis Industries
9/25/17-1468
Maestro
Interior Power Vent Enclosure
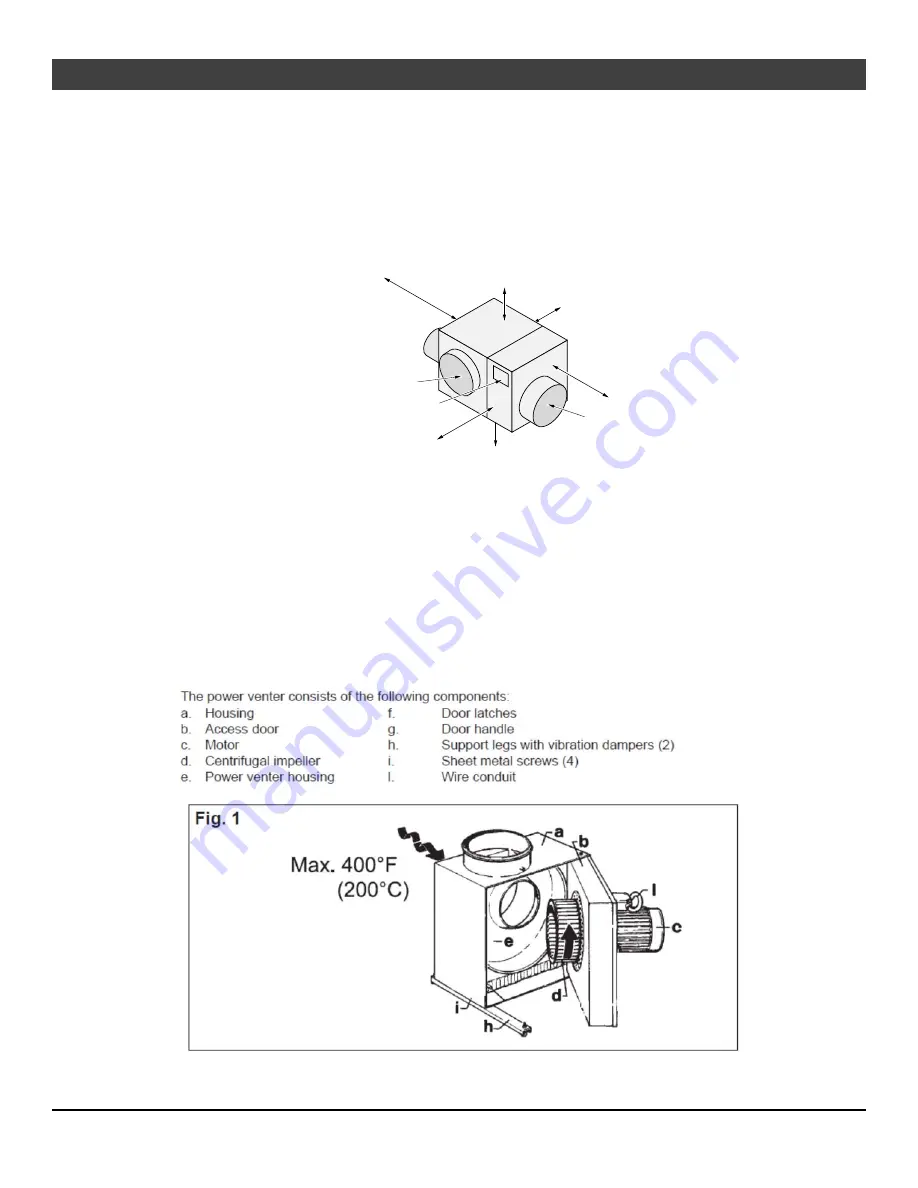
The exhaust blower assembly consists of a blower and damper constructed into a single box. This assembly
is best placed in a location where it can be accessed from all sides (ceiling plenum, utility closet, mechanical
chase, attic space, service corridor, etc.). It is imperative that the assembly be placed in a location where the
vent connections and junction box may be accessed.
If you do wish to enclose the blower assembly, make sure to place it in a location where it may be accessed
and the vent and wiring disconnected for servicing. The illustration below details the minimum clearances
required for the exhaust blower enclosure. Make sure to include an access door on the side that has the
junction box. This will allow a service person to access to the junction box and vent connections.
Interior Power Vent - Attaching Vent to the Blower Assembly
When attaching the vent to the blower assembly, make sure to accommodate servicing at a later time.
Attach a male adapter to both the intake and exhaust (e.g.: Duravent 8GVAM). When attaching make
sure to orient the adapter correctly (note direction of flow). For the exhaust, the adapter will be sealed
and screwed to the exhaust box.
After the male adapter, use an adjustable length connector on both the intake and exhaust (e.g. Duravent
8GV12A). Make sure to position the connector so the tensioner may be loosened after the installation is
complete. This arrangement allows for the adjustable lengths to be loosened at a later time and the vent
connections detached from the exhaust blower assembly.
Interior Power Vent - Components
Junction Box Cover
Exhaust
6"
6"
12"
12"
18"
6"
Intake


