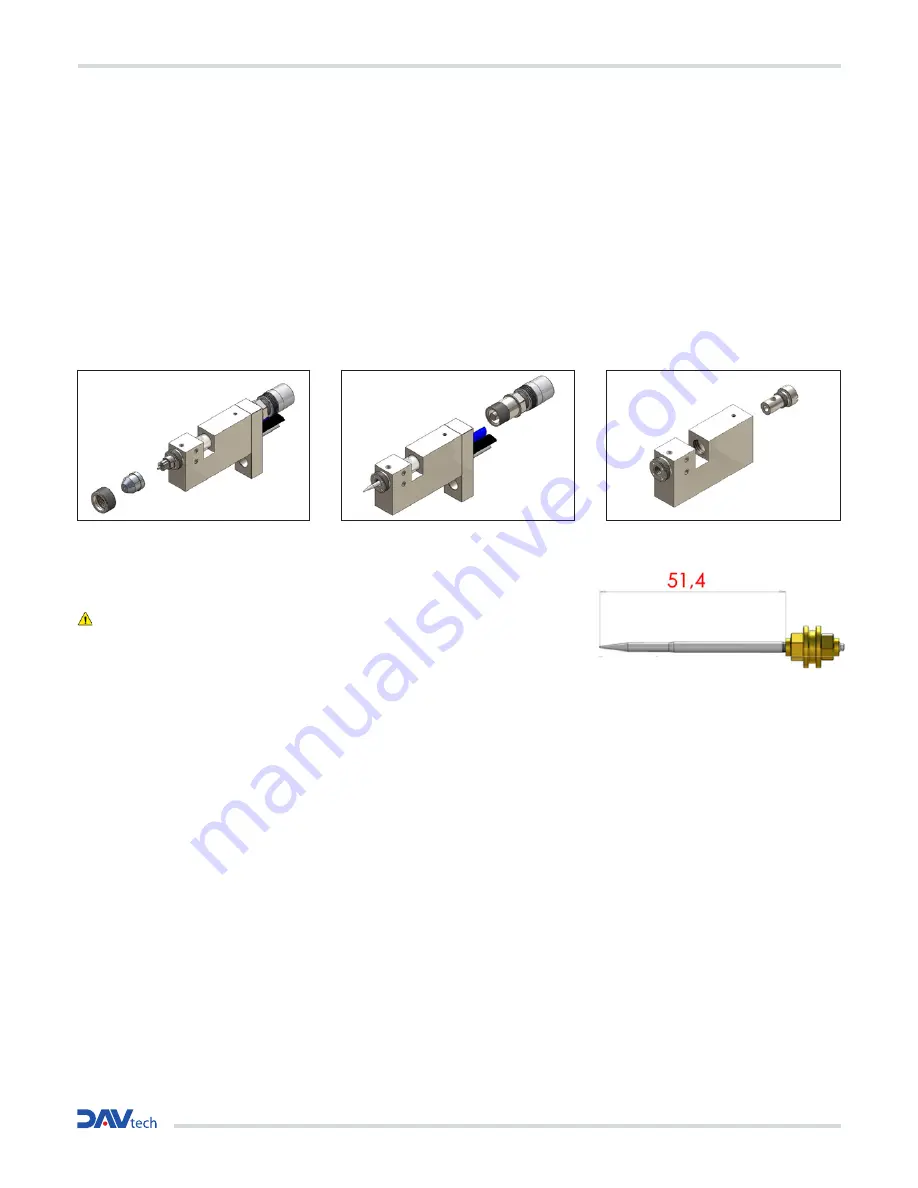
4.3 Valve Disassembly
Before disassembling the valve:
1) Clean the valve
2) Release the pressure from the system
3) Unscrew the ring nut (Pos.19) and remove the air cap (Pos.18) (fig.1)
4) Unscrew the nozzle (Pos.17) with a 7 wrench
5) Unscrew the adjustment block (Pos.1) with a 13 mm wrench.
Take care because the spring is pushing.
6) Remove the spring (Pos.2)
7) Carefully remove the fixing plate (Pos.10)
complete with pipe holder and pipes. (fig 2)
8) With a narrow nose pliers pull off the pin (Pos.3)
9) Unscrew the compass (Pos.9) with a screwdriver and remove it from the body (fig.3)
4.4 Valve Re-assembly
After having cleaned it thoroughly and replaced all the damaged parts (above all the seals and the scraper mounted
under the compass). Reassemble in the reverse order of disassembly by lightly lubricating the parts and gaskets with
mounting grease.
fig. 2
fig. 3
fig. 1
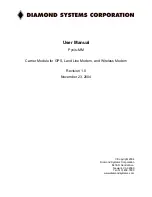
If necessary, remove the pin (Pos.9):
The measurement between the tip of the needle and the needle ring must be 51.4 mm
1) Check the wear of the O-ring (Pos.4) and replace it if necessary
2) Lubricate the new O-ring before mounting it.
Installation and maintenance guide


