background image

Contents

Product Functions   ..........................................................................................................................................................  1

Include in the box  .............................................................................................................................................................  2

Preparing Door  ..................................................................................................................................................................  3

Installing Latch and Strike  ..............................................................................................................................................  4 

Installing Exterior Handle  ................................................................................................................................................   5

Installing Interior Handle  ..................................................................................................................................................  6

Lock Operation  ..................................................................................................................................................................  7

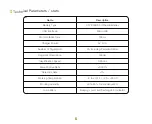
Technical Parameters / stats   ........................................................................................................................................  9

Before installing, please scan the QR codes below to watch our easy step-by-step installation video.

If you have questions regarding the installation process please contact us by mail


[email protected] 

or by phone


(929)336-6777

.

Содержание L-B201

Страница 1: ...User manual L B201 ...

Страница 2: ...ior Handle 5 Installing Interior Handle 6 Lock Operation 7 Technical Parameters stats 9 Before installing please scan the QR codes below to watch our easy step by step installation video If you have questions regarding the installation process please contact us by mail service datoiot com or by phone 929 336 6777 ...

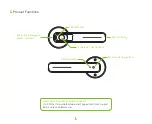
Страница 3: ...Contact Customer Support Visit https www datoaihome com pages technical support Email service datoiot com LED Indicator Setting button Fingerprint identification Mode switching button MicroUSB Emergency power interface Key Unlocking ...

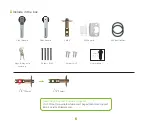
Страница 4: ...dle Rubber Gasket Strike parts Screws A x4 Keys Key hole cover pin Screws B x4 Front handle Need Help Contact Customer Support Visit https www datoaihome com pages technical support Email service datoiot com 60mm 2 3 8 70mm 2 3 4 User manual L B201 ...

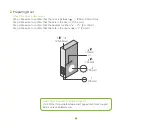
Страница 5: ...e hole in the door is 2 55 mm Step 3 Measure to confirm that the backset is either 60 70mm Step 4 Measure to confirm that the hole in the door edge is 1 25 mm Need Help Contact Customer Support Visit https www datoaihome com pages technical support Email service datoiot com 35 55mm 25mm 11 8 2 70mm 2 3 4 60mm 2 3 8 55mm 2 or 1 2 3 8 2 3 4 11 8 2 ...

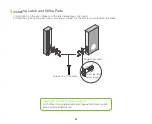
Страница 6: ...mb 2 Install the strike on the door frame ensuring you allow for the bolt to be centered in the strike Screws for strike plate Angle faces jamb Adjust the latch basket lenght 60 OR 70mm 4 Need Help Contact Customer Support Visit https www datoaihome com pages technical support Email service datoiot com ...

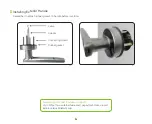
Страница 7: ...le Remember to attach rubber gasket to handle before insertion 5 Need Help Contact Customer Support Visit https www datoaihome com pages technical support Email service datoiot com Cable Spindle Connecting screws Rubber gasket ...

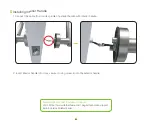
Страница 8: ...nside spindle of exterior handle with interior handle 2 Insert interior handle into door secure it using screw B into the exterior handle 6 Need Help Contact Customer Support Visit https www datoaihome com pages technical support Email service datoiot com ...

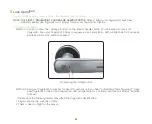
Страница 9: ...sked to scan your fingerprint Scan your fingerprint 6 times in sequence Upon completion LED will light blue for 2 seconds and lock will prompt Addition Success Method 2 Hold your fingerprint to scanner for about 10 seconds until you hear add administrator fingerprint Scan new fingerprint 6 times Upon completion LED will light blue for 2 seconds and lock will prompt Addition Success Please note the...

Страница 10: ...s Lift finger Disable Passage Mode Press the mode switching button on the interior handle to change between modes Delete all fingerprints Factory Reset Use pin to hold press the pin button on the interior handle for 5 6 seconds After prompting initialization success the lock has been reset and ALL FINGERPRINTS INCLUDING ADMINS Additional Information notices a Upon failed fingerprint verification L...

Страница 11: ...erprint Resolution Identification Speed False Positive Rate Rejection Rate Working Temperature Working Humidity Low battery Description 3 7V 800mAh Lithium Batteries Micro USB 500ms 5V 1A 20 including 2 administrators 508dpi 0 25 sec 0 001 1 4 to 131 F 20 55o C 40 85 no condensation Beeping sound and flashing LED indicator ...

Страница 12: ......
Отзывы: