DA-5500 Series Automatic Disc Duplicator User’s Guide V 6.1
4
4
.
.
M
M
a
a
i
i
n
n
F
F
u
u
n
n
c
c
t
t
i
i
o
o
n
n
s
s
(
(
Functions may vary by different models)
4.1 Copy
Please check 3. Getting Started for instructions. Note that CD/DVD-RW discs can also be copied if the
burner installed is capable of CD/DVD-RW writing. Data stored in the disc will be quickly erased
automatically before copying new data, with no special setting or procedure required.
4.2 Copy + Compare
Under this function, the passed disc in copying will be ejected and re-inserted again automatically for
compare purpose. The passed disc will be ejected automatically after comparison. The failed disc will
remain in the burner. Press [MODE] switch will eject those failed disc.
Only data CD will be compared with the master. VCD or music CD will be “verified” instead of being
compared with the master even “Compare” is selected.
4.3 Emulate
This function can test if disc and other devices shall work perfectly. Disc will remain blank when
emulation is completed. For CD/DVD-RW discs that contain data, emulate will do quick erase of all old
data before emulation. Thus, never do emulate on CD/DVD-RW disc that contain important data.
*Notice: DVD+R/RW discs cannot be emulated.
4.4 E Copy
After emulation is finished, the duplicator will start copying instantly.
*Notice: DVD+R/RW discs cannot be emulated.
4.5 Load
This function is to transfer data from reader to hard drive. Please place master disc into reader, then it will
automatically load the data to the selected partition.
4.6 Compare
This function does data comparison between master and target disc. But only data disc will be compared
fully. VCD and music CD will be verified only instead of being compared with the master.
4.7 Quick Erase
Data on CD/DVD-RW will be erased.
4.8
Verify
Target disc and master disc will be verified together.
4.9 Counter
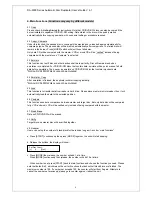
Users can set up the number of blank discs for the task as long as it is under “main functions”.
a. Press [START] continuously then press [MODE] together, the unit will start beeping.
b. Release the buttons, the display will show:
c. Press [MODE] then release, the number will add 1 at a time.
Press [MODE] continuously then release, the number will add 10 at a time.
When number is set, press [START] back to main functions and choose the function you need. Please
note that default is 0, which means the unit will continue the task until all blank discs are finished. The
maximum number is 100. If number set exceeds 100, the counter will start from 0 again. Attempts to
cancel the number set previously, please go to counter again or reboot the unit.
6
Set Disc Count
[+
] 0 [
Quit
]


