background image

F)

   Press the TEST Button then use the UP / DOWN Buttons to select the PRINT QUALITY LABEL or 

the TEST LABEL. Set a quantity of labels to print and then press the ENTER Key. After printing 
stops, carefully examine the labels for evidence of ribbon wrinkling (i.e., irregular diagonal voids that 

extend through printed areas). Proceed according to your examinations: 


If no evidence of wrinkling is present on the labels, press the CANCEL Key to stop printing and 

complete the procedure; or, 


If evidence of wrinkling is present, enter the Test Menu again and reselect the PRINT QUALITY 

LABEL or the TEST LABEL. Set a quantity of labels to print and press the ENTER Key. Slightly 
loosen the Ribbon Shield Screws then slightly readjust the Ribbon Shield to eliminate the latent 

wrinkling. When finished, press the CANCEL Key to stop printing and complete the procedure.   


The printer should now be ready for use in thermal transfer mode; however, if you are still experiencing 

problems with the installation or application of this option, refer to the troubleshooting guide below.  


 Troubleshooting 


The following table covers common installation and use problems.  


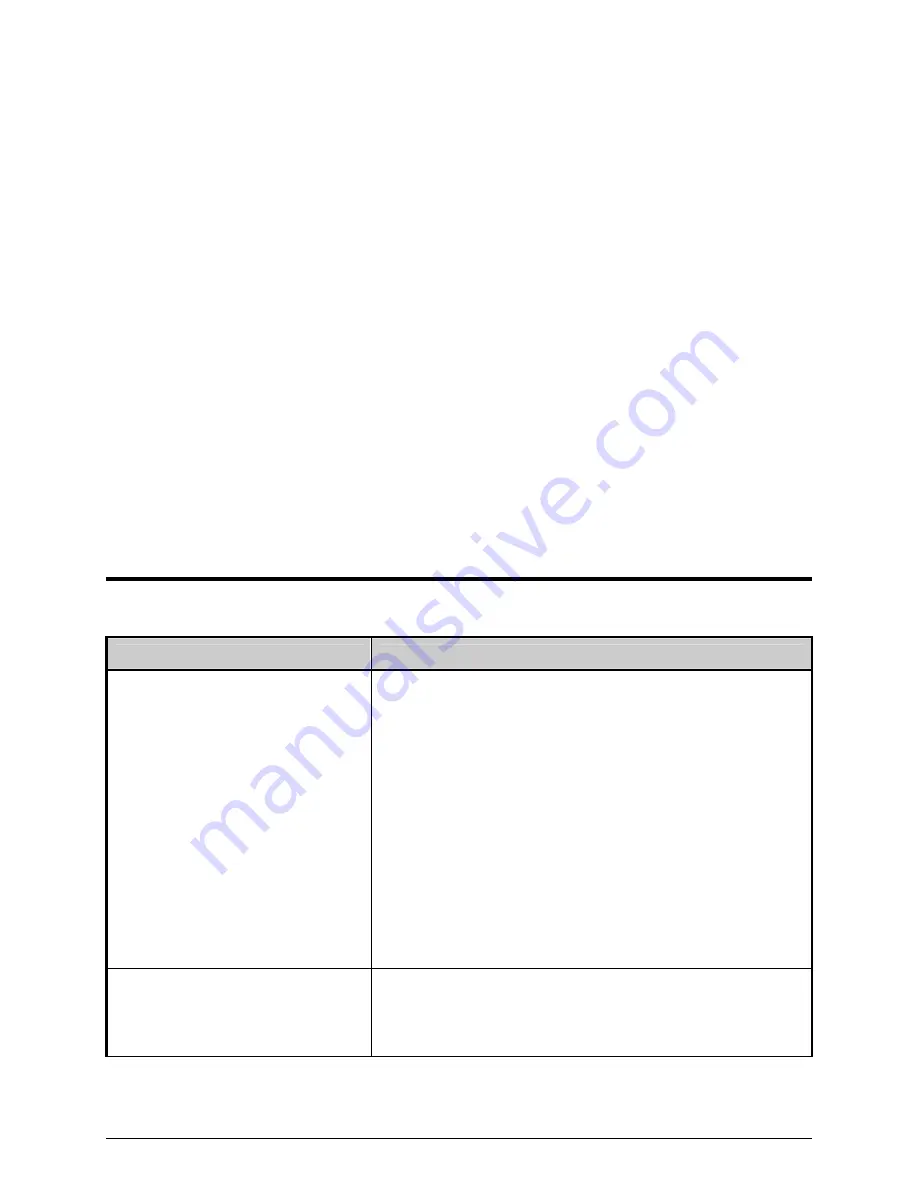
If experiencing this problem… 

Try this solution… 


‘RIBBON FAULT’ is indicated on the 

printer’s display panel: 


Ensure that ribbon is correctly installed and that the 

printhead is latched; see the Loading Diagrams on the 

printer’s cover or in the 

Operator’s Manual


Check the ribbon hubs for obstructions that may be 

inhibiting movement. 


Ensure that the ribbon core fits snugly on the Supply Hub. 


Ensure that the media is not slipping under the ribbon 

(usually caused by an incorrect ribbon and media 

combination); see Selecting Media and Ribbon, below.  


Used ribbon is not being wound by 

the Take-Up Hub:  


Ensure that the leader has been correctly wound and 

secured to the Take-Up Hub. 


Содержание H-Class

Страница 1: ...Thermal Transfer Option 92 2431 01 Rev C...

Страница 2: ......

Страница 3: ...rence CAUTION For your safety and to avoid damaging the equipment turn Off power and unplug the AC power cord from the printer before beginning this installation Contents of the Thermal Transfer Optio...

Страница 4: ...r Access Cover C Remove the Cover Screw then the Cover Plate Cover Screw Cover Plate Step 2 Installing the Option A Carefully position the Thermal Transfer Assembly Item onto the Center Plate of the p...

Страница 5: ...nstalled so the bristles are as close to the ribbon without actually touching It may be necessary to install a roll of ribbon in order to properly align the brush to the ribbon Step 3 Configuring the...

Страница 6: ...the printer Install a slightly wider Ribbon onto the Supply Hub and route it through the printer see the Operator s Manual for details Allow the Ribbon to feed from the printer along with the Media as...

Страница 7: ...ceed to D or If the ribbon flow is evenly tensioned and smooth proceed to E Supply Hub observe for flow Ribbon FEED Key D Slightly loosen the Support Cover Screw and while repeatedly pressing the FEED...

Страница 8: ...l llllllllllllllllllllllllll observe for flow Ribbon Front Panel If the ribbon flow is smooth press the CANCEL Key and then proceed to F or If the ribbon flow is rippling or if bagging is present slig...

Страница 9: ...Key to stop printing and complete the procedure The printer should now be ready for use in thermal transfer mode however if you are still experiencing problems with the installation or application of...

Страница 10: ...he ribbon Clean the printhead see the Operator s Manual Then flip the roll of ribbon on the Supply Hub see the Loading Diagrams on the printer s cover or in the Operator s Manual If there is no image...

Страница 11: ...0 12 254 305 Medium Medium GPR Plus Coated and Uncoated Paper Tag Stock some Films some Synthetics 2 10 51 254 Medium Medium PGR Coated and Glossy Paper Tag Stock some Synthetics Films 2 8 51 203 Medi...

Страница 12: ......

Отзывы: