www.datamax-oneil.com
6
Connecting your printer to a host device can be set up using various connection options that are available
for your printer. If your RL model has the available feature, you can connect via Serial, USB, Wireless
802.11 LAN or Wireless via Bluetooth
®
. The printer will automatically connect to the first available port
that provides valid data. If you wish to change that connection once established, you will need to power
the printer off and back on again. Choose from the options below for instructions on using the various
options for establishing a connection to your host device. Once established, you can proceed to Section
3.3 for information on using the configuration software (NETira
™
CT). Wired connections using USB or
serial options require the appropriate cables for use. See Section 1.3 for a list of available cables.
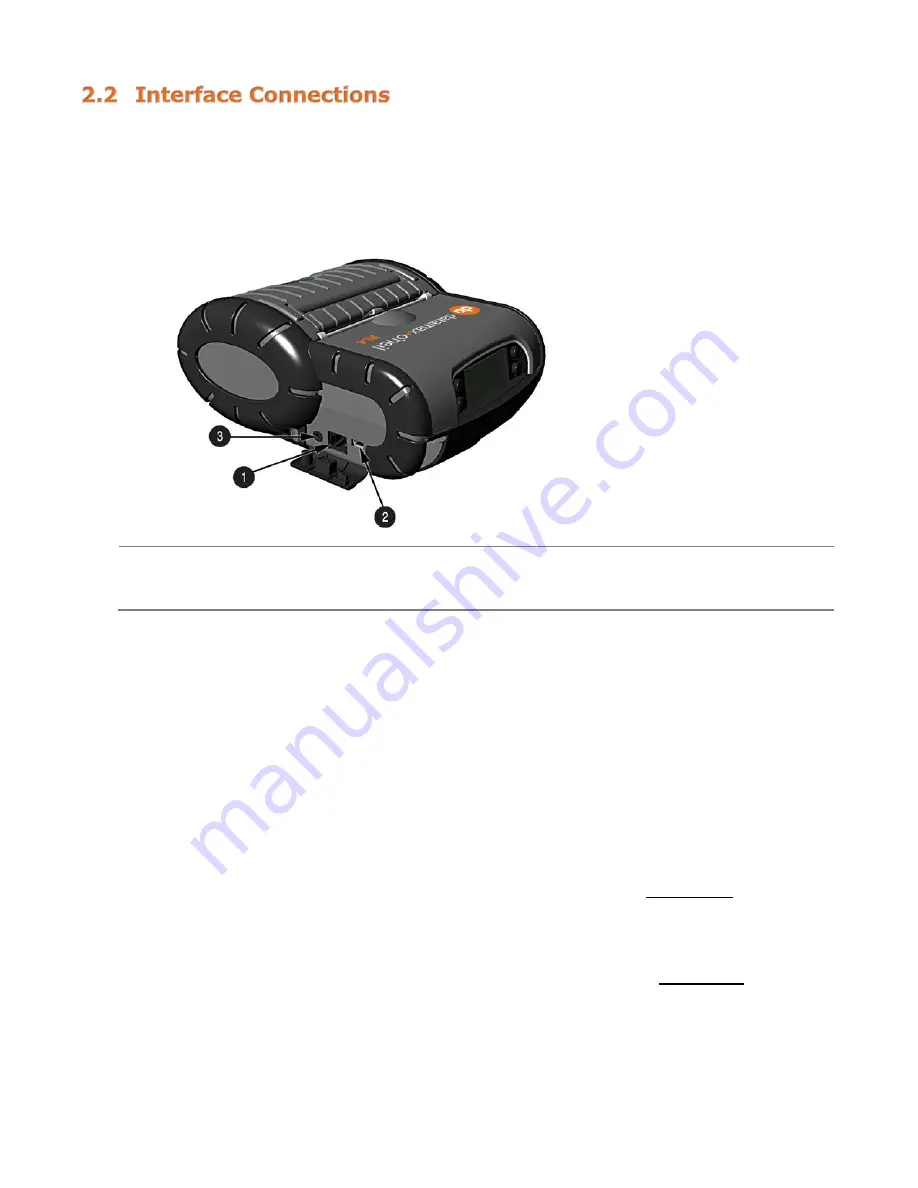
Serial (RJ11)
USB
Charging Port
Before connecting Power or interface cables to the printer, be sure the printer is powered off. For
hardware setup instructions, see Section 3.3 – Establishing Printer Connection. Once hardware
connection has been established, go to the corresponding Appendix listed below for instructions on
setting up the printer using Netira
™
CT.
Serial Connection
The serial interface supports RS-232 communications via an RJ-11 connector. The following list of serial-
port settings is menu-selectable (via host software/driver) and must match the host computer’s serial-port
settings:
> Baud Rate (Default 9600 bps)
> Parity = (Default N)
> Word Length = (Default 8 bits)
> Stop Bits = (Default 1)
USB Connection (USB)
The USB Interface is supported in Windows
®
98 and greater. Depending upon the operating system of
your host computer, installation may differ slightly. For setup information, see
Optional Wireless LAN and Bluetooth
®
For setup information on optional Wireless LAN and Bluetooth
®
Содержание RL3
Страница 1: ...User Guide RL3 3e RL4 4e 110259 005 ...
Страница 2: ......
Страница 70: ...www datamax oneil com F 1 ...
Страница 71: ......


