Installation Manual
Rhino™ 10
Mount the Computer to the Vehicle
Hold the computer by the junction of the Ram mount arm and the base on the back of the unit. Lift the assembly to the
base on the vehicle. Open the arm until the end slides over the ball on that base. Tighten the wing nut firmly.
Once the computer is attached, it can adjusted by holding the bottom of the computer, loosening the wing nut on the
arm by one turn moving the Rhino™ 10 to the desired position and re-tightening the wing nut on the arm.
ALWAYS hold the Rhino™ 10 before loosening the arm. Failure to hold the Rhino™ 10 can cause it to
swing down suddenly and may cause injury or damage the unit!
Mounting the Keyboard
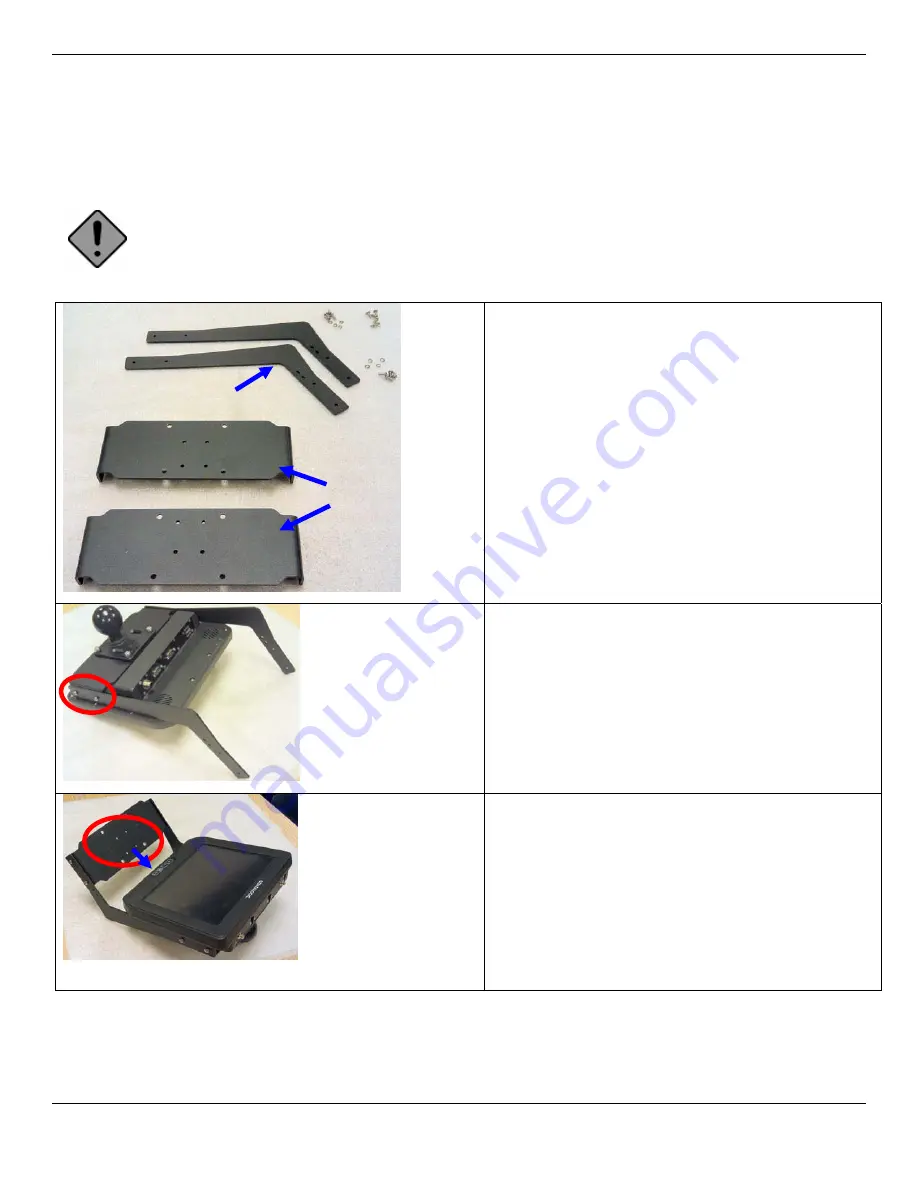
The Keyboard Mounting Kit includes:
2 interchangeable side supports
2 interchangeable mounting plates
12 8-32 machine screws with lock washers
Tools required:
#2
Phillips
screwdriver (not included)
Prior to beginning this procedure you should have al-
ready attached the mounting base and mounting ball to
the computer as described in
Adding Mounting Base to
Computer
above.
1. Attach the long end of the two side supports to
the mounting base on the Rhino™ 10 using four
of the 8-32 screws and lock washers.
2. Attach the second flanged plate to the short end
of the sides with the flanges down using the four
8-32 screws and lock washers. Note that the
screw holes in the center of the mounting plate
are closer to one side of the mounting plate.
These holes should be place closest to the com-
puter so that, when the keyboard is attached, it
will be fully supported by the mounting plate. This
is shown in the picture to the left.
Side supports (2)
Mounting plates (2)
8
Содержание Rhino 10
Страница 1: ...RhinoTM 10 Installation Manual ...
Страница 4: ... page intentionally left blank ...


