background image

Hardware Components

MX-U81 Hardware Guide

Datalogic S.r.l.

1-2

Hardware Components

The major hardware components of the system are the MX-U81 Processor, camera, and cables.

MX-U81-4-P-1 4-camera capable, PNP outputs: 959918109

MX-U81-4-N-1 4-camera capable, NPN outputs: 959918110

For details about MX-U81 cables, see “Processor Cables” on page 5-1.

For details about MX-U81 cameras, see “Camera Specifications” on page 3-13.

Safety Precautions

Warning: 

There are no user-serviceable parts inside the hardware. To avoid electrical shock, never open the case. 

Modifying or tampering with internal components will void the product warranty.

Attention: Il n'y a aucune pièce réparable par l'utilisateur à l'intérieur du dispositif. Pour éviter un choc électrique, 
n'ouvrez jamais le cas. Modification ou manipulation des composants internes annulera la garantie du produit.

1. Read all of the following instructions before setting up your system. 

Save this document for later use.


2. Follow all warnings and instructions in this manual and in other user guides shipped with your hardware compo-

nents.

3. To avoid damage to the vision system and its components, 

never 

plug in or unplug a cable when the power is on. 

Always shut down the processor and turn off the power supply before you make cable changes (see “Turning Off 

the System” on page 1-3).

4. Never use the system if a power cable has been damaged. Do not allow anything to rest on a power cable and keep 

them away from traffic.

5. The air inlets and exhausts on the unit are for ventilation. Do not block or cover these openings or insert anything 

into these openings.

6. Do not expose the vision system to moisture, rain, or snow, and do not use it near water. If a component gets wet 

unplug it immediately.

7. To avoid injury, never open the case. Modifying or tampering with internal components will void the product war-

ranty.

Service Personnel Only - Caution:

 Risk of explosion if battery is replaced by an incorrect type. Dispose of used 

batteries according to battery maker’s instructions.

Содержание MX-U81

Страница 1: ...MX U81 Hardware Guide for Processor and Cameras Revision Date October 26 2017 ...

Страница 2: ...nce CE marking states the compliance of the product with essential requirements listed in the applicable European directive Since the directives and applicable standards are subject to continuous updates and since Datalogic promptly adopts these updates therefore the EU declaration of conformity is a living document The EU declaration of conformity is available for competent authorities and custom...

Страница 3: ...pair Program for On Line Return Material Authorizations RMAs plus Repair Center contact information Service Program containing details about Maintenance Agreements Technical Support through email or phone ...

Страница 4: ......

Страница 5: ...3 Power Supply Connection 2 5 Grounding Concepts 2 6 USB Hardware Key 2 7 CFast Card 2 8 Battery 2 9 Chapter 3 MX U81 Cameras Introduction 3 1 Safety Precautions 3 1 U1xx Camera Dimensions 3 3 Mounting the Camera 3 3 Connecting the Camera 3 5 U1xx Camera Connection 3 5 U1xx Camera Connection Alternate 3 8 Camera Specifications 3 13 U1xx U1xxC 3 13 U100 U100C 3 13 U101 U101C 3 14 U110 U110C 3 15 U1...

Страница 6: ...of Contents MX U81 Hardware Guide TOC 2 Datalogic S r l Ethernet 5 1 Input Output 5 1 Power Supply 5 1 Serial Port 5 2 Monitor Panel 5 2 Display Port 5 2 USB Processor to Camera 5 2 Camera Cable 5 3 U1xx 5 3 ...

Страница 7: ...ack the shipment in case you need to move or ship it Temperature precautions If your system arrives in very cold or hot weather allow all the equipment to reach room tem perature before plugging it in Exposing a cold device to a warm room causes condensation that could damage the system if power is applied too soon If condensation forms wait for it to dry completely System Factory Setup Before we ...

Страница 8: ...ting up your system Save this document for later use 2 Follow all warnings and instructions in this manual and in other user guides shipped with your hardware compo nents 3 To avoid damage to the vision system and its components never plug in or unplug a cable when the power is on Always shut down the processor and turn off the power supply before you make cable changes see Turning Off the System ...

Страница 9: ...er button on the front of the processor see Front Panel Connections on page 1 7 Processor Specifications This section lists the general operating specifications for the MX U81 Only Datalogic USB cameras will operate with MX U81 Processor GigE cameras cannot be used Each of the MX U81 cameras has different operating specifications See MX U81 Cameras on page 3 1 for details Technical Data Supply vol...

Страница 10: ...tive Humidity 30 C Operating 10 to 90 non condensing Storage 5 to 95 non condensing Vibrations EN60068 2 6 2 to 8 Hz 1 75 mm amplitude 9 to 200 Hz 0 5 g Shock resistance EN60068 2 27 11 MS 15 G Housing material Galvanized plate plastic Mechanical protection EN 60529 IP20 Weight 4 52 lb 2 05 kg Minimum Impact Software Version Required 11 5 0 CPU MX U81 Intel Core i7 2 3 GHz quad core System Memory ...

Страница 11: ...er Supply Connection on page 2 5 10 Connect the cables from the MX U81 terminal blocks to their cameras 11 IMPORTANT A USB Hardware key is ordered and shipped separately from the processor It must be present in the USB port labeled USB5 on the processor front before the processor is powered on See System Factory Setup on page 1 1 and USB Hardware Key on page 2 7 12 Plug the power supplies into an ...

Страница 12: ...tus Lights on page 1 9 3 ETH1 Ethernet 1 See Status Lights on page 1 9 4 RS232 Serial Port COM 1 See Serial Port on page 5 2 5 Display Port connection 6 Monitor Panel connection for smart monitor 7 Supply Voltage 8 USB 3 0 Dedicated Camera Ports x 4 9 37 pin D Sub Digital I O See Processor I O Connection on page 4 1 An open PCIe x8 slot is available behind the PCI slot cover next to the Digital I ...

Страница 13: ...urn on the unit If the unit is on press and release to shut down the OS and switch off the unit see Turn ing Off the System on page 1 3 Press and hold to switch off without OS shut down Warning Data could be lost C Reset Button Resets the processor which trig gers a hardware and PCI reset The unit is restarted Warning Data could be lost D USB 2 0 Port for USB Hardware key only See USB Hardware Key...

Страница 14: ...Rear View MX U81 Hardware Guide Datalogic S r l 1 8 Rear View This illustration shows the Processor s rear panel ...

Страница 15: ... When lit indicates 1 Power Power is On 2 HDD Solid state hard drive or Cfast access is active 3 Link On An active Smart Display Link connection is estab lished Blinking Connection is interrupted due to power loss to display unit 4 Run An application is running Symbol Name When lit indicates 1 ETH1 and ETH2 Speed Off 10 Mbps Green 100 Mbps Orange 1000 Mbps Gigabit 2 ETH1 and ETH2 Activity Link On ...

Страница 16: ... highly recommended Verify that all cable connections are correct and tight Secure the cables to prevent accidents or damage to the device connectors When you move the system be careful that the movement does not loosen connections After the system is moved ver ify cable and power cord connections Repair or replace frayed or damaged cables immediately Do NOT attempt to clean the camera imager or i...

Страница 17: ...gic S r l C H A P T E R 2 Basic Hardware Components Processor Views and Dimensions This section shows specifications for the Processor including various views and dimensions Top View UNITS mm Rear View Front View ...

Страница 18: ...Processor Views and Dimensions MX U81 Hardware Guide Datalogic S r l 2 2 Side View Air Inlet Filter Inside UNITS mm ...

Страница 19: ...MX U81 Processors An optional power supply is available for MX U81 Processors If you provide your own it must supply 24VDC at 5 5 A nominal with a safe operating ambient temperature range of 0 to 55 C 32 to 131 F This equipment is to be powered by a Listed power supply for the U S and Canada or a power supply that meets the requirements for use where either IEC 60950 or EN60950 is applicable To en...

Страница 20: ...ion using the drilling template dimensions 2 Drill four surface mounting holes in the mounting surface Use suitable anchors if necessary 3 Insert four M5 mounting screws in the mounting holes and tighten them until approximately 0 2 inches 5 mm is left exposed The mounting screws must be long enough to provide sufficient support 4 Maneuver the Processor so mounting bracket slots align with the mou...

Страница 21: ...l pin 2 on the 24V power input must be connected to the power supply s grounded chas sis enclosure This connection is needed to insure electromagnetic compliance and proper operation See Grounding Concepts on page 2 6 Note The processor requires approximately 5 5 A 24VDC We recommend using a 24 VDC power supply capable of providing 5 5 A current This voltage is commonly used in many manufacturing ...

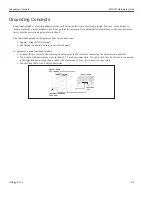
Страница 22: ...st electric shock The functional ground on the processor has two connections Supply voltage GND terminal Grounding connection on the processor back panel To guarantee a good functional ground Connect the processor to the central grounding point in the control cabinet using the shortest route possible Use a cable with a minimum cross section of 2 5 mm per connection If a cable with wire tip sleeves...

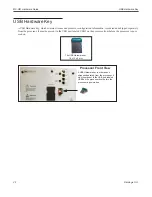
Страница 23: ...ipped separately from the processor It must be present in the USB port labeled USB5 on the processor front before the processor is pow ered on The USB Hardware key 18 x 12 x 5 mm A USB Hardware key is ordered and shipped separately from the processor It must be present in the USB port labeled USB5 on the processor front before the processor is powered on Processor Front View ...

Страница 24: ... set internally via SATA 1 with SATA III design SATA 6 Gbit s WARNING Power must be disconnected before inserting or removing the CFast card To exchange the CFast card 1 Press down on the slot cover s top clip to open the slot 2 Press the ejector at the bottom of the slot with a pointed object such as a pen 3 Pull the card straight out 4 Insert the new card straight into the slot 5 Close the slot ...

Страница 25: ...hould be replaced at least every four years WARNING Power must be disconnected before replacing the battery To replace the battery 1 Disconnect the power supply to the processor 2 Touch the housing or ground connection in order to discharge any electrostatic charge from your body 3 Press down on the slot cover s top clip to open the battery slot 4 Do not hold the battery by its edges Using the rem...

Страница 26: ...Battery MX U81 Hardware Guide Datalogic S r l 2 10 ...

Страница 27: ...ions before setting up your camera Save this document for later use Follow all warnings and instructions in this manual and in other user guides shipped with your hardware components Do not attempt to disassemble the camera Do not remove screws or attachments There are no user serviceable parts inside Refer servicing to Datalogic S r l All MX U81 cameras connect power and image transmission to the...

Страница 28: ... sure there is enough room for the camera and any lighting that may be needed Avoid areas with excessive heat vibration and environmental contaminants Mount the camera away from devices that emit large amounts of electromagnetic energy Do NOT attempt to clean the camera imager or imager cover Do NOT spray the imager or imager cover with com pressed air as this may leave spots Do not leave the came...

Страница 29: ... against the camera body insert the mounting bolts through the block mount ing bolt holes see diagram Mounting Block 95A903029 and Camera Body Bottom View also see U1xx Mounting Block 95A903029 on page 3 4 UNITS inch mm Power Trigger Connection USB Connection 0 22 5 5 Rear View without mounting block 1 14 29 1 0 25 0 74 18 7 Block Mounting holes 3 x M3 Fasteners provided 2 x 1 4 20 0 31 8 deep 1 1...

Страница 30: ...or proper stability and heat transfer See U1xx Camera Dimensions on page 3 3 U1xx Mounting Block 95A903029 Camera front Bottom View UNITS inch mm Block Mounting bolts M3 3 ea 20 8mm deep 2 ea M5 x 0 8 8mm deep 2 ea 1 18 30 0 14 13 5 0 59 15 1 06 27 25 6 25 0 24 6 5 13 Mounting Block 381 1355 Camera front faces this direction Bottom View UNITS inch mm Block Mounting bolts M3 4 5mm deep 2 ea 20 8mm ...

Страница 31: ...gnal Notes Optional Camera Power DO NOT USE Do NOT apply power to this terminal Power is supplied by the USB connection See Top Panel Connections on page 1 6 Optional Camera Power Ground DO NOT USE Not required Ground is supplied by the USB connector I O Ground I O Ground Trigger In Camera Trigger In 0 to 24 VDC recommended Maximum 30 VDC As sinking input Off 0 to 1 4 VDC On 2 2 to 24 VDC 5 to 15 ...

Страница 32: ...ic S r l 3 6 U1xx Circuit Diagrams U1xx Trigger In Circuit WARNING Never wire U1xx Camera Strobe Outputs in parallel with other U1xx Camera Strobe Outputs This will dam age the cameras U1xx Strobe Trigger Output Circuit 661 0399 Terminal Block Dimensions ...

Страница 33: ...MX U81 Hardware Guide U1xx Camera Connection 3 7 Datalogic S r l U1xx Terminal Connections ...

Страница 34: ...ector on the rear of the camera push gently until the cable connector seats securely then tighten the connector collar To disconnect it loosen the collar com pletely then grasp the connector and gently pull NOTE To reduce stress on the cable and connectors loop the cable and fasten it to the camera s mounting block Do not crimp or tie the cable tightly with wire ties as this may damage it internal...

Страница 35: ...te U1xx Trigger Input circuit sourcing Set Software Trigger Event to Falling Edge U1xx Trigger Input circuit sinking Set Software Trigger Event to Rising Edge U1xx Strobe Output circuit sourcing Set Software Strobe Trigger Output to Rising Edge Note Disconnecting the camera will turn on some strobe lights ...

Страница 36: ...nnection Alternate MX U81 Hardware Guide Datalogic S r l 3 10 U1xx Terminal Connections Alternate U1xx Strobe Output circuit sinking Set Software Strobe Trigger Output to Falling Edge U1xx Terminal Block Connections ...

Страница 37: ...MX U81 Hardware Guide U1xx Camera Connection Alternate 3 11 Datalogic S r l U1xx Unterminated Cable Connections Alternate U1xx Unterminated Cable Connections ...

Страница 38: ...cameras with a MX U81 processor Refer to the Camera Setup Tab sec tion of the Impact Software Reference Guide Calibration insures that measurements shown in Impact software tools accurately indicate the inspected object s measure ments A camera requires calibration when it is first connected to the MX U81 Processor when the camera to subject dis tance changes and when the lens is changed Calibrati...

Страница 39: ...mera cable provides trigger and strobe USB cable provides power and transmits video Operating Environment Temperature 0 to 50 C 32 to 122 F Humidity 0 to 80 non condensed Weight 2 9 ounces 80 g Software Version Impact Software V11 5 0 or greater Protection Class IP30 U100 Specifications Part Number 959933003 959933004 Pick up Device Progressive Scan CCD 659 H x 494 V pixels Sensor Size 1 4 3 69 mm...

Страница 40: ... Version Impact Software V11 5 0 or greater U101 Specifications Part Number 959933030 959933031 Pick up Device Global Shutter CMOS 640 H x 480 V pixels Sensor Size 1 4 3 8 mm diag 3 07mm H 2 3mm V Capture Rate 750 full resolution fps higher with partial scan Pixel Size 4 8 x 4 8 micrometers Power 5 VDC 2 4 W Gain 350 to 1023 Shutter Open 24 to 1 000 000 microseconds Software Version Impact Softwar...

Страница 41: ...933001 959933002 Pick up Device Progressive Scan CCD 659 H x 494 V pixels Sensor Size 1 3 4 88mm H 3 66mm V Capture Rate 90 full resolution fps higher with partial scan Pixel Size 7 4 x 7 4 micrometers Power 5 VDC 2 4 W Gain 350 to 1023 Shutter Open 24 to 1 000 000 microseconds Exposure Start Delay 31 72 μsec Software Version Impact Software V11 5 0 or greater U110 Spectral Response excludes lens ...

Страница 42: ...33005 959933006 Pick up Device Progressive Scan CCD 1296 H x 966 V pixels Sensor Size 1 3 4 86mm H 3 62mm V Capture Rate 30 full resolution fps higher with partial scan Pixel Size 3 75 x 3 75 micrometers Power 5 VDC 2 5 W Gain 100 to 1023 Shutter Open 22 to 1 000 000 microseconds Exposure Start Delay 34 50 μsec Software Version Impact Software V11 5 0 or greater U150 Spectral Response excludes len...

Страница 43: ...art Number 959933032 959933033 Pick up Device Global Shutter CMOS 1280 H x 1024 V pixels Sensor Size 1 2 8 mm diag 6 14mm H 4 92mm V Capture Rate 200 full resolution fps higher with partial scan Pixel Size 4 8 x 4 8 micrometers Gain 100 to 1023 Shutter Open 16 to 1 000 000 microseconds Software Version Impact Software Release 11 8 0 97 or greater U151 Spectral Response excludes lens and light sour...

Страница 44: ...33007 959933008 Pick up Device Progressive Scan CCD 1628 H x 1236 V pixels Sensor Size 1 1 8 7 16mm H 5 44mm V Capture Rate 20 full resolution fps higher with partial scan Pixel Size 4 4 x 4 4 micrometers Power 5 VDC 3 5 W Gain 100 to 1023 Shutter Open 31 to 1 000 000 microseconds Exposure Start Delay 34 50 μsec Software Version Impact Software V11 5 0 or greater U180 Spectral Response excludes le...

Страница 45: ...Part Number 959933034 959933035 Pick up Device Global Shutter CMOS 1920 H x 1200 V pixels Sensor Size 2 3 9 5mm H 6 08mm V Capture Rate 150 full resolution fps higher with partial scan Pixel Size 4 8 x 4 8 micrometers Power 5 VDC 3 5 W Gain 100 to 1023 Shutter Open 31 to 1 000 000 microseconds Software Version Impact Software V11 8 0 97 or greater U181 Spectral Response excludes lens and light sou...

Страница 46: ...ber 959933011 959933012 Pick up Device CMOS 2048 H x 1088 V pixels Sensor Size 2 3 11 26mm H 5 98mm V Capture Rate 165 full resolution fps higher with partial scan Pixel Size 5 5 x 5 5 micrometers Power 5 VDC 2 5 W Gain 100 to 1023 Shutter Open 31 to 1 000 000 microseconds Exposure Start Delay 34 50 μsec Software Version Impact Software V11 5 0 or greater U190 Spectral Response excludes lens and l...

Страница 47: ...33013 959933014 Pick up Device CMOS 2048 H x 2048 V pixels Sensor Size 1 14 8 mm diag 11 26 mm H x 11 26 mm V Capture Rate 90 full resolution fps higher with partial scan Pixel Size 5 5 x 5 5 micrometers Power 5 VDC 2 6 W Gain 100 to 1023 Shutter Open 31 to 1 000 000 microseconds Exposure Start Delay 34 50 μsec Software Version Impact Software V11 5 0 or greater U195 Spectral Response excludes len...

Страница 48: ...s Part Number 959933009 959933010 Pick up Device Progressive Scan CMOS Rolling Shutter 2592 H x 1944 V pixels Sensor Size 1 2 5 5 70 mm H x 4 28mm V Capture Rate 14 full resolution fps Pixel Size 2 2 x 2 2 micrometers Power 5 VDC 2 2 W Software Version Impact Software V11 5 0 or greater U197 Spectral Response excludes lens and light source characteristics ...

Страница 49: ...ations Part Number Pick up Device Global Shutter CMOS 2448 H x 2048 V pixels Sensor Size 2 3 11 1 mm diag 8 4 mm H x 7 1 mm V Capture Rate 20 full resolution fps higher with partial scan Pixel Size 3 45 x 3 45 micrometers Gain 100 to 1023 Shutter Open 112 to 1 000 000 microseconds Software Version Impact Software Release 11 10 or greater U198C Spectral Response excludes lens and light source chara...

Страница 50: ...cations for these cameras consult the manufac turer s documentation You must purchase a license from Datalogic to connect a third party camera to the MX U81 processor JAI Camera This camera requires an MX U40 or MX U80 processor See Note on Device Driver Install on page 3 25 JAI Camera Connection To connect JAI camera power trigger signals and strobe outputs use cable 606 0671 xx 12 pin Hirose con...

Страница 51: ...r 1 Use a USB cable to connect the camera to one of the USB camera ports on the processor 2 On the processor Windows interface click Start Control Panel 3 Select Device Manager from the list of options 4 In the list of devices you should see a listing for Other Devices USB3 Vision Device with a yellow warning icon 5 Double click the item then click Update Driver 6 Click Browse My Computer for driv...

Страница 52: ...JAI Camera MX U81 Hardware Guide Datalogic S r l 3 26 ...

Страница 53: ...puts and outputs See MX U81 Cameras on page 3 1 for details Processor I O Connection To connect MX U81 processor input and output signals use either cable 606 0675 xx 37 pin D sub Male to Male Cable with terminal block 248 0110 or use cable 606 0675 xx and remove one end to create a pigtail with no terminal block IMPORTANT Do not connect or disconnect the cable while power is on CurrentSinking NPN...

Страница 54: ...tion 20 21 Red Black Orange Black Output Minus Note 1 Output 1 22 23 Yellow Black Green Black Output 2 Output 3 24 25 Gray Black Pink Black Output 4 Output 5 26 27 Pink Red Pink Blue Output 6 Output 7 28 29 Pink Green Light Blue Output 8 Output 9 30 31 Light Blue Black Light Blue Red Output 10 Output 11 32 33 Light Blue Blue Light Blue Green Output 12 Output 13 34 35 Gray Red Gray Green Output 14 ...

Страница 55: ...8 Green White Blue White Input 16 Output Plus Note 5 19 20 Purple White Red Black No Connection No Connection 21 Orange Black Output 1 22 23 Yellow Black Green Black Output 2 Output 3 24 25 Gray Black Pink Black Output 4 Output 5 26 27 Pink Red Pink Blue Output 6 Output 7 28 29 Pink Green Light Blue Output 8 Output 9 30 31 Light Blue Black Light Blue Red Output 10 Output 11 32 33 Light Blue Blue L...

Страница 56: ...ion of the input pulse must be longer than the debounce time The active trigger edge rising falling or both input pulse duration and debounce are all configured in the Vision Program Manager Settings tab This table describes the input characteristics Input Wiring Note All connections to inputs must be made using properly grounded shielded cable CurrentSinking NPN InputCircuit The diagram below sho...

Страница 57: ...ing PNP InputCircuit The diagram below shows how to wire a sensor to a general purpose or event input for model numbers containing the let ter P All inputs are compatible with current sourcing output signals Pin 1 is the Input Minus Common connection for all the inputs ...

Страница 58: ...rnal power source is required to power an output load The outputs are merely switches that are open or closed All output connections must use properly grounded and shielded cable Note The Trigger Signal and Strobe Output for MX U81 cameras are separate and not part of the MX U81 Processor inputs and outputs See MX U81 Cameras on page 3 1 for details Supply Voltage 5 VDC minimum to 35 VDC maximum S...

Страница 59: ... containing the letter N NOTES To prevent output damage all inductive loads must have noise suppressors connected directly across the load as close to the load as possible This is an internal connection not an output voltage source An exter nal power source must be con nected to Plus Common as indicated Output Plus is not an output volt age source An external power source must be connected as indi...

Страница 60: ...aining the letter P NOTES To prevent output damage all inductive loads must have noise suppressors connected directly across the load as close to the load as possible This is an internal connection not an output voltage source An exter nal power source must be con nected to the Load as indicated Output Plus is not an output volt age source An external power source must be connected as indicated ...

Страница 61: ... switch connection and they configure themselves and the communications to suit the environment Input Output The terminal block and cable for connecting MX U81 processor are listed in the table below For connection diagrams see Processor I O Connection on page 4 1 The last two digits of the part number indicate the cable length in meters Power Supply This equipment is to be powered by a Listed pow...

Страница 62: ...monitor panel port provides RGB DVI and SDL video signals The processor requires a monitor and keyboard when it first starts and to configure the system A VGA cable 5 meters maximum with the appropriate adapter can be used on this connector Display Port The display port provides DVI and HDMI video signals USB Processor to Camera A USB 3 0 cable is used to connect the MX U81 Processor to the U Seri...

Страница 63: ...able wire color codes and connection diagrams see U1xx Camera Connection on page 3 5 The last two digits of the part number indicate the cable length in meters Connector Type Part Number Terminal Block 661 0399 Camera Cable DB9 to 6 pin Hirose Male for use with above terminal block 606 0674 xx Hirose 6 pin Male to pigtail for use with no termi nal block 606 0672 xx ...

Страница 64: ...U1xx MX U81 Hardware Guide Datalogic S r l 5 4 ...

Страница 65: ...ont 1 7 power 2 5 top 1 6 USB 5 2 VGA 5 2 D Debounce 4 4 Dimensions processor 1 3 2 1 U1xx 3 3 DisplayPort connector 5 2 DVI I connector 5 2 E Ethernet cable 5 1 connector 1 6 status 1 9 F Flash compact 2 4 2 9 Front connector 1 7 H Hardware components 1 2 Hardware key 2 7 I I O cable 5 1 reference 4 1 Input Output See I O Inputs processor 4 4 Installation processor 2 3 Interrupts 4 4 J JAI camera...

Страница 66: ...or 1 3 U1xx 3 13 Status lights 1 9 Support technical 1 10 Switch power 1 7 System shut down 1 3 T Technical support 1 10 Temperature range processor 1 3 Terminal block processor 4 1 U1xx 3 5 3 6 Third party camera 3 24 Top connector 1 6 Turn off system 1 3 U U100 U100C 3 13 U101 U101C 3 14 U110 U110C 3 15 U150 U150C 3 16 U151 U151C 3 17 U180 U180C 3 18 U181 U181C 3 19 U190 U190C 3 20 U195 U195C 3 ...

Отзывы: