Datalogic Applications
User’s Manual
151
Pairing Configuration Controls
These fields let you configure your connection to the PC you are
running DXU on. These fields are filled in automatically, but you can
change them to deliberately connect to another IP address where
another instance of DXU is running, for example.
Barcode Settings
As with the other version of the Scan2Deploy dialog box, this tab
allows to set the maximum size of each label by symbology. For
example, if you know that your devices can scan larger 2D labels
than DXU’s default setting, you can increase the size of your label so
fewer labels are needed to fully deploy your configuration.
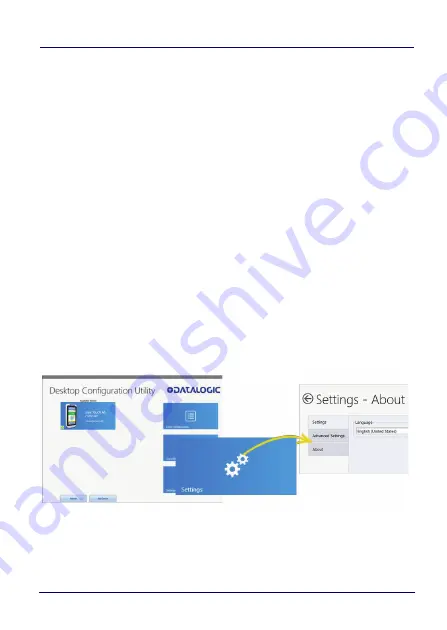
Settings Window
The
Settings
window is opened by clicking the Settings button on
DXU
main window. This view includes controls which should seldom
need to be changed, such as the language that DXU displays in, TCP
ports used to communicate with remote devices, and the About tab
that displays DXU’s version.
Содержание Jota A6 Touch
Страница 1: ...Multi Purpose Device for Retail User s Manual...
Страница 8: ...vi JOYA TOUCH NOTES...
Страница 16: ...Introduction 8 JOYA TOUCH A6 General View Front View Scan Key Touch Panel Display...
Страница 17: ...Introduction User s Manual 9 Back View Laser Safety Label Product Label Power Key...
Страница 19: ...Introduction User s Manual 11 CAUTION Do not apply any sticker to the Joya Touch A6 see the picture below...
Страница 22: ...Introduction 14 JOYA TOUCH A6 NOTES...
Страница 36: ...Battery 28 JOYA TOUCH A6 NOTES...
Страница 65: ...Settings User s Manual 57 4 Tap Save...
Страница 85: ...Settings User s Manual 77 Wedge Use it to enable or disable the keyboard wedge and the intent wedge...
Страница 105: ...Settings User s Manual 97...
Страница 116: ...Settings 108 JOYA TOUCH A6 NOTES...
Страница 118: ...Datalogic Applications 110 JOYA TOUCH A6...
Страница 141: ...Datalogic Applications User s Manual 133...
Страница 172: ...Datalogic Applications 164 JOYA TOUCH A6...
Страница 198: ...Datalogic Applications 190 JOYA TOUCH A6 SureFox...
Страница 209: ...Tools User s Manual 201 2 Select the tab SDK Update Sites and click the icon on the right side toolbar...
Страница 215: ...Tools User s Manual 207 4 Use a CD Rom Installer to debug the ADB driver and read the Joya Touch A6 as an ADB device...
Страница 217: ...Tools User s Manual 209 The wizard will guide through the creation of a new application...
Страница 222: ...Tools 214 JOYA TOUCH A6 NOTES...
Страница 226: ...Data Capture 218 JOYA TOUCH A6 NOTES...
Страница 236: ...Connections 228 JOYA TOUCH A6 NOTES...
Страница 242: ...Test Codes 234 JOYA TOUCH A6 High Density Codes continued 0 25 mm 10 mils 80 EAN 13 80 EAN 8...
Страница 243: ...Test Codes User s Manual 235 Medium Density Codes 0 38 mm 15 mils Code 39 17162 Interleaved 2 5 0123456784 Code 128 test...
Страница 244: ...Test Codes 236 JOYA TOUCH A6 Medium Density Codes continued 0 38 mm 15 mils 100 EAN 13 100 EAN 8...
Страница 245: ...Test Codes User s Manual 237 Low Density Codes 0 50 mm 20 mils Code 39 17162 Interleaved 2 5 0123456784 Code 128 test...
Страница 246: ...Test Codes 238 JOYA TOUCH A6 Low Density Codes continued 0 50 mm 20 mils 120 EAN 13 120 EAN 8...
Страница 247: ...Test Codes User s Manual 239 2D Codes Datamatrix ECC200 Example Inverse Datamatrix ECC200 Example...
Страница 248: ...Test Codes 240 JOYA TOUCH A6 NOTES...
Страница 253: ...Safety and Regulatory Information User s Manual 245 Laser Warning Label Scan Window Data Label...
Страница 274: ...Support Through the Website 266 JOYA TOUCH A6 NOTES...


