


22
Using the System
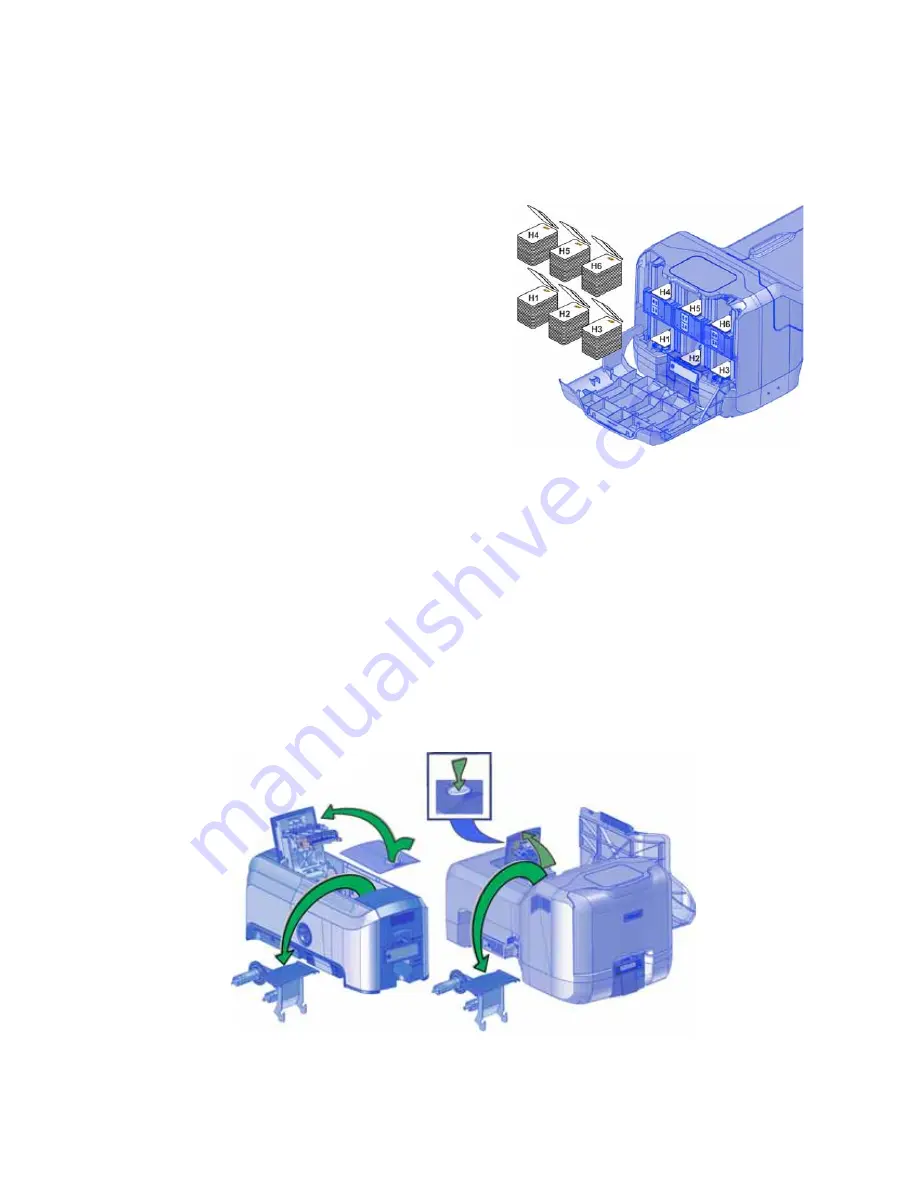
Optional Multi-Hopper
1.
Unlock
the
printer
and
open
the
multi
‐
hopper.
2.
Load
the
cards
into
the
hoppers.
The
input
hoppers
are
labeled
H1
through
H6.
You
can
load
up
to
100
cards
into
each
hopper.
(Cards
can
stick
together.
Slide
or
fan
the
cards
to
separate
the
edges
before
placing
them
in
the
input
hoppers.)
•
Insert
ISO
magnetic
stripe
cards
with
the
stripe
(back
side)
facing
down
and
toward
the
right
side.
•
Insert
smart
cards
with
the
smart
card
chip
facing
up
and
toward
the
back
of
the
hopper.
3.
Close
the
multi
‐
hopper
and
lock
the
printer
when
you
finish
loading
cards.
Load the Print Ribbon
Load
the
ribbon
when
you
install
the
printer
and
when
the
ribbon
runs
out.
1.
Unlock
the
printer,
if
necessary,
and
open
the
printer
supplies
access
door
on
the
optional
multi
‐
hopper.
2.
Open
the
printer
cover.
3.
Remove
the
ribbon
cartridge.
Содержание CD800
Страница 1: ...Datacard CD800 Card Printer User s Guide March 2014 Part No 527443 001 Rev A ...
Страница 8: ...viii ...
Страница 14: ...xiv ...
Страница 16: ...2 Introduction ...
Страница 25: ...CD800 Card Printer User s Guide 11 ...
Страница 26: ...12 About the Printer ...
Страница 42: ...28 Printing Cards ...
Страница 54: ...40 System Maintenance ...
Страница 114: ...A 16 CLM Laminator ...