Data I/O
FLX500
Chptr 3
—32—
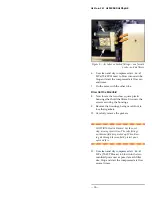
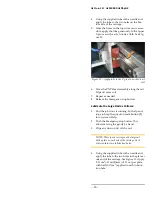
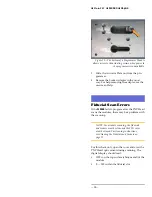
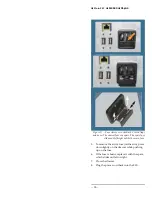
Figure 17—Fuse Access is in the Back. Closed (top)
and open. The nearest fuse is a spare. The spare fuse
slides out left/right unlike the main fuse.
5.
To remove the active fuse (farthest in), press
down lightly on the drawer while pushing
up on the fuse.
6.
If the fuse is burnt, replace it with the spare,
which slides out left or right.
7.
Close the drawer.
8.
Plug the power cord back into the FLX.
Содержание FLX500
Страница 4: ... Data I O FLX500 ii ...
Страница 12: ... Data I O FLX500 Chptr 1 8 blank page ...
Страница 28: ... Data I O FLX500 Chptr 2 24 blank page ...
Страница 40: ... Data I O FLX500 Chptr 4 36 blank page ...
Страница 42: ... Data I O FLX500 Chptr 5 38 Daily Sign off Clean the sockets page 10 Date Initials Notes ...
Страница 43: ...5 Sign off Charts Daily Sign off 39 Daily Sign off Date Initials Notes ...
Страница 44: ... Data I O FLX500 Chptr 5 40 Daily Sign off Date Initials Notes ...
Страница 45: ...5 Sign off Charts Daily Sign off 41 Daily Sign off Date Initials Notes ...
Страница 46: ... Data I O FLX500 Chptr 5 42 Daily Sign off Date Initials Notes ...
Страница 48: ... Data I O FLX500 Chptr 5 44 Weekly Sign off Date Initials Notes ...
Страница 52: ... Data I O FLX500 Chptr 5 48 blank page ...
Страница 57: ... FLX500 ...
Страница 58: ... FLX500 FLX programmable media experts ...

