background image


D

AMALL 

D-2304 


P

AGE 

|


21 

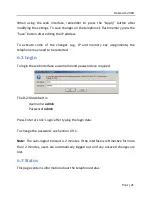
When using  the  web interface,  remember to press the  “Apply”  button  after 
modifying the settings. To save changes on the telephone’s flash memory press the 
“Save” button after editing the IP address. 
 
To activate some of the changes (e.g. IP and memory key assignments)  the 
telephone may need to be restarted. 

6.2


Login 

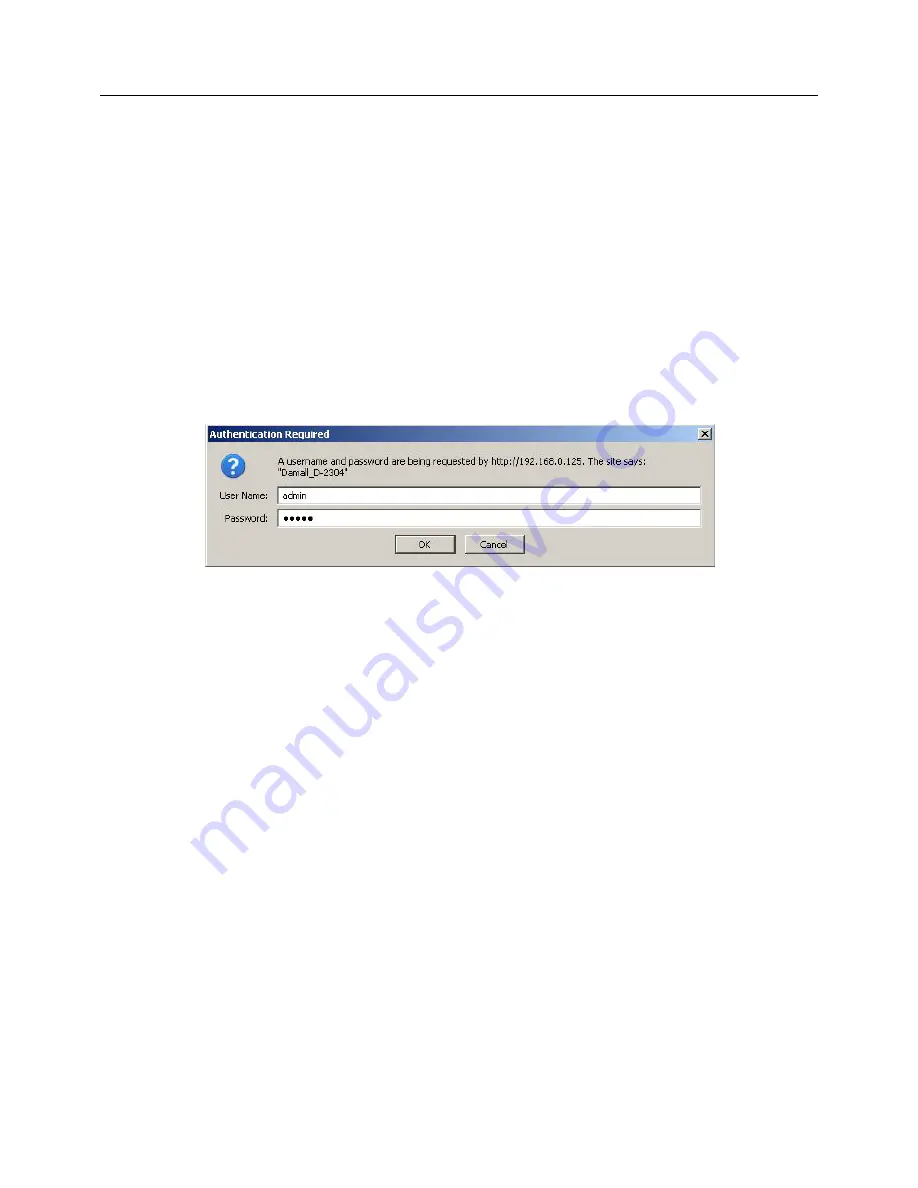
To login the web interface a username and password are required.  


The D-2304 default is: 

Username: 

admin


Password: 

admin


Press Enter or click ‘Login’ after typing the login data. 
 
To change the password, see Section 6.9.1. 
 

Note:

  The auto-logout timeout is 2 minutes. If the interface is left inactive for more 

than 2 minutes, users are automatically logged out and any unsaved changes are 
lost.  

6.3


Status 

This page contains information about the telephone status: 
 

Содержание D-2304

Страница 1: ...USER MANUAL DAMALL D 2304 IP PHONE ...

Страница 2: ...document is prohibited without prior written consent of the publisher Such consent will only be granted in those instances when the source of the document is clearly stated Revision 1 3 3 Released on 20 07 2007 Declaration of conformity can been found at this internet address http www damalltech com ...

Страница 3: ...2 8 Cleaning 6 2 9 Product Disposal 6 2 10 Product Warranty 7 3 General Information 9 3 1 Package Contents 9 3 2 General Specifications 9 3 3 Before Starting 9 3 4 Getting Started 10 3 4 1 Basic Installation 10 3 4 2 Network Installation 10 3 4 3 LCD Display 10 3 4 4 Key features 11 4 Basic Operation 13 4 1 Getting Familiar 13 4 2 Placing Calls 14 4 2 1 Hold 14 4 2 2 Unattended Transfer 14 4 2 3 A...

Страница 4: ...g 17 5 4 3 Call Waiting 18 5 4 4 Autodial 18 5 4 5 Dialing Rules 18 5 4 6 Greeting Word 18 5 5 Network Setup 18 5 5 1 SIP Setup 1 and 2 19 5 5 2 Network 19 5 5 3 Change Password 19 5 6 Reboot 19 6 Web Interface 20 6 1 Basic Access 20 6 2 Login 21 6 3 Status 21 6 4 LAN Config 22 6 5 SIP Config 23 6 6 Advanced Configuration 24 6 6 1 Dialling Rules 24 6 6 2 User Defined Rules 25 6 6 3 Call Options 27...

Страница 5: ...ear Config 31 6 8 4 File update 31 6 8 5 FTP Update 31 6 9 System management 32 6 9 1 Account Configuration 32 6 9 2 Syslog Configuration 33 6 9 3 Time Configuration 34 6 9 4 Reboot 34 7 Advanced Configuration Methods 35 7 1 Phone Configuration 35 7 2 Telnet Configuration 35 7 3 Telnet Post Mode 35 8 Quick Reference 36 8 1 Default Configuration 36 8 2 Default Passwords 36 ...

Страница 6: ...ly use this device in its standard working position 2 2 Qualified Personnel Damall products including this device should have installations or repairs carried out only by qualified and fully trained technicians 2 3 Accessories Do not connect the device to any incompatible products Use only accessories that have been approved by Damall 2 4 Waterproofing Do not allow for contact with liquid that may...

Страница 7: ...s 2 7 Power Supply The device s power supply should comply with the voltage of the device In the event of a concern about the voltage settings please contact technical support Do not remove any security devices Always disconnect the telephone from the power supply during storms All maintenance work should be carried out by qualified technicians 2 8 Cleaning Clean the equipment using a slightly dam...

Страница 8: ...osal benefits us and the environment 2 10 Product Warranty Damall warranty information is dependent on each customer and the rules and regulations pertaining to their country of business This guideline pertains to Damall s standard basic warranty The Manufacturer Damall Limited warrants its products to be free from defects in material and workmanship during the warranty period The product is cover...

Страница 9: ...m installing or using the product without complying with the relevant standards legal health and safety technical etc that are in place in the country where the product is used Damage resulting from misuse negligence unauthorized product modification repair or attempted repair by anyone not authorized by Damall including the user or failure to follow instructions supplied with the product Damage c...

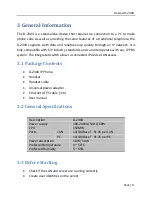
Страница 10: ...te with any IP PBX system The integrated switch allows a connected IP device LAN access 3 1 Package Contents D 2304 IP Phone Handset Handset cable Universal power adapter Ethernet UTP5 cable 3 m User manual 3 2 General Specifications Description D 2304 Power supply 100 240VA 5VDC 60Hz CPU 150MHz Ports LAN 10 100Base T RJ 45 per LAN PC 10 100Base T RJ 45 per PC Power absorption 1 8W 1 4W Preferred ...

Страница 11: ...e back of the unit This device is provided with a ground connection Use the device only in a fully grounded electric system with Residual Current Device RCD and relevant safety measures as prescribed by law 3 4 2 Network Installation See Sections 5 and 6 for details on how to connect the phone either using the Phone LCD Interface or the Web Interface 3 4 3 LCD Display The D 2304 telephone has a ba...

Страница 12: ...ional telephone as well as providing a wide range of features when connected to a server Some key features Integrated switch supports DHCP or Static IP Protocols supported TCP UDP IP HTTP DHCP Client FTP VoIP protocols SIP RFC3261 Voice coding g711 α law μ law Configurable protocol ports Telnet HTTP FTP Support includes Caller ID Hold Call Forwarding Blind and Attended Transfer Do Not Disturb DTMF...

Страница 13: ...ll log adjustable volume Voice recording with a server Standard encryption and authentication DIGEST using MD5 Many configuration options keypad LCD web interface or Telnet TFTP or HTTP configuration uploading Upgrade via TFTP FTP or HTTP server Configurable syslog server ...

Страница 14: ...buttons UP DOWN RIGHT LEFT and a central OK button UP DOWN Go to the previous next item in the interface MENU This will also adjust the volume of the handset or the speaker MULTIFUNCTION 1 3 Three multifunction buttons that are situated beneath the LCD screen which are used in the MENU and with other functions MENU Access the phone s interface menu when the telephone is not in use ...

Страница 15: ...r Lift the handset or press the SPEAKER button and press DIAL to redial the last number called Without lifting the handset choose an entry in the Phone Book or Call List and press DIAL or lift the handset Note that most IP systems require the setup of dialling rules before outgoing calls can be made See Sections 5 4 5 or 6 6 1 for further details 4 2 1 Hold Press HOLD to put a caller on hold Press...

Страница 16: ...S messages select the leftmost MULTIFUNCTION button Follow the on screen instructions to read send and delete SMS messages Use the keypad to enter SMS messages At any time EXIT will quit the SMS application 4 5 Do Not Disturb Press the rightmost MULTIFUNCTION button while the phone is inactive to put the phone in Do Not Disturb mode Once doing so the screen will display Do Not Disturb until the sa...

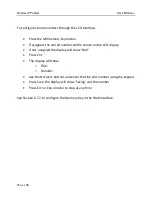
Страница 17: ... shown on the LCD display If not assigned the display will show Null Press EDIT The display will show o Title o Number Use the NAVIGATE buttons and enter the title and number using the keypad Press SAVE the display will show Saving and the number Press EXIT or END in order to stop at any time See Section 6 7 2 to configure the Memory Key in the Web Interface ...

Страница 18: ... of the phone s ringer and also selects between the phone s different built in ring tones 5 3 Volume This controls the volume of the handset the microphone and the speakerphone 5 4 Phone Setup This controls some of the different phone options available These options must also have been made available on the server or the phone will not be able to use them regardless of any settings 5 4 1 Do Not Di...

Страница 19: ... 5 Network Setup Network setup is for configuring the phone s SIP and network settings To enter the Network setup a password is required The default password is 123 To check for existing network settings use the NAVIGATE buttons Pressing DOWN displays the network mode either DHCP or static the IP address of the phone and Busy Forward calls only if the line is busy No Answer Forward calls if there ...

Страница 20: ...his to change the password for the Network Setup options 5 6 Reboot This reboots the device Enable Identity Enables the SIP account Server Address IP address of the SIP server Server Port Port number on the SIP server Display Name The extension number of the phone Account Name The user ID created for the SIP line SIP Password Password as created on the server Network Mode Set to either DHCP or Sta...

Страница 21: ...r To check the phone s existing network settings use the navigation pad on the phone Pressing DOWN displays the network mode either DHCP or static the IP address of the phone and the network gateway Pressing RIGHT displays the status and IP address of the server If there is no DHCP server use the Phone interface as described in Section 5 5 2 to set the phone s IP address ...

Страница 22: ...phone may need to be restarted 6 2 Login To login the web interface a username and password are required The D 2304 default is Username admin Password admin Press Enter or click Login after typing the login data To change the password see Section 6 9 1 Note The auto logout timeout is 2 minutes If the interface is left inactive for more than 2 minutes users are automatically logged out and any unsa...

Страница 23: ...nd SIP phone numbers Firmware version is on the bottom of the page 6 4 LAN Config To define the network settings for the D 2304 select the type of IP address used either Static or DHCP If DHCP is selected the phone should automatically detect an IP address When selecting Static IP address the phone s IP address the Subnet Mask and the DNS server IP address all need to be specified The D 2304 displ...

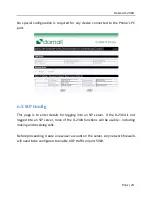
Страница 24: ...s page is to enter details for logging into an SIP server If the D 2304 is not logged into an SIP server none of the D 2304 functions will be usable including making and receiving calls Before proceeding create a new user account on the server Any network firewalls will need to be configured to enable UDP traffic on port 5060 ...

Страница 25: ...ress SIP Server address Server Port SIP server destination UDP port default 5060 Domain Realm If a domain is used DTMF Mode DTMF send mode select one of the options 6 6 Advanced Configuration 6 6 1 Dialling Rules This determines SIP behaviour when dealing with incoming and outgoing calls While an analogue telephone can relay numbers one digit at a time when using the SIP protocol this is not alway...

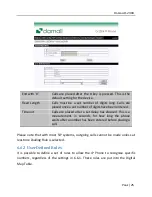
Страница 26: ...dless of the settings in 6 6 1 These rules are put into the Digital Map Table End with Calls are placed after the key is pressed This is the default setting for the device Fixed Length Calls must be a set number of digits long Calls are placed once a set number of digits have been entered Timeout Calls are placed after a set delay has elapsed This is a measurement in seconds for how long the phone...

Страница 27: ...t to add a timeout at the end of this rule so that the ATA will start a call if no digits are entered 18 xxx Any four digit numbers between 1000 and 8999 9xxxxxxx Any 8 digit numbers starting with 9 All rules entered are displayed in the Digital Map Table To delete a rule select it from the drop down menu and click Delete x Any digit between 0 and 9 A range of numbers This must be defined either b...

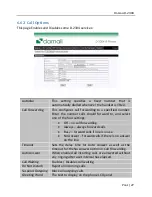
Страница 28: ...Off no call forwarding Always always forward calls Busy forward calls if line is in use No Answer forward calls if there is no answer on the line Timeout Sets the delay time for Auto Answer as well as the timeout for the No Answer option in Call Forwarding Auto Answer When enabled all incoming calls are answered without any ringing after a set interval has elapsed Call Waiting Enables Disables cal...

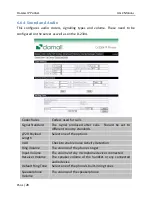
Страница 29: ...ced after calls Should be set to different country standards g729 Payload Length Select one of the options VAD Check to enable Voice Activity Detection Ring Volume The volume of the phone s ringer Input Volume The volume of any microphone devices connected Receiver Volume The speaker volume of the handset or any connected audio device Default Ring Tone Select one of the phone s built in ring tones...

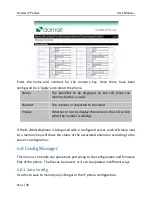
Страница 30: ...on to add Click Delete to remove The phone book is also accessible on the telephone keypad by pressing the PHONE BOOK button See Section 4 3 for details of how to use the phone book to dial 6 7 2 Memory Key DM 2604 Each D 2304 telephone is provided with an RJ 45 jack marked MOD which can link it to a memory extension module A module contains 20 configurable memory keys which can be used as quick c...

Страница 31: ... the server s configuration 6 8 Config Manager This menu is to handle any operations pertaining to the configuration and firmware files of the phone The file can be erased or it can be updated in different ways 6 8 1 Save Config Use this to save to memory any changes in the IP phone configuration Name The identifier to be displayed on the LCD when the memory button is used Number The number or ext...

Страница 32: ... its original default settings 6 8 4 File update Select a file containing firmware or configuration upgrades During the upgrade the display of the phone shows Download and Update Once the upgrade has been completed the phone will reboot automatically 6 8 5 FTP Update Phones can import or export configuration files or update firmware using FTP or TFTP servers ...

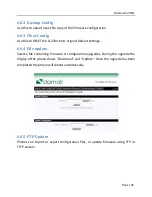
Страница 33: ...ount Configuration This modifies the usernames and passwords used to access the D 2304 s web interface Server Type Either FTP or TFTP Server Address IP address of the server Username Password Username and password for an FTP user Filename Firmware updates use the bin extension Config updates use the cfg extension ...

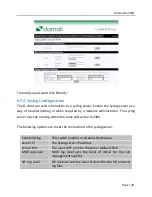
Страница 34: ...er must be running within the same LAN as the D 2304 The following options are to set the connection to the syslog server Enable Syslog This switch enables or disables the feature Server IP The Syslog server IP address Server Port The input UDP port for the server default 514 MGR Log Level MGR log level sets the level of detail for the call management log files SIP Log Level SIP log level sets the...

Страница 35: ... This page contains all time and date settings Either set the time manually or specify an SNTP server that the D 2304 can use to synchronise with its internal clock 6 9 4 Reboot Use the reboot button to restart the D 2304 Settings should be saved before a reboot ...

Страница 36: ...n The Phone can also be configured by dialling on the keypad Please contact Damall for full reference information on Dialling Configuration Codes 7 2 Telnet Configuration For users familiar with Telnet the D 2304 has a telnet interface with all basic telnet commands to configure options 7 3 Telnet Post Mode For users familiar with Post Mode the D 2304 also has this option The IP address that the c...

Страница 37: ... PHONES USER MANUAL PAGE 36 8 Quick Reference 8 1 Default Configuration The default D 2304 static IP address is 192 168 0 179 8 2 Default Passwords Phone Interface 123 Web Interface Username Admin Password Admin ...

Страница 38: ...bject to change without notice To contact Damall by telephone 1 646 328 2048 North America 39 0230 468670 International To contact technical support by email support damalltech com Damall Headquarters Via G Pascoli 18 60044 Fabriano An Italy www damalltech com ...

Страница 39: ......
Отзывы: