background image

DAKTRONICS  WARRANTY & LIMITATION OF LIABILITY 


Copyright © Daktronics, Inc.  SL-02374  Rev 12  19Nov15   Page 1 of 2 


This Warranty and Limitation of Liability (the “Warranty”) sets forth the warranty provided by Daktronics with respect to the Equipment. By accepting delivery of the 
Equipment, Purchaser and End User agree to be bound by and accept these terms and conditions.  Unless otherwise defined herein, all terms within the Warranty 
shall have the same meaning and definition as provided elsewhere in the Agreement. 
 
DAKTRONICS WILL ONLY BE OBLIGATED TO HONOR THE WARRANTY SET FORTH IN THESE TERMS AND CONDITIONS UPON RECEIPT OF FULL PAYMENT FOR THE 
EQUIPMENT.   
 
1. 

Warranty Coverage 


A.  Daktronics warrants to the original end user (the “End User”) that the Equipment will be free from Defects (as defined below) in materials and      
workmanship for a period of one (1) year (the “Warranty Period”).  The Warranty Period shall commence on the earlier of: (i) four weeks from the date 
that the Equipment leaves Daktronics’ facility; or (ii) Substantial Completion as defined herein. The Warranty Period shall expire on the first anniversary 
of the commencement date.   
 
“Substantial Completion” means the operational availability of the Equipment to the End User in accordance with the Equipment’s specifications, without 
regard to punch-list items, or other non-substantial items which do not affect the operation of the Equipment.   


B.  Daktronics’ obligation under this Warranty is limited to, at Daktronics’ option, replacing or repairing, any Equipment or part thereof that is found by 
Daktronics not to conform to the Equipment’s specifications.   Unless otherwise directed by Daktronics, any defective part or component shall be 
returned to Daktronics for repair or replacement.  This Warranty does not include on-site labor charges to remove or install these components.  
Daktronics may, at its option, provide on-site warranty service.  Daktronics shall have a reasonable period of time to make such replacements or repairs 
and all labor associated therewith shall be performed during regular working hours.  Regular working hours are Monday through Friday between 8:00 
a.m. and 5:00 p.m. at the location where labor is performed, excluding any holidays observed by Daktronics.    
 
C.  Daktronics shall pay ground transportation charges for the return of any defective component of the Equipment. All such items shall be shipped by 
End User DDP Daktronics designated facility.  If returned Equipment is repaired or replaced under the terms of this Warranty, Daktronics will prepay 
ground transportation charges back to End USer and shall ship such items DDP End User’s designated facility; otherwise, End User shall pay 
transportation charges to return the Equipment back to the End User and such Equipment shall be shipped Ex Works Daktronics designated facility.  All 
returns must be pre-approved by Daktronics before shipment.  Daktronics shall not be obligated to pay freight for any unapproved return.  End User shall 
pay any upgraded or expedited transportation charges. 
 
D.  Any replacement parts or Equipment will be new or serviceably used, comparable in function and performance to the original part or Equipment, and 
warranted for the remainder of the Warranty Period.  Purchasing additional parts or Equipment from the Seller does not extend the Warranty Period. 
 
E.  Defects shall be defined as follows.  With regard to the Equipment (excepting LEDs), a “Defect” shall refer to a material variance from the design 
specifications that prohibit the Equipment from operating for its intended use.  With respect to LEDs, “Defects” are defined as LED pixels that cease to 
emit light.   Unless otherwise expressly provided, this Warranty does not impose any duty or liability upon Daktronics for partial LED pixel degradation. 
Notwithstanding the foregoing, in no event does this Warranty include LED pixel degradation caused by UV light.   This Warranty does not provide for the 
replacement or installation of communication methods including but not limited to, wire, fiber optic cable, conduit, trenching, or for the purpose of 
overcoming local site interference radio equipment substitutions. 
 
EXCEPT AS OTHERWISE EXPRESSLY SET FORTH IN THIS WARRANTY, TO THE MAXIMUM EXTENT PERMITTED BY APPLICABLE LAW, DAKTRONICS DISCLAIMS 
ANY AND ALL OTHER PROMISES, REPRESENTATIONS AND WARRANTIES APPLICABLE TO THE EQUIPMENT AND REPLACES ALL OTHER WARRANTIES OR 
CONDITIONS, EXPRESS OR IMPLIED, INCLUDING, BUT NOT LIMITED TO, ANY IMPLIED WARRANTIES OR CONDITIONS OF MERCHANTABILITY, FITNESS FOR 
A PARTICULAR PURPOSE, OR ACCURACY OR QUALITY OF DATA.  OTHER ORAL OR WRITTEN INFORMATION OR ADVICE GIVEN BY DAKTRONICS, ITS 
AGENTS OR EMPLOYEES, SHALL NOT CREATE A WARRANTY OR IN ANY WAY INCREASE THE SCOPE OF THIS LIMITED WARRANTY.   
 
THIS LIMITED WARRANTY IS NOT TRANSFERABLE.   
 

2. 

Exclusion from Warranty Coverage 


 This Warranty does not impose any duty or liability upon Daktronics for any:  

A.  damage occurring at any time, during shipment of Equipment unless otherwise provided for in the Agreement. When returning Equipment to 
Daktronics for repair or replacement, End User assumes all risk of loss or damage, agrees to use any shipping containers that might be provided by 
Daktronics, and to ship the Equipment in the manner prescribed by Daktronics;  
 
B.  damage caused by: (i)the improper handling, installation, adjustment, use, repair, or service of the Equipment,or (ii) any physical damage which 
includes, but is not limited to, missing, broken, or cracked components resulting from non-electrical causes; altered, scratched, or fractured electronic 
traces; missing or gauged solder pads; cuts or clipped wires; crushed, cracked, punctured, or bent circuit boards; or tampering with any electronic 
connections, provided that such damage is not caused by personnel of Daktronics or its authorized repair agents;  
 
C.  damage caused by the failure to provide a continuously suitable environment, including, but not limited to: (i) neglect or misuse; (ii) improper power 
including, without limitation, a failure or sudden surge of electrical power; (iii) improper air conditioning, humidity control, or other environmental 
conditions outside of the Equipment’s technical specifications such as extreme temperatures, corrosives and metallic pollutants; or (iv) any other cause 
other than ordinary use;  
 

Содержание DMP-8000 Series

Страница 1: ...201 Daktronics Drive Brookings SD 57006 5128 www daktronics com support 800 325 8766 DMP 8000 SERIES DIGITAL MEDIA PLAYER OPERATION MANUAL P1833 19 May 2017 DD1881645 Rev 04...

Страница 2: ...art of this book covered by the copyrights hereon may be reproduced or copied in any form or by any means graphic electronic or mechanical including photocopying taping or information storage and retr...

Страница 3: ...5 Services 15 Services 16 Management 16 Media Management Server 16 Diagnostics 16 Restart 17 System Restart 17 VIP 18 5000 Series 18 Brightness 18 Temperature 18 Test Patterns 19 4000 Series 19 Bright...

Страница 4: ...enance Guide 40 Maintenance Frequency 40 Maintenance Tools 40 General Cleaning Precautions 41 Exterior Computer Cleaning 41 Interior Computer Cleaning 41 13 Troubleshooting 43 Initial Troubleshooting...

Страница 5: ...eduled and interactive display control scenarios The player distributes graphics animations live video real time data 3D effects web page content and other types of creative content to a digital displ...

Страница 6: ...om the internet To download the DisplayFind file from the internet follow the steps below 1 Open a web browser i e Internet Explorer or Firefox browser 2 Navigate to dakfiles daktronics com 3 Click ve...

Страница 7: ...scovery responses to be received from any displays Temporarily disable other third party anti virus firewall applications i e McAfee Symantec ZoneAlarm software etc Note Configure firewall exceptions...

Страница 8: ...Displays 3 Double click the desired display to launch the configuration utility within a web browser Dashboard After logging into the player the first time an initial screen opens showing status tiles...

Страница 9: ...in the upper right corner of the screen Click User to expand the menu panel to show the full session specific navigation information Refer to Right Side Menu p 6 for more information Left side menu i...

Страница 10: ...ttings Password Password opens a window that enables the operator to change their password Enter the current password new password and confirm the change Refer to Figure 9 After entering a new passwor...

Страница 11: ...reen to expand the main menu panel to show the full system navigation information Refer to the table below For more detailed information on each left side menu item refer to Section 4 Dashboard p 8 Se...

Страница 12: ...a firmware update Browse to the correct file and click Update Firmware to update the player firmware Refer to Figure 14 VIP This tile shows information about any system configured video image processo...

Страница 13: ...of the software program used to schedule and manage the media files Click this tile to open the Services link under the Config menu Security This tile shows the security settings for the player Click...

Страница 14: ...igure 17 Save Icon Before saving a change a dialog box opens at the top of the screen warning that changes are pending Refer to Figure 19 Figure 19 Pending Changes Prompt Cancel any entered changes at...

Страница 15: ...anging the ID will result in a loss of communication with any registered services Note Do not use this feature unless instructed to do so by Daktronics technicians The Boot Sequence drop down menu ena...

Страница 16: ...Protocol DHCP to automatically assign an IP address to the player A DHCP server is required on the network for proper operation If the network configuration is left in this mode and no DHCP server exi...

Страница 17: ...address automatically is similar to IP address configuration and uses information received from a local DHCP server to configure DNS information This is the default setting Manual Select Use the follo...

Страница 18: ...n pixels Height is the height of the display s active area area that shows the image in pixels Mode determines how the content is arranged on the display Refer to Figure 26 and the table below Mode De...

Страница 19: ...to the time server for this function to work To set an NTP server follow the steps below 1 Click Active 2 Set the Sync Interval to determine how frequently the NTP server is synchronized with the play...

Страница 20: ...emote cloud based Venus Control Suite software program Set the Host field as venus daktronics com and choose 443 from the Port drop down list Refer to Figure 31 Locally hosted This option selects the...

Страница 21: ...ure 35 To trigger a scheduled weekly restart click Weekly enter a time in the Restart Time field and select the day s of the week that the restart will be executed To trigger a scheduled daily restart...

Страница 22: ...d according to ambient light conditions Values vary to reflect the information from the light sensor Manual Use this option to manually set the dimming values using the slider bar The brightness level...

Страница 23: ...om the light sensor Manual Use this option to manually set the dimming values using the slider bar The brightness level remains at this level until it is adjusted Moving the slider bar to the right ad...

Страница 24: ...40 Configuration Security RTD RTD maps Enhanced Real Time Data ERTD sign numbers to zones that are configured for the display Zoning allows a DMP 8000 series display to be divided into multiple subpa...

Страница 25: ...ing to the control system being used For Show Control systems refer to the Show Control Installation and Setup Manual DD1780603 For Venus Control Suite systems refer to the Venus Control Suite Operati...

Страница 26: ...deo feed of the display content This video plays on a canvas that represents the display size Refer to Figure 43 Figure 43 Monitor Use the magnifying glass and arrow icons at the top of the video feed...

Страница 27: ...ure 45 Figure 45 Restore System Backup Prompt Data Table Index Click Data Table Index to open a list of Data Tables that provide general player system information Refer to Figure 46 Click a data table...

Страница 28: ...content files such as AVIs JPGs PNGs GIFs MPEG etc first determine which file types and specifications are supported by the applicable control system and player s In addition to file type note any ot...

Страница 29: ...ditional resources Title Document Number Visiconn Advertiser Manual DD1633051 Visiconn Display Management Owner Manual DD1633084 Registration A secure connection must be established for a player to be...

Страница 30: ...Venus Control Suite enables the operator to import create edit and organize display content as well as manage accounts and run reports When using Show Control System VMPL content is created using Con...

Страница 31: ...ion on how to use IDM to manage the health of a DMP 8000 series player system including how to register a display with IDM refer to the table below for additional resources Title Document Number IDM U...

Страница 32: ...play When the player is in internal keying mode it can play audio in two different ways Embedded Audio If the video being passed through the player has embedded audio that audio will be played from t...

Страница 33: ...indows Notification Area Audio Delay The player includes an audio delay filter to ensure better audio and video content synchronization This filter can be configured to work either automatically or ma...

Страница 34: ...2 Locate the Primary ini file and right click the file to open it in a text editing application such as Windows Notepad 3 Locate the audio section and set the delay value to the desired length of time...

Страница 35: ...er and character generator Depending on the operator s needs and the site s video production system the DMP 8000 can be used to fill either or both of these roles which are described in more detail in...

Страница 36: ...ny associated third party capture device and creates a DPF file for each device in the C ProgramData Daktronics Vnet4 Content Devices folder These input files can be triggered from the system s contro...

Страница 37: ...ses the incoming video signal as a background and then combines it with any content files that are being played allowing the video to appear through any transparent areas of the content Refer to Figur...

Страница 38: ...the alpha channel or key signal contains data that instructs the downstream device on what parts of the background video should be removed to show the fill video Refer to Figure 57 Video DMP 8000 Alph...

Страница 39: ...exist What data or other information is available and pertinent To plan the layout of the zone follow the steps below 1 Determine the locations and sizes of the zones Refer to Figure 58 Bottom bar zon...

Страница 40: ...xample 8 Save the proportions of each zone for future use Changing Default Layout Files The DMP 8000 includes default copies of layout files that identify zone sizes and locations These files are txt...

Страница 41: ...s action is used frequently with fascia displays Copied zones are synchronized Show Control buttons can specify only the parent zone but also control any copies of that zone Copied zones play content...

Страница 42: ...ermine the coordinates for the top left corner of each zone For example x 0 and y 80 translates to the zone placed on the left edge of the display and down 80 from the top 9 Verify the LAYOUT file ext...

Страница 43: ...39 3 Add the LAYOUT file location as a relative path Refer to Figure 66 LAYOUT file location Figure 66 LAYOUT File Path 4 Save the file...

Страница 44: ...r particles from around the computer Soft Lint Free Cloth Clean components and the exterior computer surface Isopropyl Rubbing Alcohol Clean plastic computer parts Note Alcohol is the only solvent rec...

Страница 45: ...ned with water or isopropyl rubbing alcohol Note Using any cleaning or dusting solvents is not recommended as these can damage plastic computer components Clean ventilation locations to ensure a stead...

Страница 46: ...r as it can generate static electricity that may damage the computer Be sure to check power supplies fans and heat sinks Dust dirt and other contaminates frequently collect around these components Not...

Страница 47: ...one of these solutions fix the problem operators should call Daktronics Technical Services Refer to the customer service telephone numbers listed in Section 14 Exchange Repair Return Programs p 46 Ret...

Страница 48: ...5 If certain prerequisites have not been satisfied the registration code may not be retrieved properly If the registration code is not shown in the player output after start up follow the steps below...

Страница 49: ...blanks or flickers when using SDI output ensure the reference sync signal is set appropriately for the video signal coming in or going out from the player For more information on diagnosing or resolv...

Страница 50: ...Customer ID Number ______________________________________________________ To participate in the Exchange Program follow these steps 1 Call Daktronics Customer Service Market Description Customer Servi...

Страница 51: ...mber listed on the previous page 2 Receive a Return Materials Authorization RMA number before shipping Refer to the telephone number listed on the previous page 3 Package and pad the item carefully to...

Страница 52: ...48 This page intentionally left blank...

Страница 53: ...Documents This section includes the following DD1481866 DMP 8000 Stand Alone Models Technical Specifications DD2350114 DMP 8065 2 Embedded Player Technical Specifications DD3002238 DMP 8000 Content St...

Страница 54: ...50 This page intentionally left blank...

Страница 55: ...SDI HD SDI HDMI Display Port Video input SDI HD SDI Composite Component HDMI N A SDI HD SDI Composite Component HDMI SDI HD SDI Composite Component HDMI 6G SDI SDI Output X X X X X HD SDI output X X X...

Страница 56: ......

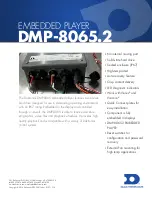
Страница 57: ...ed through a network the DMP 8065 is able to receive and store still graphics video files and playback schedules It provides high quality playback and is compatible with a variety of Daktronics contro...

Страница 58: ...l Temperature 29 2 to 131 f 34 to 55 C Power Supply 65W Input Voltage 12VDC Power Failure Recovery Yes Physical Size l x w x h 18 5 x 8 4 x 2 4 UL CE CB fCC Mounting Options Internal to display chassi...

Страница 59: ...uncompressed AVI file format or MOV file with the animation codec RLE encoding In this case do not use the FFMPEG file converter program because alpha channels are not supported in MP4 H 264 files Not...

Страница 60: ...e Main Options tab select H 264 from the Format drop down list Refer to Figure 1 Selecting H 264 opens the H 264 Options window as shown in Figure 2 Figure 1 Setting the Format 2 Click the Video tab a...

Страница 61: ...Output tab select H 264 from the Format drop down list Refer to Figure 3 2 Select Main or High from the Profile drop down list under Basic Video Settings Refer to Figure 4 3 Select 5 1 from the Level...

Страница 62: ...This page intentionally left blank...

Страница 63: ...51 B Daktronics Warranty Limitation of Liability This section includes the Daktronics Warranty Limitation of Liability statement...

Страница 64: ...52 This page intentionally left blank...

Страница 65: ...placement parts or Equipment will be new or serviceably used comparable in function and performance to the original part or Equipment and warranted for the remainder of the Warranty Period Purchasing...

Страница 66: ...ectors employees or agents be liable for any claims asserting or based on a loss of use of the facility or equipment lost business revenues or profits loss of goodwill failure or increased cost of ope...

Отзывы: