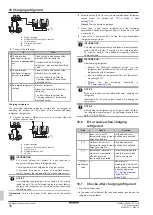
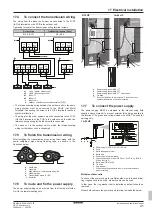
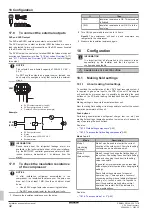
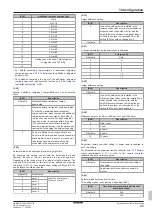
background image

18 Configuration

Installation and operation manual

45

REMA5+REYA8~20A7Y1B
VRV 5 heat recovery
4P684060-1 – 2022.02

[2‑14]

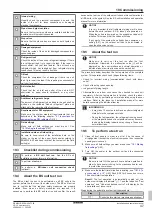
Additional amount charged [kg]

1

0<x<5

2

5<x<10

3

10<x<15

4

15<x<20

5

20<x<25

6

25<x<30

7

30<x<35

8

35<x<40

9

40<x<45

10

45<x<50

11

50<x<55

12

55<x<60

13

Setting cannot be used. Total refrigerant

charge has to be <63.8 kg.

14

15

▪ For  details  concerning  the  calculation  of  additional  refrigerant

charge  amount,  see 

"16.3  To  determine  the  additional  refrigerant

amount"

 [

4

 36].

▪ For  guidance  concerning  the  input  of  the  additional  refrigerant

charge  amount  and  leak  detection  function  see 

"18.2  Using  the

leak detection function"

 [

4

 46].

[2‑20]

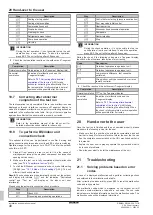
Manual  additional  refrigerant  charge/BS/indoor  unit  connection
check

[2‑20]

Description

0 (default)

Manual additional refrigerant charge
deactivated.

1

Manual additional refrigerant charge activated.

To stop the manual additional refrigerant
charge operation (when the required additional
refrigerant amount is charged), push BS3. If
this function was not aborted by pushing BS3,
the unit will stop its operation after 30 minutes.
If 30 minutes was not sufficient to add the
needed refrigerant amount, the function can be
reactivated by changing the field setting again.

2

Perform a BS/indoor unit connection check.

Perform a BS units and indoor units connection
check where for each indoor unit is checked if
the piping and communication wiring are
connected to the same branch pipe port.

[2‑22]

Automatic low noise setting and level during night time.

By  changing  this  setting,  you  activate  the  automatic  low  noise
operation  function  of  the  unit  and  define  the  level  of  operation.
Depending on the chosen level, the noise level will be lowered. The
start  and  stop  moments  for  this  function  are  defined  under  setting
[2‑26]  and  [2‑27].  For  more  details  about  settings  [2‑26]  and  [2‑27],
see installer user reference guide

[2‑22]

Description

0 (default)

Deactivated

1

Level 1

Level 5<Level 4<Level
3<Level 2<Level 1

2

Level 2

3

Level 3

4

Level 4

5

Level 5

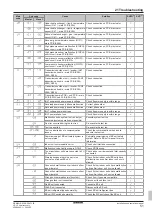
[2‑35]

Height difference setting.

[2‑35]

Description

0

In case the outdoor unit is installed in the
lowest position (indoor units are installed on a
higher position than outdoor units) and the
height difference between the highest indoor
unit and the outdoor unit exceeds 40 m, the
setting [2‑35] should be changed to 0.

1 (default)

[2‑47]

T

target temperature during heat recovery operation.

[2‑47]

T

e

 target [°C]

0 (default)

Auto

2

6

3

7

4

8

5

9

6

10

7

11

[2‑49]

Height difference setting.

[2‑49]

Description

0 (default)

1

In case the outdoor unit is installed in the
highest position (indoor units are installed on a
lower position than outdoor units) and the
height difference between the lowest indoor
unit and the outdoor unit exceeds 50 m, the
setting [2‑49] has to be changed to 1.

[2‑58]

Maintenance cycle for BS unit AFR check (1 year=365 days)

[2‑58]

Description

0

Timer reset

1

1 year

2

2 years

5 (default)

5 years

10

10 years

[2‑60]

Supervisor  remote  controller  setting.  A  power  reset  is  required  to
save this setting.

For details about the supervisor remote controller, see 

"13.2 System

layout  requirements"

  [

4

  21]  or  refer  to  the  remote  controller

installation and user reference guide.

[2‑60]

Description

0 (default)

No supervisor remote controller connected to
the system

1

Supervisor remote controller connected to
system

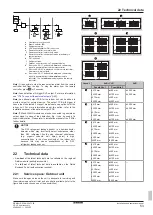
[2‑65]

Automatic leak detection interval time.

This setting is used in conjunction with setting [2‑88].

[2‑65]

Time between automatic leak detection

executions [days]

0 (default)

365

1

180

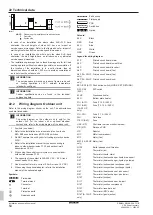
Содержание VRV 5 Series

Страница 1: ...llation and operation manual VRV 5 heat recovery English Installation and operation manual VRV 5 heat recovery REYA8A7Y1B REYA10A7Y1B REYA12A7Y1B REYA14A7Y1B REYA16A7Y1B REYA18A7Y1B REYA20A7Y1B REMA5A...

Страница 2: ...25 30 35 40 45 50 55 60 20 15 10 Lowest underground floor a m kg Amin m2 65 63 8 189 27 9 1 m kg Amin m2 150 50 6 160 54 0 170 57 4 180 60 7 189 63 8 27 9 1 190 63 8 30 10 1 200 63 8 40 13 5 50 16 8...

Страница 3: ...20 21 22 23 24 25 v skladu z dolo bami vastavalt n uetele vadovaujantis io dokumento nuostatomis atbilsto i du standartu pras b m nasledovn mi ustanoveniami u standartlar n h k mlerine EN 60335 2 40...

Страница 4: ...littu l mp tila TS TSmin Alhaisin matalapainepuolen l mp tila L C TSmax Suurinta sallittua painetta PS vastaava kyll stysl mp tila M C Kylm aine N Varmuuspainelaitteen asetus P bar Valmistusnumero ja...

Страница 5: ...6 S I 2008 1597 Supply of Machinery Safety Regulations 2008 S I 2016 1091 Electromagnetic Compatibility Regulations 2016 following the provisions of BS EN 60335 2 40 as set out in A and judged positiv...

Страница 6: ...the maximum allowable pressure PS M C Refrigerant N Setting of pressure safety device P bar Manufacturing number and manufacturing year refer to model nameplate K L M TSmin TSmax PS N P 40 20 61 R32 4...

Страница 7: ...19 8 2 17 Symptom Hot air can be felt when the indoor unit is stopped 19 9 Relocation 19 10 Disposal 19 10 1 Eco Design requirements 19 For the installer 20 11 About the box 20 11 1 To remove the acce...

Страница 8: ...dustry and on farms or for commercial use by lay persons Documentation set This document is part of a documentation set The complete set consists of General safety precautions Safety instructions that...

Страница 9: ...als that are inherently resistant to corrosion or are suitably protected against corrosion WARNING Take sufficient precautions in case of refrigerant leakage If refrigerant gas leaks ventilate the are...

Страница 10: ...cables first before separating the earth connection The length of the conductors between the power supply stress relief and the terminal block itself MUST be as such that the current carrying wires ar...

Страница 11: ...on concerning use of the appliance in a safe way and understand the hazards involved Children SHALL NOT play with the appliance Cleaning and user maintenance SHALL NOT be made by children without supe...

Страница 12: ...parts WARNING Before operating the unit be sure the installation has been carried out correctly by an installer Maintenance and service see 7 Maintenance and service 416 WARNING If the supply cord is...

Страница 13: ...o be effective the unit MUST be electrically powered at all times after installation except for maintenance WARNING The refrigerant inside the unit is mildly flammable but normally does NOT leak If th...

Страница 14: ...er Do NOT remove the front panel Some parts inside are dangerous to touch and appliance problems may happen For checking and adjusting the internal parts contact your dealer This operation manual offe...

Страница 15: ...ation if the room temperature is low 20 C 6 3 2 To use the dry program To start 1 Press the operation mode selector button on the user interface several times and select program dry operation 2 Press...

Страница 16: ...ll and result in injury NOTICE NEVER inspect or service the unit by yourself Ask a qualified service person to perform this work NOTICE Do NOT wipe the controller operation panel with benzine thinner...

Страница 17: ...ming in Check if there are too many occupants in the room during cooling operation Check if the heat source of the room is excessive Check if direct sunlight enters the room Use curtains or blinds Che...

Страница 18: ...om Fan operation is possible but cooling and heating do not work Immediately after the power is turned on The micro computer is getting ready to operate and is performing a communication check with al...

Страница 19: ...in the outdoor unit does not stop after a short heating operation This is to prevent refrigerant from remaining in the compressor The unit will stop after 5 to 10 minutes 8 2 16 Symptom The inside of...

Страница 20: ...YQ14 16 RYYQ8 12 kg ONLY FOR RYYQ8 20 MODELS DATE AMOUNT CALCULATE THE ADDITIONAL REFRIGERANT CHARGING AMOUNT BASED ON THE FORMULA BELOW BEFORE CHARGING SHIPMENT INDICATED ON THE MACHINE NAMEPLATE AND...

Страница 21: ...f an R32 sensor located in the indoor unit or BS unit For more information about the SVS output see 17 8 To connect the external outputs 442 Indoor unit installation For installation of the indoor uni...

Страница 22: ...ut PCB of the indoor unit of that specific room The outdoor SVS will trigger for any R32 leak detected in the complete system For BS units and indoor units SVS is only triggered when its own R32 senso...

Страница 23: ...ction with the leak is now shut off from the rest of the system and the amount of refrigerant that can leak is significantly reduced Note In case 2 branch pipe ports are combined to a single branch pi...

Страница 24: ...can lead to lower minimum room area requirements Note In case multiple indoor units are connected to the same branch pipe port the sum of the connected indoor unit capacity classes needs to be equal o...

Страница 25: ...100 OK Ports C and D are combined and have to be considered as 1 branch pipe They only serve room 3 Using table a to find maximum capacity class of the indoor unit 250 The selected indoor unit is 200...

Страница 26: ...erground floor NO Start installation Procedure to check if smallest area of lowest underground floor meets the requirements Start installation Derive maximum system charge See step 3 in above text Det...

Страница 27: ...m to a residential location NOTICE The installation and any maintenance requires a professional with relevant EMC experience to install any specific EMC mitigation measures defined in the user instruc...

Страница 28: ...s Stands under the unit must be at least 100 mm wide 100 mm 100 mm NOT allowed Allowed preferred installation The height of the foundation must at least be 150 mm from the floor In heavy snowfall area...

Страница 29: ...ipe A is in case of multi connection the sum of the outdoor units connected upstream HP class Piping outer diameter mm Liquid pipe Suction gas pipe HP LP gas pipe 5 10 9 5 19 1 15 9 12 18 12 7 22 2 19...

Страница 30: ...door unit capacity index Refrigerant branch kit 200 KHRQ23M20T 200 x 290 KHRQ23M29T9 290 x 640 KHRQ23M64T 640 KHRQ23M75T Concerning refnet headers choose from the following table in accordance with th...

Страница 31: ...cal wiring through the knockout holes wrap the wiring with protective tape to prevent damage 15 2 2 To connect the refrigerant piping to the outdoor unit NOTICE Be sure to use the supplied accessory p...

Страница 32: ...dust cap to prevent aging of O ring and risk of leakage To handle the service port Always use a charge hose equipped with a valve depressor pin since the service port is a Schrader type valve After ha...

Страница 33: ...ng 2 21 until the outdoor unit has finished the initialisation Leak test and vacuum drying Checking the refrigerant piping involves Checking for any leakages in the refrigerant piping Performing vacuu...

Страница 34: ...t and the copper flare 15 3 5 To perform vacuum drying To remove all moisture from the system proceed as follows 1 Evacuate the system for at least 2 hours to a target vacuum of 100 7 kPa 1 007 bar 5...

Страница 35: ...l connected indoor units are recognised see 1 10 and 1 39 in 18 1 7 Mode 1 Monitoring settings 444 NOTICE Before starting charging procedures check if the 7 segment display indication of the outdoor u...

Страница 36: ...each containing less than 63 8 kg refrigerant charge For factory charge refer to the unit name plate NOTICE The total refrigerant charge amount in the system MUST always be lower than 15 96 kg the num...

Страница 37: ...ush BS3 to stop manual charging Charging is finished Fill in the amount on the additional refrigerant charge label Input the additional refrigerant amount via setting 2 14 Go to test run 16 5 To charg...

Страница 38: ...door unit 6 Activate setting 2 20 to start the manual additional refrigerant charge mode For details see 18 1 8 Mode 2 Field settings 444 Result The unit will start operation 7 Open valve A and charge...

Страница 39: ...ion CAUTION See 2 Specific installer safety instructions 48 to make sure this installation complies with all safety regulations 17 1 About electrical compliance This equipment complies with EN IEC 610...

Страница 40: ...Multiply the above result by 1 1 49 0 A 1 1 53 9 A so the recommended fuse capacity would be 63 A NOTICE When using residual current operated circuit breakers be sure to use a high speed type 300 mA r...

Страница 41: ...wiring After installing the transmission wires wrap them along with the onsite refrigerant pipes using finishing tape as shown in the illustration below d b e a d a c f a Liquid pipe b Gas pipe c High...

Страница 42: ...ce is not OK Go to the next step 2 Turn ON the power and leave it on for 6 hours Result The compressor will heat up and evaporate any refrigerant in the compressor 3 Measure the insulation resistance...

Страница 43: ...ly before turning on the power 18 1 4 To access mode 1 or 2 Initialisation default situation NOTICE Be sure to turn ON the power 6 hours before operation in order to have power running to the crankcas...

Страница 44: ...n 0 Unit is currently not operating under low noise restrictions 1 Unit is currently operating under low noise restrictions 1 2 Shows the status of power consumption limitation operation 1 2 Descripti...

Страница 45: ...g on the chosen level the noise level will be lowered The start and stop moments for this function are defined under setting 2 26 and 2 27 For more details about settings 2 26 and 2 27 see installer u...

Страница 46: ...he commissioning instructions in this chapter a general commissioning checklist is also available on the Daikin Business Portal authentication required The general commissioning checklist is complemen...

Страница 47: ...e the test run of the outdoor unit checks this confirmation for all BS units in the system See the BS unit installation and operation manual for more information NOTICE It is very important that all r...

Страница 48: ...arried out the outdoor unit display will indicate and the indication Centralised control and Test run will display on the indoor unit user interface s Steps during the automatic connection check proce...

Страница 49: ...re information R32 sensor malfunction in one of the indoor units c Check connection on PCB or actuator The system will continue operation but indoor unit in scope will stop operating Refer to the serv...

Страница 50: ...s Check refrigerant amount recharge unit Refrigerant overcharge Stop valve closed Check refrigerant amount recharge unit Open stop valves Ambient temperature sensor malfunction R1T main PCB X18A Check...

Страница 51: ...ect phase order Reversed power supply phase malfunction Correct phase order INV1 voltage power shortage Check if power supply is within range INV1 power phase loss Check if power supply is within rang...

Страница 52: ...he alarm only and supervisor remote controller have no functionality The screen of the remote controller in alarm only and supervisor mode will be off Operation of the remote controller can be checked...

Страница 53: ...e iTM and WAGO module can also be connected to generate an output signal in case of leak detection E g it can be used at a supervised location Please refer to installation manual of the iTM for furthe...

Страница 54: ...4 Refer to the installation manual for connection wiring to indoor outdoor transmission F1 F2 and outdoor multi transmission Q1 Q2 5 When using the central control system connect outdoor outdoor trans...

Страница 55: ...lectronic expansion valve inverter cooling Y7E 14 20 HP only Electronic expansion valve liquid injection Y2S Solenoid valve liquid pipe Y3S Solenoid valve high pressure low pressure gas pipe Y4S Solen...

Страница 56: ...4P684060 1 2022 02 Copyright 2022 Daikin 4P684060 1 0000000M Verantwortung f r Energie und Umwelt...

Отзывы: