-
7
-
WARNING
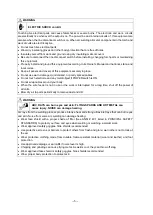
FUMES AND GASES can be hazardous to your health.
Arc welding produce fumes and gases. Breathing these fumes and gases can be hazardous to your
health.
•
Keep your head out of the fumes. Do not breathe the fumes.
•
Ventilate the area and/or use exhaust at the arc to remove welding fumes and gases.
•
If ventilation is poor, use an approved air-supplied respirator.
•
Read the Material Safety Data Sheets (MSDS) and the manufacturer’s instructions on metals,
consumables, coatings, and cleaners.
•
Do not weld or cut in locations near degreasing, cleaning, or spraying operations. The heat and arc
rays can react with vapors to form highly toxic and irritating gases.
•
Work in a confined space only if it is well ventilated, or while wearing an air-supplied respirator.
Shielding gases used for welding can displace air causing injury or death. Be sure the breathing air
is safe.
WARNING
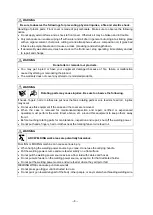
CYLINDER can explode if damaged.
A shielding gas cylinder contains high-pressure gas. If damaged, a cylinder can explode. Since gas
cylinders are normally part of the welding process, be sure to treat them carefully.
•
Use only correct shielding gas cylinders, gas regulator, hoses, and fittings designed for the specific
application; maintain them in good condition.
•
Protect compressed gas cylinders from excessive heat, mechanical shock, and arcs.
•
Keep the cylinder upright and securely chained to a stationary support or a rack to prevent falling or
tipping.
•
Keep cylinders away from any welding or other electrical circuit.
•
Never touch cylinder with welding electrode.
•
Read and follow instructions on compressed gas cylinders, associated equipment, and the CGA
publication P-1 listed in PRINCIPAL SAFETY STANDARDS.
•
Turn face away from valve outlet when opening cylinder valve.
•
Keep protective cap in place over valve except when gas cylinder is in use or connected for use.
•
Do not disassemble or repair the gas regulator except for the person authorized by the manufacturer
of them.
Содержание OTC CM-0401-D
Страница 12: ...12 6 1 CONNECTION FLOW CHART 1 1 2 1 2 3 3 4 4 5 5 6 7 8 6 7 8...
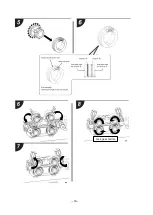
Страница 18: ...18 Lock gear carrier...
Страница 20: ...20...
Страница 31: ...31 9 4 REPLACE THE CENTER GUIDE Replace the center guide following the procedure shown below...
Страница 46: ...46 12 3EXTERNAL VIEW mm...
Страница 47: ...47...


