


17
Figure 2-7
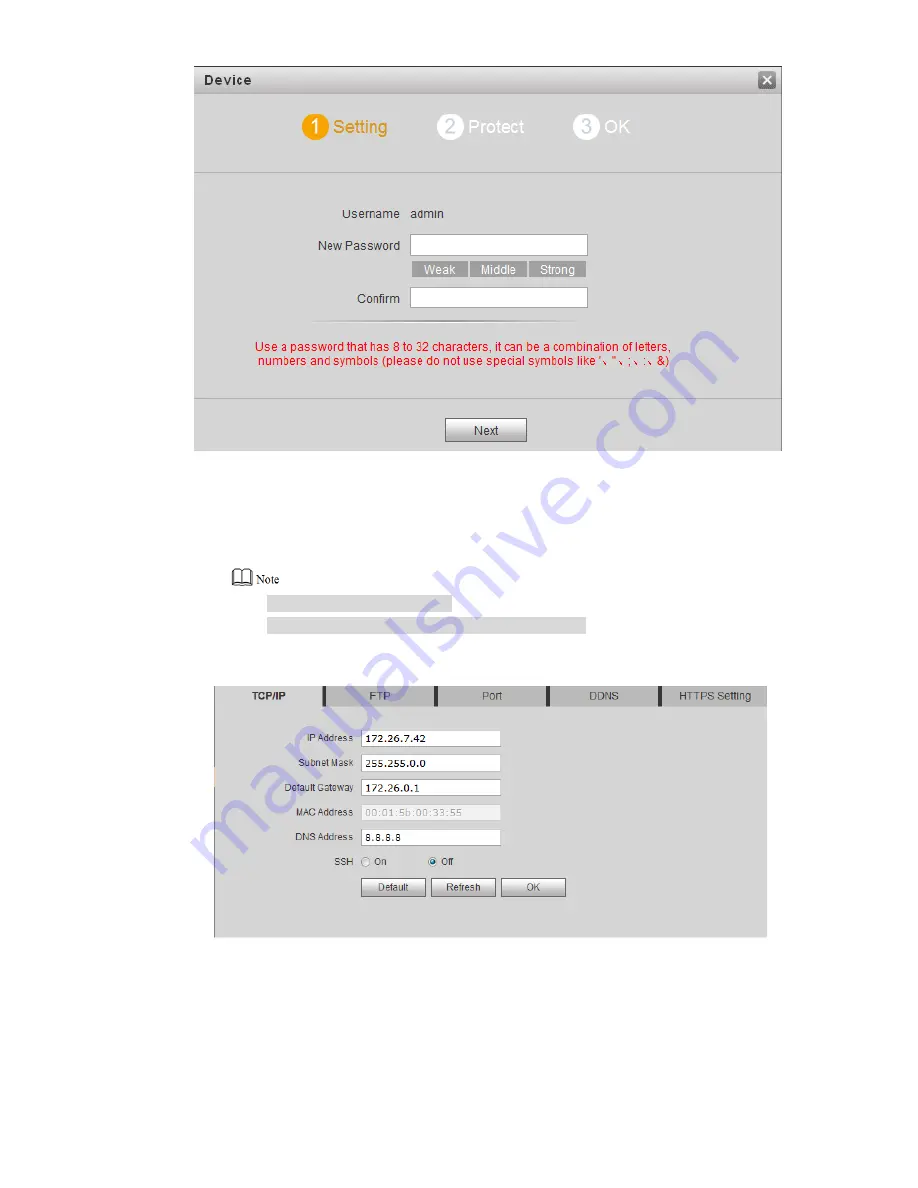
According to interface prompt, enter “New Password” and “Confirm”, and click “Next”.
Step 2
Select “Email” and enter your Email address. This Email address is used to reset the
password, so it is recommended that it should be set.
Login WEB interface.
Step 3
Default user name is admin.
Password is the new one set during initialization.
Select “System Config > Network Config > TCP/IP”.
Step 4
The system displays “TCP/IP” interface, as shown in Figure 2-8.
Figure 2-8
Enter the planned “IP Address”, “Subnet Mask” and “Default Gateway”, and click “OK”.
Step 5
After modification is completed, VTO reboots automatically, while the following two
cases occur at WEB interface.
If PC is in the planned network segment, WEB interface jumps to new IP login
interface automatically.
If PC is not in the planned network segment, login will be failed. Please add PC to
Содержание Villa VTO
Страница 1: ...Villa VTO Version 3 1 Quick Start Guide V1 0 1...
Страница 16: ...8 Figure 1 13 Figure 1 14...
Страница 18: ...10 Figure 1 17...
Страница 22: ...14 Figure 2 3 Step 4 Fix the bare device onto sheet metal bracket with M3 6 screws Figure 2 4...
Страница 38: ...30 Figure 2 27...


