


User’s Manual
12
No. Name
Description
You can click the icon to enable or disable alarm manually.
3
Snapshot
4
Record
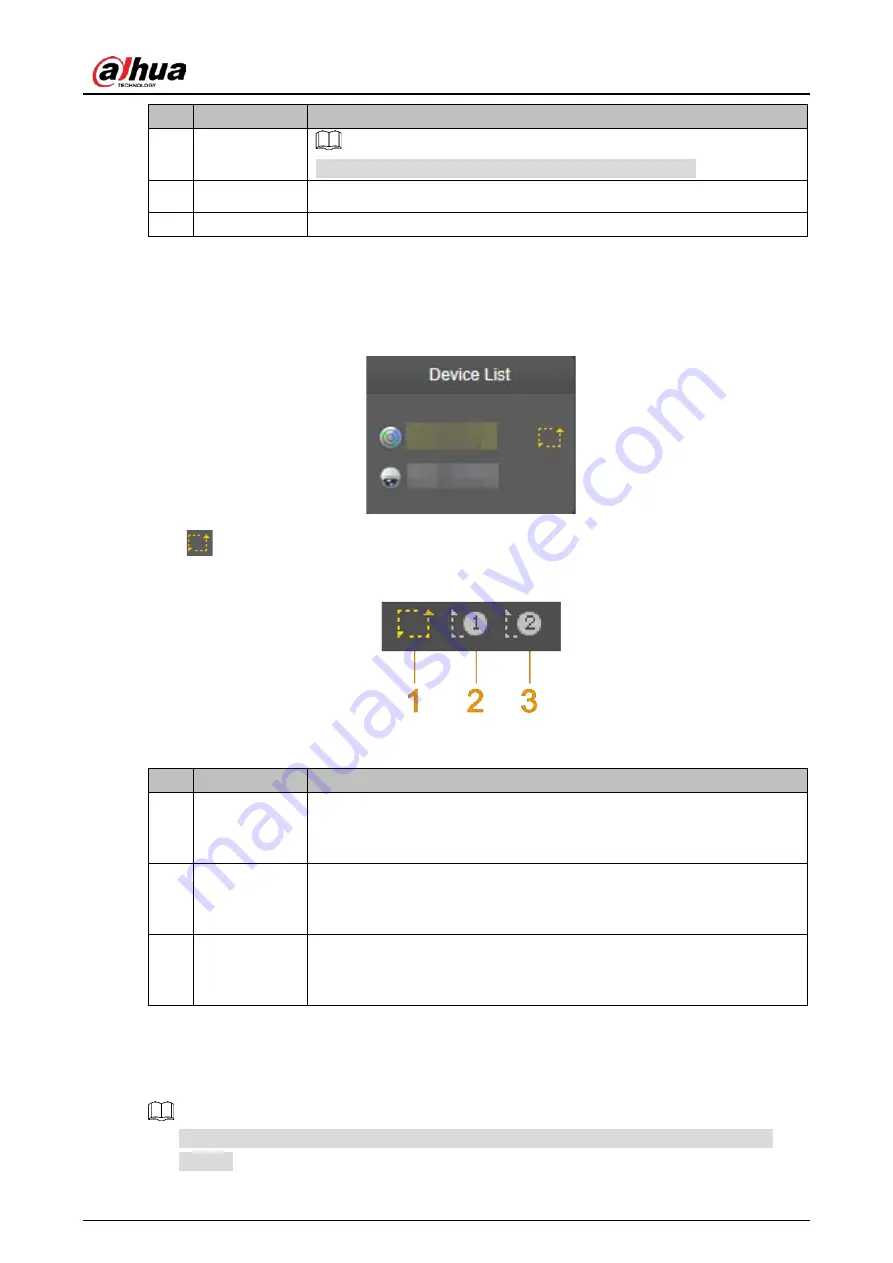
Device List
2.6
You can view IP addresses of radar and the linked cameras, and set video stream. See Figure 2-7.
Device list
Figure 2-7
Click
to select video streams. For details, see Figure 2-8 and Table 2-5.
Select video stream
Figure 2-8
Table 2-5
Video stream icon descriptions
No. Name
Description
1
Main Stream
Under the selected stream media protocol, use main stream to monitor
and store video. Main stream is applied in live view and record storage by
default. Click the icon again to close live video.
2
Sub Stream 1
Under the selected stream media protocol, use sub stream 1 to monitor if
the network bandwidth is insufficient. Click the icon again to close live
video.
3
Sub Stream 2
Under the selected stream media protocol, use sub stream 2 to monitor if
the network bandwidth is insufficient. Click the icon again to close live
video.
PTZ Control
2.7
You can control PTZ function of the linked camera by PTZ control bar on
Live
interface.
PTZ control is only for radar speed dome tracking system, and you can skip this function as
needed.
Содержание DH-PFR4K-B240
Страница 1: ...User s Manual Security Radar User s Manual V1 0 2 ZHEJIANG DAHUA VISION TECHNOLOGY CO LTD...
Страница 30: ...User s Manual 24 Channel title Figure 4 3 Time title Figure 4 4...
Страница 31: ...User s Manual 25 OSD information Figure 4 5 Font Figure 4 6...
Страница 42: ...User s Manual 36 50 m 120 m protection zone management Figure 4 19 240 m protection zone management Figure 4 20...
Страница 102: ...User s Manual 96...


