background image


18 


Rotisserie Air Fryer 

Model No. SDA1551  

User Manual 

IMPORTANT 

 RETAIN THESE INSTRUCTIONS FOR FUTURE REFERENCE 

Troubleshooting Guide 

Problem 

Possible Cause 

Possible Fix 

Food is 
Overcooked/Burnt


Cooking Temperature is 
set too high. 
 

Check cooking 
temperature and lower 
accordingly using the 
Temperature Controls 
(13). 

Cooking time is too long. 


Check cooking time and 
reduce the cooking time 
accordingly using Timer 
Controls (8). 

Food is not evenly 
cooked 


Certain foods require 
turning or or shaking part 
way through cooking  

Turn or shake the food as 
required 


Food is undercooked.


Cooking Temperature is 
set too low. 


Check cooking 
temperature and increase 
the Temperature 
accordingly using the 

Temperature Controls 
(13).


Cooking time is too 
short. 


Check cooking time and 
increase the cooking time 

using Timer Controls (8).


Unit does not power up  Power/Start/Stop (11) 

button has not been 
selected. 

Press the 

Power/Start/Stop (11) 
button.


No power to the Air 
Fryer. 

Check that the mains plug 
is inserted into the socket 
and the socket is switched 

on (if applicable). 

The accessory is not 
inserted or not pushed 

fully home 

Ensure the accessory is 
inserted and pushed fully 

home. 

Burning smell from unit  Previous food remains 

on Rotisserie Basket, 
Mesh Baskets or other 

accessories 

Ensure all cooking 
accessories are cleaned 
after each use. 

Temperature on the 
display has changed 
from Celsius to 
Fahrenheit 

Temperature selection 
has been triggered 
accidentally. 

Press and hold the plus 
and minus 

Temperature 

Controls

 (13)

 and the 

minus 

Timer Control 

(8)


buttons on the Control 
Panel (2) for 5 seconds. 

Содержание SDA1551

Страница 1: ...1 Rotisserie Air Fryer Model No SDA1551 User Manual IMPORTANT RETAIN THESE INSTRUCTIONS FOR FUTURE REFERENCE...

Страница 2: ...ontrol Panel 9 Description of Parts Accessories 9 Control Descriptions 10 Preset Cooking Chart 11 Before First Use of Your Air Fryer 11 Cooking with Your Rotisserie Air Fryer 12 Using the Mesh Trays 1...

Страница 3: ...endor cannot be held liable for damages or injury incurred through improper or incorrect use Read and familiarise yourself with all operating instructions before using this Air Fryer Before plugging y...

Страница 4: ...eave the appliance unattended during use DO NOT leave the appliance unattended whilst connected to the mains supply Always use this appliance on a solid level non flammable surface DO NOT use this app...

Страница 5: ...nsure appliance is situated in an open area do not allow it to come in contact with cupboards curtains wall coverings clothing or other flammable materials Unplug after each use Grasp the plug not the...

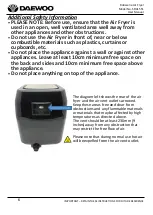
Страница 6: ...against a wall or against other appliances Leave at least 10cm minimum free space on the back and sides and 10cm minimum free space above the appliance Do not place anything on top of the appliance T...

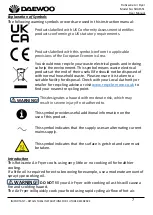
Страница 7: ...lity for disposal Check with your Local Authority or retailer for recycling advice or visit www recycle more co uk to find your nearest recycling point WARNING This symbol provides useful additional i...

Страница 8: ...Overview Description of Parts Control Panel 6 8 2 4 5 7 3 1 9 10 11 12 13 1 Air Inlet 2 Control Panel 3 Air Vent Outlet rear 4 Door 5 Viewing Window 6 Non Slip Feet 7 LED Display 8 Timer Controls 9 Co...

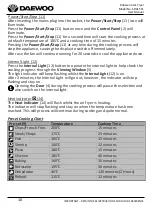
Страница 9: ...s to increase or decrease the cooking temperature Cooking Presets 9 Select one of the 10 presets cooking programs from the Preset Cooking Chart below The pre programmed time and temperature will be au...

Страница 10: ...operate the internal light to help check the cooking progress through the Viewing Window 5 The light indicator will keep flashing whilst the Internal Light 12 is on After 2 minutes the Internal Light...

Страница 11: ...Parts above Check that there is no damage to the mains cable or product Ensure that you clean your Air Fryer before first and every use with a damp cloth and dry thoroughly Wash all the accessories a...

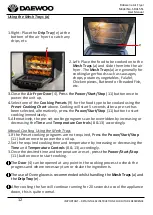
Страница 12: ...ely press the Power Start Stop 11 button to start cooking immediately 5 Alternatively the pre set cooking programs can be overridden by increasing or decreasing the Time and Temperature Controls 8 13...

Страница 13: ...yer using the Rotisserie Basket Skewer Tongs b provided Ensure that the end of the Rotisserie Basket mark L is on the left Follow the below steps to install the Rotisserie Basket in the Air Fryer 4 Fi...

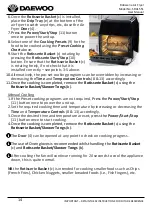
Страница 14: ...is completed remove the Rotisserie Basket c using the Rotisserie Basket Skewer Tongs b Manual Cooking 1 If the Preset cooking programs are not required Press the Power Start Stop 11 button once to pow...

Страница 15: ...e the Fork is in place tighten the screw Repeat the above process again for the other Fork at the other end of the bar so that the food is securely mounted centrally between the Forks on the Rotisseri...

Страница 16: ...erature are set press the Power Start Stop 11 button once to start cooking The Air Fryer Door 4 can be opened at any point to check on cooking progress The use of Oven gloves is recommended whilst han...

Страница 17: ...80 Turn Potato Gratin 500 18 22 180 Meat Poultry Steak 100 300 8 14 180 Turn Pork Chops 100 300 10 14 180 Turn Hamburger 100 300 7 14 180 Turn Sausage Roll 100 300 13 15 180 Turn Chicken Drumsticks 10...

Страница 18: ...e Temperature Controls 13 Cooking time is too short Check cooking time and increase the cooking time using Timer Controls 8 Unit does not power up Power Start Stop 11 button has not been selected Pres...

Страница 19: ...dispose of it safely Never attempt to reuse the plug or insert it into a socket outlet as there is a danger of electric shock Recycling Information Disposal of the Packaging Dispose of paper and card...

Страница 20: ...20 Rotisserie Air Fryer Model No SDA1551 User Manual IMPORTANT RETAIN THESE INSTRUCTIONS FOR FUTURE REFERENCE...

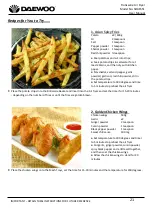
Страница 21: ...er 1 teaspoon Red chili powder teaspoon Peel potatoes and cut into strips Soak potato strips in salt water for at least 20mins and then dry with kitchen paper Mix shallot salt and pepper garlic powder...

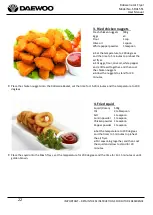
Страница 22: ...en nuggets Allow the nuggets to stand for 20 minutes 4 Fried squid Squid Frozen 500g Oil 2 tablespoon Salt 1 teaspoon Cumin powder 1 teaspoon Chicken powder 1 teaspoon Pepper powder 1 teaspoon Set the...

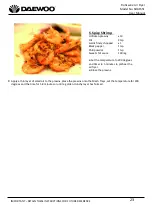
Страница 23: ...prawns onto the Mesh Trays set the temperature for 200 degrees and the time for 5 8 minutes or until a golden crunchy layer has formed 5 Spicy Shrimp Unfrozen prawns x10 Oil 2 tsp Garlic finely choppe...

Страница 24: ...suse or any consumable parts The guarantee will berendered invalid if the product is re sold or has been damaged through inexpert repair The guarantee is only valid within the UK and Eire Your standar...

Отзывы: