background image


Using your Halogen Air Fryer


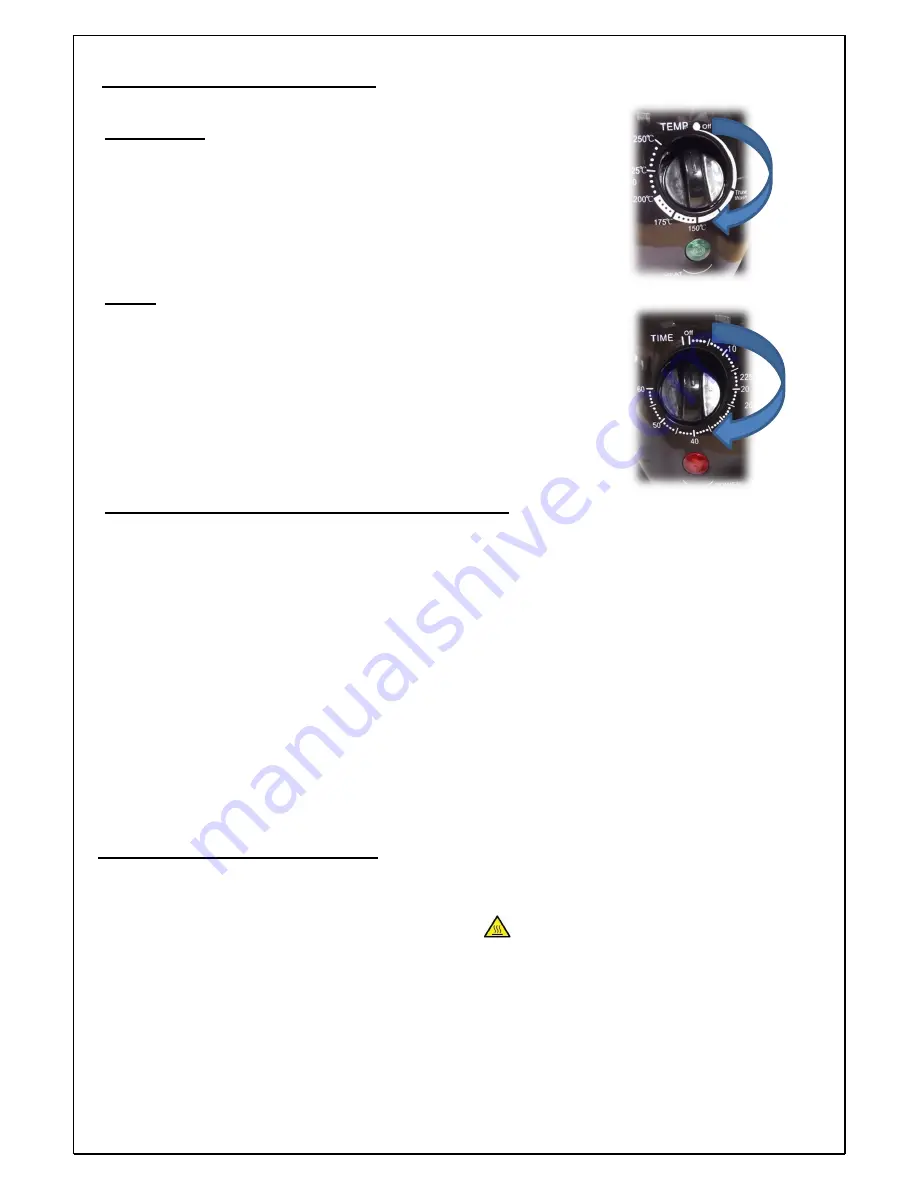
Thermostat 


Timer 


Hints and tips on using your Halogen Air Fryer 


1. Pre-heat the Halogen Air Fryer with the Thermostat at maximum for 3 

minutes before use. 

2. Always place food on the racks to ensure good air circulation. 
3. Leave at least 1cm gap between food items on the same rack, again 

this ensures good air circulation. 

4. Once food is cooked it can be kept hot by turning the thermostat 

down to 150˚C until it is ready to serve. 

5. This appliance has a safety interlock built into the carrying handle 

which will prevent the appliance operating unless the lid handle is in 
the fully folded down (horizontal) position and it clicks. 

6. Whilst roasting, line the bottom of the bowl with cooking foil to cook 

more evenly and to ease cleaning. 


Operating the Halogen Air Fryer 

1. The outer surface of the bowl will become very hot during cooking, be 

sure to place the bowl in its Insulated Base and on a solid, level 
heatproof surface. Danger Hot Surface 

2. Place the low or high rack (see the below table for the correct rack 

height) into the bowl and place food on the rack leaving space between 
the pieces of food for good air circulation. Place the food at least 1cm 
away from the side of the bowl again for the best air circulation. 

3. Cover  the  bowl  with  the  lid/motor  assembly  ensuring  that  it  is  correctly 

seated. 


The thermostat allows you to set the 
cooking temperature from 65˚C to 
250˚C. Rotate the control clockwise 
to increase the cooking temperature 
and anticlockwise to reduce the 
temperature.


The timer dial is marked in minutes, rotate the 
timer clockwise to set the cooking time. The 
timer will count down and return to the off 
position at the end of the cooking period and 
sound a bell.


Содержание HEA1032

Страница 1: ......

Страница 2: ...erence There are no user serviceable parts if the unit fails consult a qualified electrician a repair centre or contact the supplier if the unit is under warranty If the supply cord is damaged it must...

Страница 3: ...ance off and disconnect from the mains and let it cool sufficiently before moving it Always carry the appliance with both hands using the handles provided Burn hazard THIS APPLIANCE MUST BE EARTHED De...

Страница 4: ...w to store the lid Using the tongs to pick up a rack Using the tongs to pick up a basket 1 Safety Switch underneath handle 2 Carrying handle 3 Timer range 0 60 minutes 4 Thermostat 0 250 C 5 Green Pow...

Страница 5: ...essories in hot soapy water with a sponge or cloth rinse thoroughly and dry Unpacking the Extension Ring 3 NB the Extension Ring arrowed is supplied packed around the Glass Bowl inside the Base Ensure...

Страница 6: ...eaning Operating the Halogen Air Fryer 1 The outer surface of the bowl will become very hot during cooking be sure to place the bowl in its Insulated Base and on a solid level heatproof surface Danger...

Страница 7: ...erlock switch clicks Insert the mains plug into the nearest wall socket and set the thermostat to the desired temperature Set the timer using the reference table below as a guide The red heat and gree...

Страница 8: ...s per 1lb 20 mins 180 190 C Low rack Lamb 16 mins per 1lb 20 mins 180 190 C Low rack Pork 24 mins per 1lb 20 mins 180 190 C Low rack Steak Rare 3 mins each side 250 C High rack Medium 5 mins each side...

Страница 9: ...ealed pouch at the bottom of the cooking bowl How to fry roast You can get the effect of deep frying without all the oil by spraying the food lightly with oil using the dispenser provided The food wil...

Страница 10: ...illet steak with garlic salt pepper and red wine in a covered dish for 4 hours basting and turning occasionally Remove the steak from the marinade and wrap in cooking foil with the carrot lemonand ora...

Страница 11: ...sure the Halogen Air Fryer is unplugged and the timer is in the OFF position before storing away Ensure the halogen oven has cooled completely before storing WARNING 1 NEVER PUT THE GLASS BOWL IN THE...

Страница 12: ...with the letter E or coloured Green Before refitting the plug cover check that there are no cut or stray strands of wire inside the plug Use a 13 Amp BS 1362 fuse only BSI or ASTA approved fuses shoul...

Страница 13: ......

Отзывы: