background image

Setting up your VCR

Once you have connected your VCR and put batteries in the                

remote control, you are ready to use the VCR. Before you start,
however, you must be certain  to do the following:

Turn on the television.

Tune the television to channel 3 or 4 (whichever
channel you selected when connecting the VCR).

Turning the VCR on

1

Press POWER on the remote control. You can also
press POWER on the VCR’s front panel.

2

Set the VCR to VCR mode by pressing TV/VCR on the
remote control if the VCR indication is not lit.

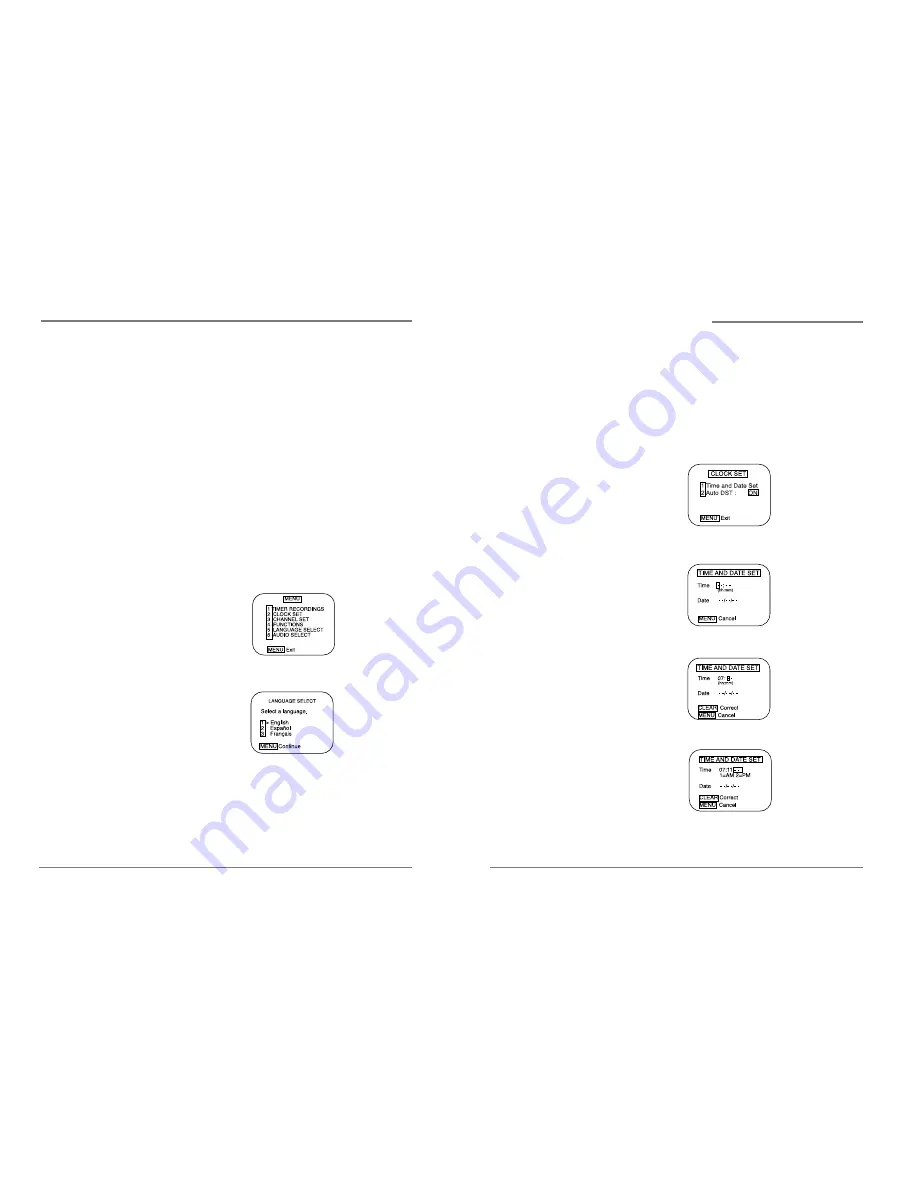
Changing the on-screen menu language

You may select the language in which you would like the
VCR’s menu to be displayed: English, Spanish, or French.

1

Press MENU to display the main menu.

2

Press 5 to select Language. 

3

Press 1 to select English, 2 to select Español
or  3 to select Français.

4

Press MENU once to return the main menu, which
will be displayed in the language you selected. Press
MENU again to exit the menu system and return to
normal viewing.

13

12

Daewoo Video Cassette Recorder User’s Guide

Daewoo Video Cassette Recorder User’s Guide

Setting the clock

The clock  displays the current time and is used for

timer recording. Therefore, it is important to set the

time and date accurately.

If you are setting the clock for the first time, or if a

power failure has erased the clock settings, the clock

will display --:--. 

1

Press MENU to display the menu.

2

Press 2 to select Clock Set

3

Press 1 to select Time and Date Set.

4

Use 0-9 to enter the hour and the minutes.

5

Press 1 if it is AM; press 2 if it is PM.

6

Use 0-9 to enter the month, day, and  year. The VCR

will automatically adds the correct day of the week

according to the date that is selected.

Setting up your VCR,

continued

Содержание DVK84N

Страница 1: ...Video Cassette Recorder User s Guide DVK84N As an ENERGYSTAR Partner DAEWOO has determined that this product meets the ENERGYSTAR guidelines for energy efficiency...

Страница 2: ...ing electrodes and requirements for the grounding electrode See example as shown Safety information i ANTENNA DISCHARGE UNIT NEC SECTION 810 20 ANTENNA LEAD IN WIRE POWER SERVICE GROUNDING ELECTRODE S...

Страница 3: ...aners Use a damp cloth for cleaning 15 Object and Liquid Entry Never push objects of any kind into this video product through openings as they may touch dangerous voltage points or short out parts tha...

Страница 4: ...ess to change the channel channels stored in memory only or to adjust the tracking 6 REW Press to rewind a video cassette 7 PLAY Press to play a video cassette or press during video cassette playback...

Страница 5: ...ime options 10 Display panel Displays information to assist you in operating the VCR successfully 11 Remote Sensor This sensor receives a signal from your remote control Do not block sensor view from...

Страница 6: ...deo tape playback for temporarily still picture Each press of the button advances the picture one frame 14 100 Press in combination with the 0 9 buttons to select channels greater than 100 15 FF Press...

Страница 7: ...ust connect your VCR to an external antenna or cable system Next you will connect the VCR to the television Follow the directions below to make these connections You will normally only make one of the...

Страница 8: ...ur VCR continued TV 9 8 Daewoo Video Cassette Recorder User s Guide Daewoo Video Cassette Recorder User s Guide If you have a coaxial terminal for VHF signals and twin lead terminals for UHF signals y...

Страница 9: ...r cable between the OUT terminal on the converter box and the ANT IN terminal on the VCR Keep your VCR tuned to channel 3 or 4 and change channels using the converter box If your cable system only req...

Страница 10: ...English 2 to select Espa ol or 3 to select Fran ais 4 Press MENU once to return the main menu which will be displayed in the language you selected Press MENU again to exit the menu system and return...

Страница 11: ...and exit from the Time and Date Set menu 8 Press MENU again to exit the menu system and return to normal viewing Selecting cable or antenna viewing You must set the viewing mode for your VCR choosing...

Страница 12: ...sette Recorder User s Guide Daewoo Video Cassette Recorder User s Guide 4 Press 2 to select Add Remove Channels 5 Press DISPLAY to add the channel 6 Press MENU three times to exit from the menus Setti...

Страница 13: ...e stand by mode in power off mode Do not attempt to pull out the video cassette once the VCR begins to load the video cassette Do not insert fingers or any foreign object beyond the door flaps of the...

Страница 14: ...TV VCR If your VCR is connected to an antenna set the viewing mode to ANTENNA a cable system set the viewing mode to CABLE Manual recording Watching and recording the same channel To watch and record...

Страница 15: ...o Video Cassette Recorder User s Guide 8 Use 0 9 to enter the recording start time 9 Use 0 9 to enter the recording end time AM PM and the current date year will be selected automatically 10 Use 0 9 t...

Страница 16: ...cel it 5 Press MENU repeatedly to return to normal viewing One touch timer recording OTR One touch timer records a program for a preset recording time 30 minutes to 4 hours 1 Be certain to do the task...

Страница 17: ...ollowing guidelines will help you to determine the best audio playback mode Choose Hi Fi to play back sound recorded on the Hi Fi track Linear to play back the sound recorded on the linear mono track...

Страница 18: ...re to find the second program the VCR will skip over it If you record multiple programs in one recording session the VCR will only find the index mark that was placed on the video cassette tape when t...

Страница 19: ...ht saving time begins on the first Sunday in April Because the clock automatically changes from 2 00 AM to 3 00 AM forward one hour remember to include the extra hour for timer recording falling withi...

Страница 20: ...ents accidental erasure of a recording SP Standard play the recording speed to use when the best picture quality is of prime importance and when total recording time is not 32 Daewoo Video Cassette Re...

Страница 21: ...e tape and then slowly finishes rewinding Do not prematurely eject the tape Troubleshooting continued Troubleshooting Your Daewoo VCR is designed to give you trouble free performance for many years If...

Страница 22: ...a customer opening a new unit finds that it is initially defective This unit may be returned to the factory by the dealer for exchange Under no circumstances will a customer be permitted to return an...

Отзывы: