background image

8

O P T I O N A L   A C C E S S O R I E S

CHECKLIST FOR INSTALLATION

1.  Make sure the unit has been installed according to all of the installation instructions and the wall and top cabinet templates.

2.  Plug in the power cord.

3.  Keep the use and care manual.

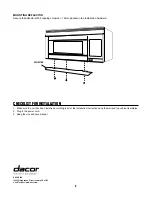
MOuNTING DEFLECTOR

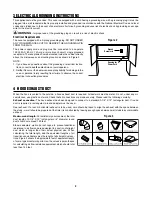
Secure the deflector with 3 tapping screws 4 x 12mm, packed in the installation hardware.

DEFLECTOR

DACOR INC.
14425 Clark Avenue, City of Industry, CA 91745
1-800-793-0093 • www.dacor.com

Содержание PCOR30

Страница 1: ...the gaps Wall construction should be a minimum of 2 x 4 wood studding and 3 8 or more thick dry wall or plaster lath The mounting surfaces must be capable of supporting a weight of 110 pounds the oven...

Страница 2: ...ection procedures 4 HOOD EXHAUST DUCT When the hood is vented to the outside a hood exhaust duct is required All ductwork must be metal Do not under any cir cumstances use plastic duct work Check that...

Страница 3: ...h 4 3 Top Cabinet Screw 5 x 60 mm 2 4 Flat Washer 30 mm diameter 2 5 Grommet 1 6 Tapping Screw 4 x 12 mm 1 7 Exhaust Damper Assembly 1 8 Deflector 1 9 Mounting Plate 1 The installation hardware items...

Страница 4: ...nd save 4 screws that hold fan cover in place Remove fan cover bracket as shown in Fig 6 2 Remove hood fan unit carefully and slip wires out of wire box Rotate hood fan unit 90 so that exhaust ports a...

Страница 5: ...rly placed Check steps 3 and 4 again 7 Attach the fan cover bracket to the oven unit with 4 existing screws as shown in Fig 9 NOTE The exhaust damper assembly is not required for recirculat ing exhaus...

Страница 6: ...appropriate and put the toggle nuts onto the toggle bolts See Fig 12 Refer to instructions in wall template 3 Position the mounting plate with the toggle bolts attached at the wall location and inser...

Страница 7: ...ward In the case of a non recessed bottom in the top cabinet the hole for the cord may need to be enlarged Remove the carton portions 6 Tighten the two unit mounting screws located in the grease filte...

Страница 8: ...the installation instructions and the wall and top cabinet templates 2 Plug in the power cord 3 Keep the use and care manual MOUNTING DEFLECTOR Secure the deflector with 3 tapping screws 4 x 12mm pac...

Отзывы: