

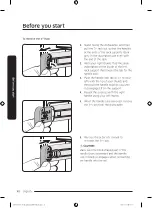


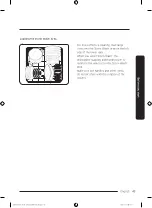


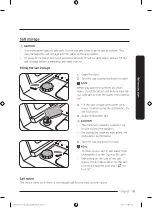


3.
Close the lid by sliding it up.
4.
If the items are heavily soiled, pour
a small amount of detergent onto the
door for better cleaning results.
NOTE
• The additional detergent will activate
during the pre-wash process.
• When testing for the energy label,
detergent was only used in the main
wash and not in the prewash.
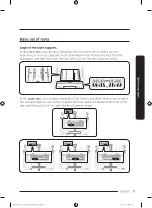
The cover opens automatically to dispense the detergent during the wash.
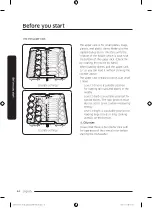
English
49
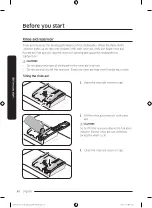
Be
for
e y
ou s
tar
t
DD68-00250L-00_IB_DACOR_DW8700B_EN.indd 49
2024-01-11 3:09:40