15
Appendix A: Screen Adjustment for Type 2 Motor (LT suffix in Part Number)
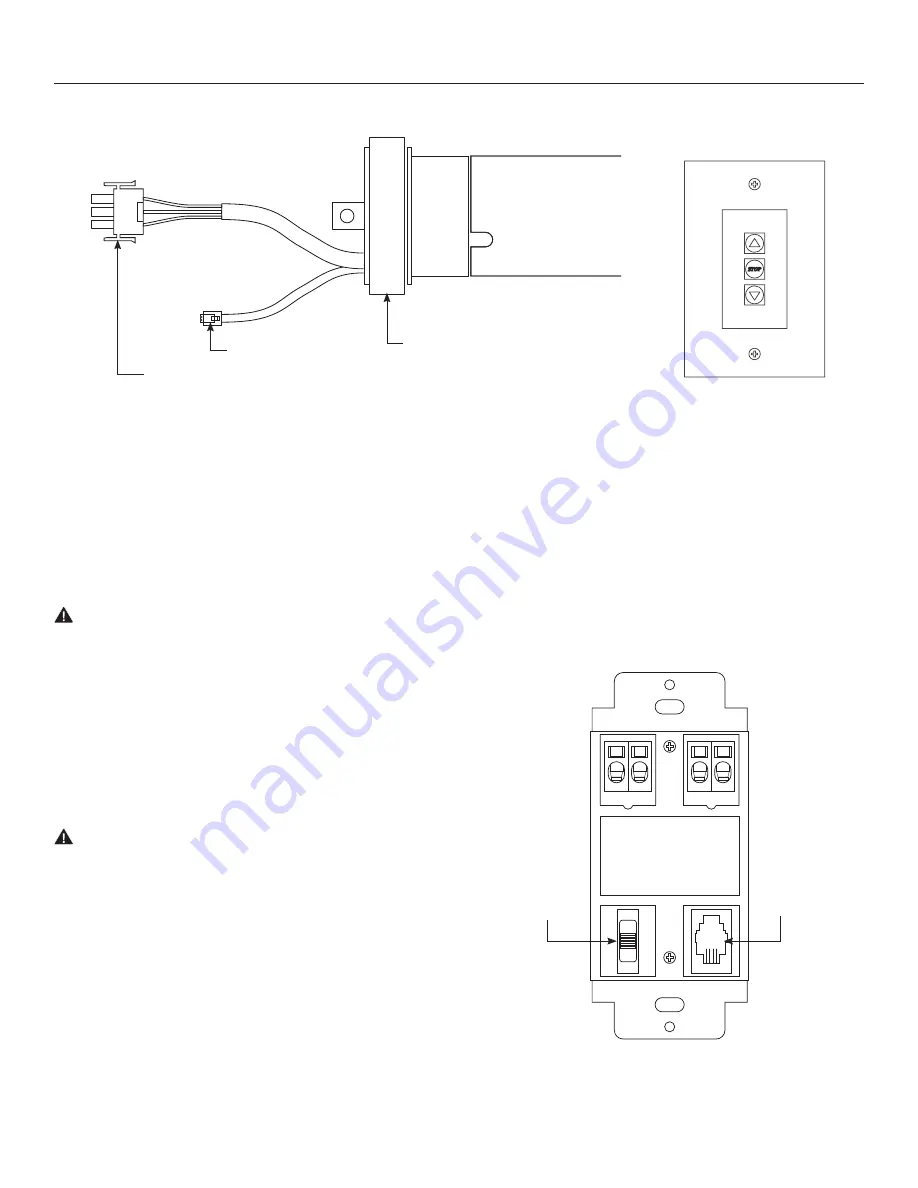
No manual limit adjustments
on end of motor
RJ-22 cable
3-wire connection
TYPE 2 MOTOR
TYPE 2 WALL SWITCH
1. Remove the cover plate from the 3-button wall switch and
remove the switch from the junction box.
2. Locate small 3-position switch on back of wall switch.
3. To adjust the down limit switch, slide the 3-position switch to the
down position. Press and hold the down button to run the screen
down to the desired stop position. Release the button to stop the
screen. DO NOT PUSH THE STOP BUTTON.
CAUTION: Do not adjust for more drop than what was
ordered. At least 1–1/2 wraps of fabric must remain on the
roller. This screen comes standard with 12" black at the top.
4. When the screen is in the desired down position, slide the
3-position switch to the off (center) position. The down limit
switch is now set.
5. To adjust the up limit switch, slide the 3-position switch to the up
position. Press and hold the up button to run the screen up to
the desired stop position. Release the button to stop the screen.
DO NOT PUSH THE STOP BUTTON.
CAUTION: Adjusting the limits by more than 6” can cause the
screen surface to lose proper tensioning.
6. When the screen is in the desired up position, slide the 3-position
switch to the off (center) position. The up limit switch is now set.
7. To test limit switch setting, make sure the 3-position switch is in
the off (center) position. Press and release the up or down button
on the wall switch to operate the screen.
8. Replace switch and cover plate on the wall.
NOTE:
If stop button is pressed, the wall switch will reverse
direction. To correct this, press the stop button again. This will
reset the switch. You will have to reset both the up and the down
limit settings.
IMPORTANT NOTE:
The wall switch is REQUIRED to make any
limit switch adjustments, even if a third party control system is
used. Therefore, it is advised to wire the switch or provide a
4-conductor connection that is accessible.
RJ-22
3-Position
Switch
DN
GND +5V
UP
Back of Wall Switch
Содержание ViewShare
Страница 1: ...INSTRUCTION BOOK FOR ViewShare Tensioned Advantage Electrol Retrofit ...
Страница 18: ...18 ...
Страница 19: ...19 ...


