4
Pre-Installation of ViewShare Screen and Roller Assembly
1. Remove existing motor and pin end roller assembly brackets
from inside the case.
NOTE:
At this point the inside of case will be empty except for
the junction box connections on the motor end.
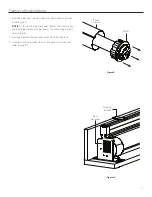
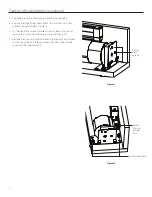
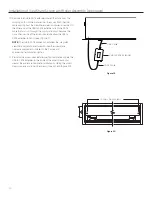
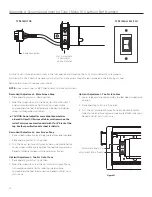
2. Remove a single circular knockout from motor end of case for
CAT5 cable needed in the Installation of ViewShare Screen and
Roller Assembly (Figure 4).
NOTE:
The CAT5 cable should be run from the Local CAT5 to
USB Extender in Camera and Speakerphone Installation to this
location. Final connection of this CAT5 cable running through the
knockout will occur in Step 10 of Installation of ViewShare Screen
and Roller Assembly.
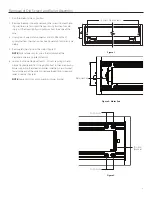
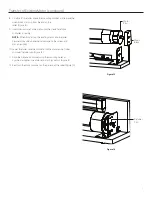
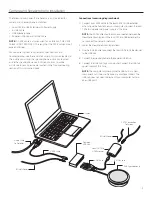
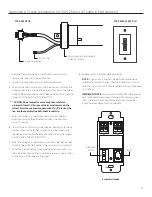
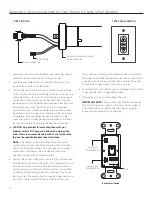
3. Place the two spacing gaskets (shown in Figure 5) on the bracket
bolts with 1/4” – ½” of the bolts showing through the bottom
(Figure 6).
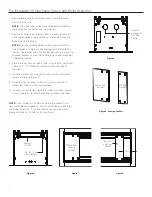
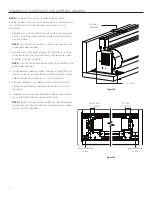
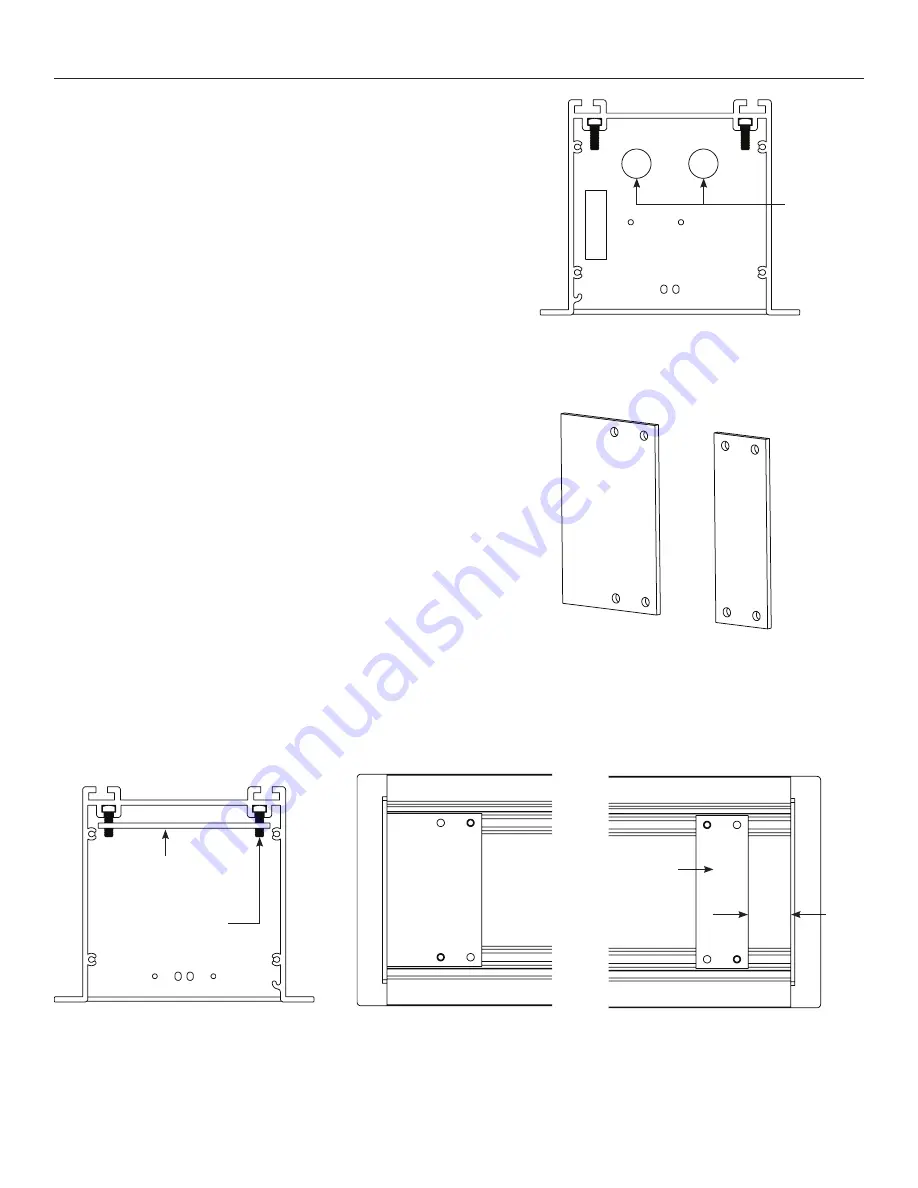
4. Slide the motor end spacing gasket until it makes contact with
the end of the case (Figure 7).
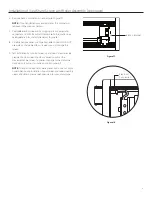
5. Slide the pin end spacing gasket until it is approximately 1 ½
inches from the end of the case (Figure 8).
6. Carefully unpack the new ViewShare screen and roller assembly
and set aside. Be sure to leave the packing paper on the roller.
NOTE:
If your screen and roller assembly was ordered with a
new motor, please proceed to “Installation of ViewShare Screen
and Roller Assembly”. If you are utilizing your existing motor,
please continue to “Transfer of Existing Motor”.
Figure 4
Figure 5 – Spacing Gaskets
Figure 6
Figure 7
Figure 8
Circular
Knockouts
for CAT5
Cable
Spacing
Gasket
1/4" to 1/2" of
bolt showing
Motor End
Gasket
Motor End
Spacing
Gasket
Pin End
Spacing
Gasket
1 ½ in.
Pin End
Gasket
Содержание ViewShare Advantage Electrol Retrofit
Страница 1: ...INSTRUCTION BOOK FOR ViewShare Advantage Electrol Retrofit ...
Страница 18: ...18 ...
Страница 19: ...19 ...


