background image

6.  Determine where the projector will be 

located and make a hole in the ceiling 
and create a tile for the Da-Lift. See 
Figure 3 & 8. 


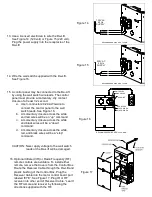
8.  Lower Da-Lift by connecting the power 

supply to 120 volt or 220 volt AC power. 
Use the switch shown to operate the Da-
Lift. See Figure 10. The “Stop” button is 
needed only for intermediate stopping. 
WARNING! Avoid pinch points when 
operating Da-Lift with built-in switch. 
 

9.  Power the projector and adjust projector 

location.  


Figure 8 

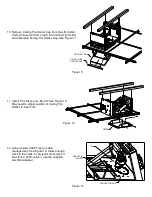
7.  Attach Da-Lift to structural ceiling. See 

Figure 9. 


TRIM PIECE

HAS TO FIT

INSIDE CUT-OUT

SCRAP

"A"

"B"

DA-LIFT MODEL

"A"

"B"

26P

16-1/2"

15-3/8"

33P

21"

19-7/8"

NOTE:

CUT-OUTS ARE SQUARE.
TOLERANCES ARE ±1/8".

TILE HAS TO

FIT INSIDE

CEILING TILE HOLDER

CUT-OUT


3/8" ALL-THREAD

3/8" HEX NUT

3/8" FLAT WASHER

3/8" FLAT WASHER

3/8" LOCK HEX NUT

CHANNEL

NOTE: ITEMS CALLED

OUT ARE NOT SUPPLIED

Figure 9 

"UP"

"DOWN"

"STOP"

CONNECT TO

120V AC OR

220V AC.

WARNING!

AVOID PINCH POINTS

WHEN OPERATING DA-LIFT

WITH THIS SWITCH

CEILING TILE HOLDER CAP


Figure 10 
 

Содержание Advance 26P Pivoting Da-Lift 26P

Страница 1: ...nce may overheat 4 To reduce the risk of electric shock do not disassemble this appliance Contact an authorized service dealer when repair work is required Incorrect reassembly can cause electric shoc...

Страница 2: ...ion but the Pivoting Da Lift will work with drywall ceiling Remove contents from carton and examine for damaged or missing parts If installing the Pivoting Da Lift with a plenum cover fasten Plenum Co...

Страница 3: ...P CEILING TILE HOLDER CEILING TILE TRIM 120V AC CONNECTION CHANNEL MOUNTED TO STRUCTURAL CEILING NOT SUPPLIED 3 8 ALL THREAD NUTS AND WASHERS NOT SUPPLIED CHANNEL NOT SUPPLIED PROJECTOR TRIM CEILING T...

Страница 4: ...umbnuts can be used for fine tuning projector position in next step 5 Secure the projector and mount to the Da Lift Use the features shown to adjust the projector s position See Figure 3 and 7 Project...

Страница 5: ...switch 9 Power the projector and adjust projector location Figure 8 7 Attach Da Lift to structural ceiling See Figure 9 TRIM PIECE HAS TO FIT INSIDE CUT OUT SCRAP A B DA LIFT MODEL A B 26P 16 1 2 15 3...

Страница 6: ...cutout from step 6 into Ceiling Tile Holder and assemble Ceiling Tile Holder Cap See Figure 11 12 Use provided Cable Ties for cable management See Figure 13 Allow enough slack in the cords for projec...

Страница 7: ...MMENDED WIRE SIZE 12 AWG BLACK HOT HOT WHITE COMMON COMMON GREEN GROUND GROUND 120V AC 60 Hz SUPPLY RECOMMENDED WIRE SIZE 12 AWG 220V AC 50 Hz SUPPLY BROWN HOT HOT BLUE COMMON COMMON GREEN GROUND GROU...

Отзывы: