


71
Figure 4.4.6.3
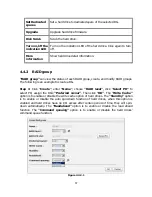
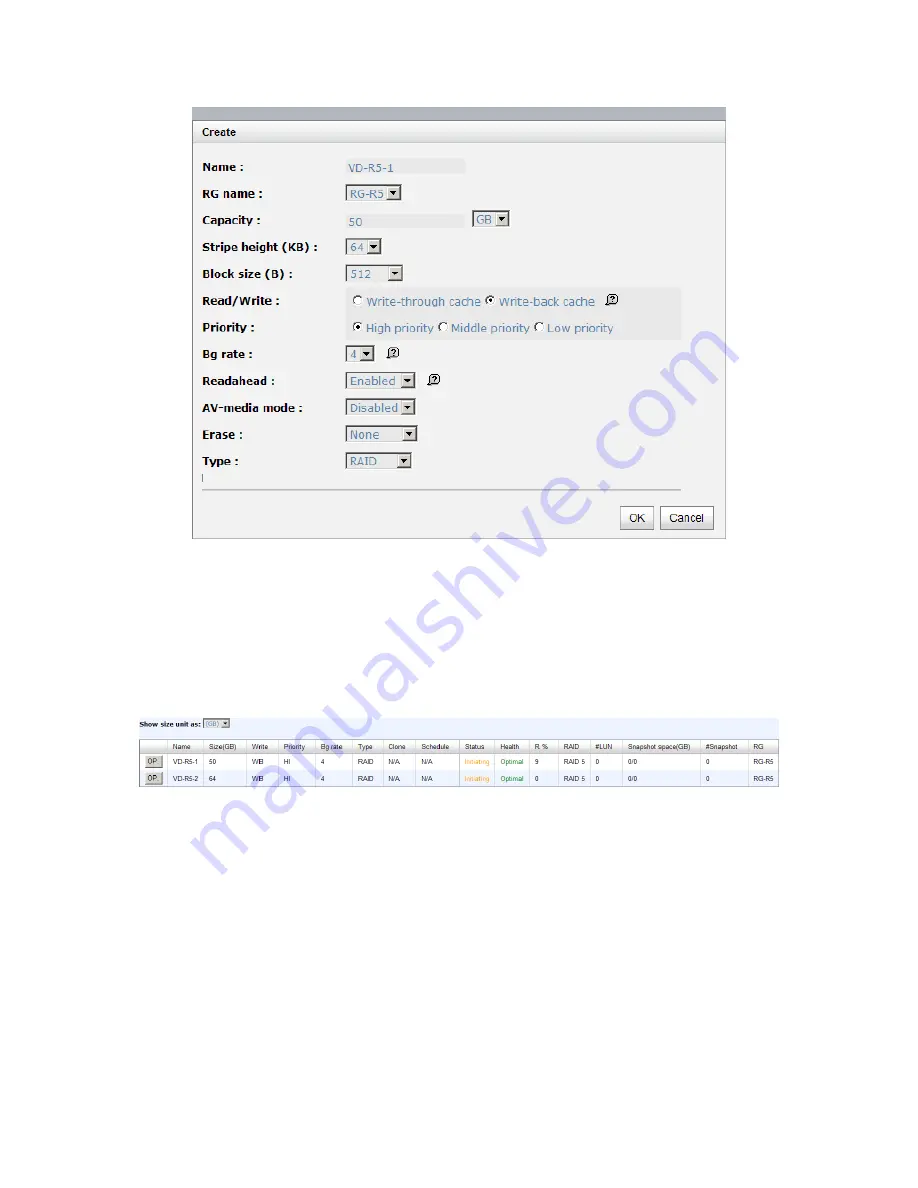
1.
Select “/ Volume configuration / Virtual disk”.
2.
Click “Create”.
3.
Input a VD name, choose a RG Name and enter a size for this VD; decide the stripe
height, block size, read / write mode, bg rate, and set priority, finally click “OK”.
4.
Done. A VD has been created.
5.
Follow the above steps to create another VD.
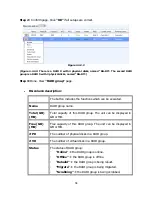
Figure 4.4.6.4
(Figure 4.4.6.4: Creating VDs named “VD-R5-1” and “VD-R5-2” from RAID group “RG-R5”, the
size of “VD-R5-1” is 50GB, and the size of “VD-R5-2” is 64GB. There is no LUN attached.)
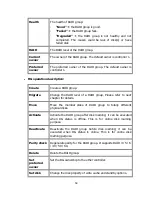
Step 3: Attach a LUN to a VD.
There are 2 methods to attach a LUN to a VD.
1.
In “/ Volume configuration / Virtual disk”, check the gray button next to the VD
number; click “Attach LUN”.
2.
In “/ Volume configuration / Logical unit”, click “Attach”.
The procedures are as follows:
Содержание DSN-6020
Страница 138: ...138 Figure B 4 Figure B 5 8 Click OK Figure B 6 Figure B 7...
Страница 144: ...144 Step 3 Click confirm The system will ask you to shutdown Please shutdown IP SAN storage Click Ok...
Страница 145: ...145 Go to Maintenance Reboot and shutdown Click Shutdown to shutdown the system Click Ok...


