48
Port Forwarding/Virtual Server Setting
Q22: How do I enable DMZ on my router?
DMZ should only be used if you have a computer/device that cannot run Internet applications properly
from behind the router.
Note:
By enabling the DMZ (Demilitarized Zone) feature, you are allowing the router to forward all incoming
traffic from the internet to the device specified, virtually disabling the routers "firewall protection". This may
expose the device to a variety of security risks, so only use this option as a last resort.
Please launch your browser and enter http://dlinkrouter.local or http://192.168.0.1 into the address
bar. Then login and follow the steps below:
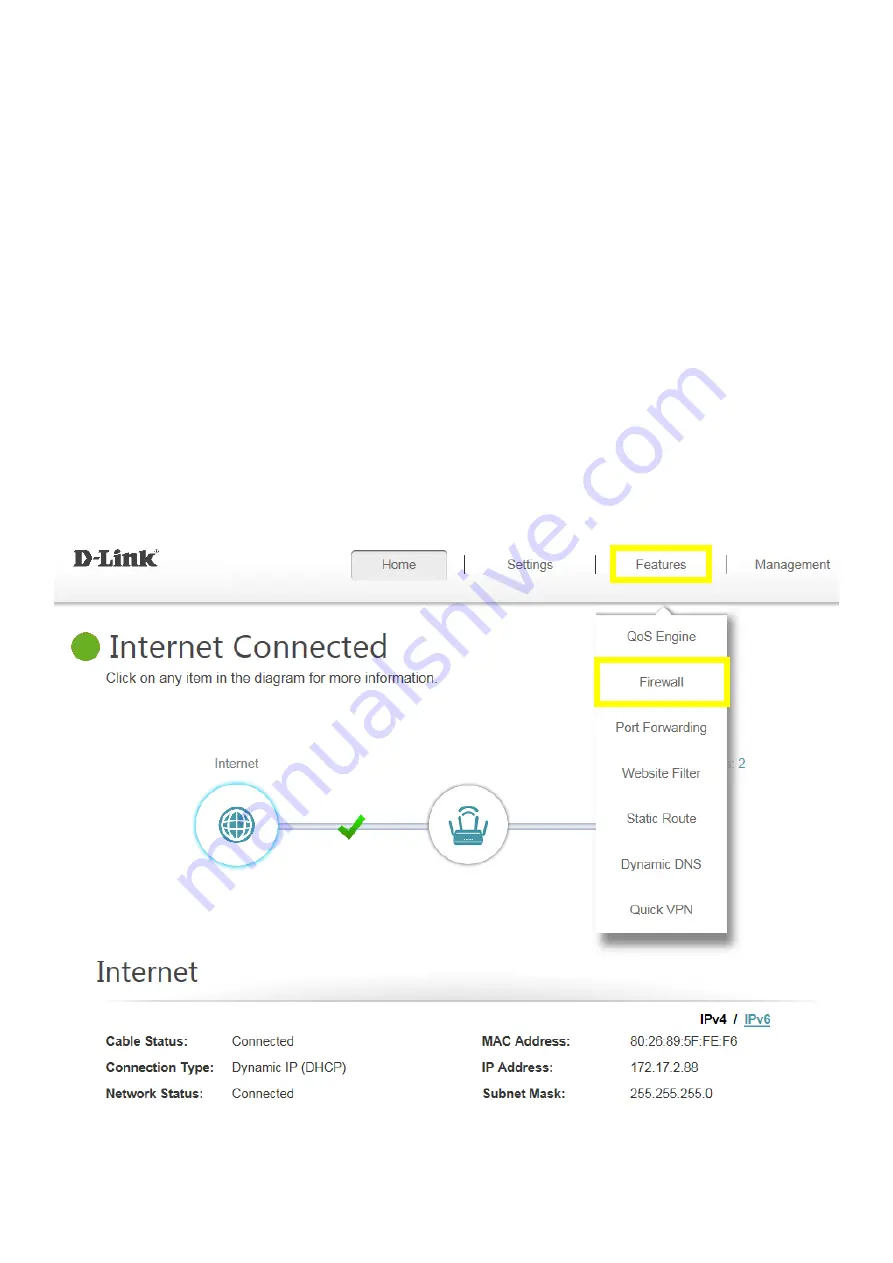
Step 1:
Click
Features
->
Firewall
Содержание DIR-882
Страница 10: ...9 Step 2 Click Advanced Setting...
Страница 11: ...10 Step 3 Find Mac address clone field then select one Mac address from the drop down menu and click Save...
Страница 13: ...12 Step 3 Click Reserve IP to Enable and fill in the reserved IP address then click Save...
Страница 15: ...14 Step 2 Disable Smart Connect and select the 802 11 mode for 2 4G 5G band...
Страница 16: ...15...
Страница 17: ...16 Step 3 Click Save to save your configuration...
Страница 19: ...18 Step 2 Change the IP address as needed under Network Setting and click Save...
Страница 21: ...20 You can find your WAN IP by clicking on the Home tab It will be displayed under the Internet Section...
Страница 24: ...23...
Страница 26: ...25 Step 5 Select your desired Drive Letter and Click Finish...
Страница 27: ...26...
Страница 29: ...28 Step 2 Click Select File to browse for the firmware...
Страница 30: ...29 Step 3 Click Upload Firmware you selected to upload...
Страница 34: ...33 Step 3 Click Save to save the configuration...
Страница 39: ...38 Step 2 Click the Guest Zone tab...
Страница 40: ...39 Step 3 Configure Guest Zone and click Save...
Страница 47: ...46 Step 2 Then click Advanced Settings...
Страница 48: ...47 Step 3 Click SIP to disable SIP ALG then click Save...
Страница 53: ...52 Step 4 Click Save After finish adding your rule...
Страница 55: ...54 Step 3 Click Save After finish adding your rule...
Страница 65: ...64 Step 4 You ll be able to check the log in Kiwi Syslog Service Manager as below...
Страница 66: ...65 Method 3 E mail Settings Step 1 Setup the e mail information as below Step 2 You will receive the log email...
Страница 77: ...76 Step 2 Click Schedule...
Страница 81: ...80 Step 3 Select Connect to a workplace...
Страница 88: ...87 Step 3 Fill in the WAN IP address Step 4 Fill in the Pre shared key...
Страница 89: ...88 Step 5 Connect to your VPN server...
Страница 90: ...89 Step 6 Make sure if you can ping your client under DUT...
Страница 94: ...93...


