


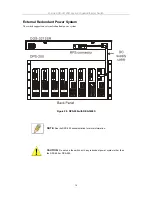


D-Link DGS-3212SR Layer 2 Gigabit Ethernet Switch
Before You Connect to the Network
NOTICE:
Do not connect the switch to the network until you have established
the correct IP settings.
Before you connect to the network, you must install the switch on a flat surface or in a rack, set up a terminal
emulation program, plug in the power cord, and then set up a password and IP address.
The switch is supplied with rubber feet for stationing it on a flat surface and mounting brackets and screws for
mounting the switch in a rack.
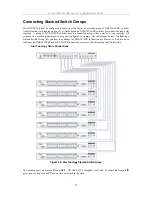
NOTICE:
Do not connect the stacked switch group to the network until you have
properly configured all switches for switch stacking. An improperly configured
switch stack can cause a broadcast storm.
Installing the Switch Without the Rack
1. Install the switch on a level surface that can safely support the weight of the switch and its attached
cables. The switch must have adequate space for ventilation and for accessing cable connectors.
2. Set the switch on a flat surface and check for proper ventilation. Allow at least 5 cm (2 inches) on each
side of the switch and 15 cm (6 inches) at the back for the power cable.
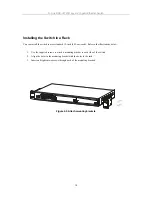
3. Attach the rubber feet on the marked locations on the bottom of the chassis.
4. The rubber feet, although optional, are recommended to keep the unit from slipping.
Figure 2-1. Install rubber feet for installations with or without a rack
9
Содержание DGS-3212SR
Страница 1: ...D Link DGS 3212SR High Density Layer 2 Modular Gigabit Ethernet Switch Manual...
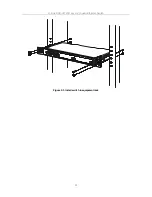
Страница 21: ...D Link DGS 3212SR Layer 2 Gigabit Ethernet Switch Figure 2 3 Install switch in equipment rack 11...
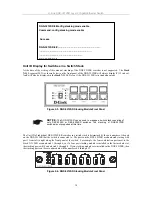
Страница 47: ...D Link DGS 3212SR Layer 2 Gigabit Ethernet Switch Figure 4 3 config stacking Command 37...