- 127 -
Step 1.
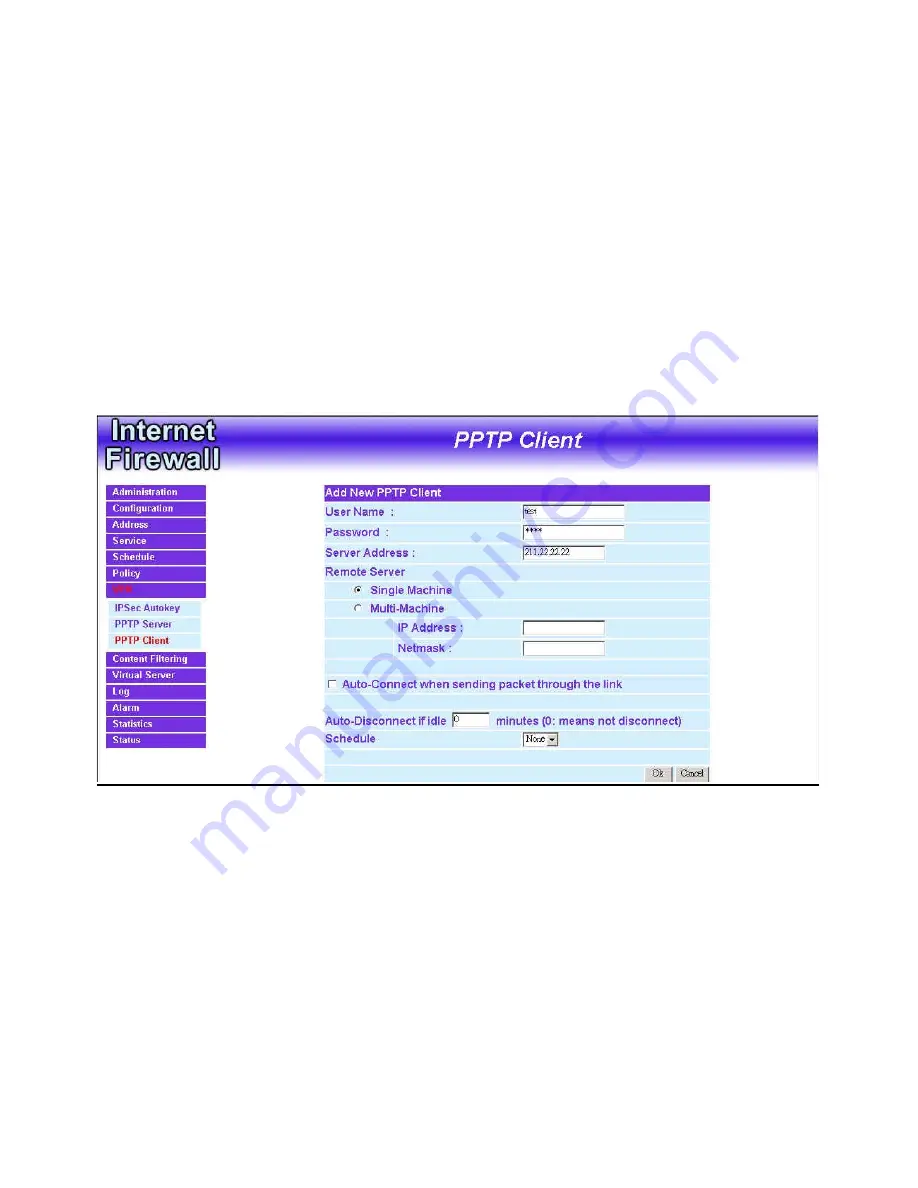
Adding a PPTP Client
Select
VPN
→
PPTP Client
.
User name: Specify the PPTP client. This should be
unique.
Password: Specify the PPTP client password.
Server Address: Enter the PPTP Server’s IP address.
Remote Client
:
Single Machine:
Check to connect to single computer.
Multi-Machine: Check to allow multiple computers
connected to the PPTP server.
IP Address
:
Enter the PPTP Client IP address.
Netmask
: Enter the PPTP Client Sub net mask.
Auto-Connect when sending packet through the link
:
Check to enable the auto-connection whenever there’s
packet to transmit over the connection.
Auto-Disconnect if idle minutes
: Configure this device to
disconnect to the PPTP Server when there is no activity for
a predetermined period of time. To keep the line always
connected, set the number to 0.
Schedule
:
Click the down arrow to select the schedule,
which was pre-determined in Schedule. Refer to the
corresponding section for details.
Step 4.
Click
OK
to save modifications or click
Cancel
to cancel
modifications.
Содержание DFL-300 - Security Appliance
Страница 1: ... 1 FIREWALL VPN ROUTER User s Manual Doc No 120602 01 ...
Страница 45: ... 45 ...
Страница 123: ...Step 3 Click OK to save modifications or click Cancel to cancel modifications 123 ...
Страница 144: ...When Disable appears in the drop down list no Virtual Server can be added 144 ...
Страница 172: ...Step 4 When the following screen appears the setup is completed 172 ...
Страница 174: ...Step 8 When the following screen appears the setup is completed 174 ...
Страница 177: ...Step 9 An Incoming FTP policy should now be created 177 ...
Страница 179: ...Step 8 Open all the services ANY Step 9 The setup is completed 179 ...


