


D-Link DES-3250TG Standalone Layer 2 Switch
Creating an access profile is divided into two basic parts. The first is to specify which part or parts of a frame the Switch will
examine, such as the MAC source address or the IP destination address. The second part is entering the criteria the Switch will
use to determine what to do with the frame. The entire process is described below in two parts.
Part 1
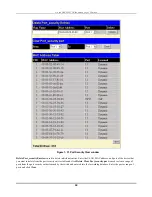
To display the currently configured Access Profiles on the Switch, open the
Configuration
folder and click on the
Access
Profile Table
link. This will open the
Access Profile Table
page, as shown below.
Figure 7- 42. Access Profile Table
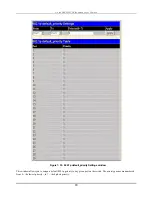
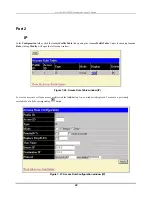
To add an entry to the
Access Profile Table
, click the
Add
button. This will open the
Access Profile Configuration
page, as
shown below. There are three
Access Profile Configuration
pages; one for
Ethernet
(or MAC address-based) profile
configuration, one for
IP
address-based profile configuration and one for the
Packet Content Mask
. You can switch between
the three
Access Profile Configuration
pages by using the
Type
drop-down menu. The page shown below is the
Ethernet
Access Profile Configuration
page.
Ethernet
Figure 7- 43. Access Profile Table (Ethernet)
81
Содержание DES-3250TG
Страница 1: ...D Link DES 3250TG Stackable Layer 2 Switch User s Guide ____________________...
Страница 106: ...D Link DES 3250TG Standalone Layer 2 Switch Figure 7 54 Access Rule Display window Packet Content Mask 96...
Страница 154: ...D Link DES 3250TG Standalone Layer 2 Switch Figure 9 21 Authenticator Status window 144...
Страница 186: ......


