background image

64

D-Link COVR-2202 User Manual

Section 3 - Configuration

System Log (Continued)

SMTP Server 

Address:

Enter your SMTP server address.

SMTP Server Port:

Enter your SMTP server port.

Enable 

Authentication:

Enable this option if your SMTP server requires authentication.

Account Name:

Enter your SMTP account name.

Password:

Enter your SMTP account password.

E-mail Log When Full or On Schedule

Send When Log 

Full:

If enabled, this option will set Covr Point A to automatically send the log 

when it is full.

Send on Schedule:

If enabled, this option will set Covr Point A to send the log according 

to a set schedule.

Schedule:

If you enable 

Send On Schedule

, use the drop-down menu to select 

a schedule to apply. The schedule may be set to 

Always

, or you can 

create your own schedules in the 

Schedule

 section. Refer t

Schedule 

on page

 62

 for more information.

Click 

Save

 when you are done.

Содержание COVR-2202

Страница 1: ...I BAND WHOLE HOME WI FI SYSTEM COVR 2202 2200 USER MANUAL Covr your whole home in Seamless Wi Fi C100 M0 Y19 K23 Pantone 3145C C100 M0 Y19 K23 Pantone 3145C High Performance More Coverage One Seamless...

Страница 2: ...ered in the U S and other countries App StoreSM is a service mark of Apple Inc Chrome browser Google Play and Android are trademarks of Google Inc Internet Explorer Windows and the Windows logo are tr...

Страница 3: ...et 14 COVR 2200 15 Connected Clients 16 Extenders 17 Settings 18 Wizard 18 Internet 19 IPv4 19 IPv6 29 VLAN 42 Wireless 44 Wi Fi 44 Guest Zone 46 Network 47 Advanced 49 QoS Engine 49 Firewall 51 IPv4...

Страница 4: ...nnect to a Wireless Client 73 WPS Button 73 Upgrading Firmware 74 Using the Web User Interface 74 Using the D Link Wi Fi App 74 Resetting Your Device 76 Wireless Basics 77 What is Wireless 78 Tips 80...

Страница 5: ...iew Package Contents If any of the above items are missing or damaged please contact your local reseller Wi Fi Configuration Card Ethernet Cable COVR 2200 Covr Point A Router x 1 COVR 2200 Covr Point...

Страница 6: ...ements Computer with the following Windows Macintosh or Linux based operating system An installed Ethernet adapter or Wi Fi interface Browser requirements Internet Explorer 10 or higher Firefox 28 or...

Страница 7: ...hroughout your entire home using a single wireless network name SSID This means that once you connect your connection is maintained seamlessly as you and your wireless device roam throughout your home...

Страница 8: ...istributing devices to each network Expandable Network Covr is a scalable solution extra Covr Points can be added to increase the reach of your network Scale up your Wi Fi by adding another Covr Point...

Страница 9: ...e is no connection to the device Blinking white Oncesetup ablinkingwhiteLEDindicatesaweakconnection orthattheCovrPointisconnecting to a wireless client using Wi Fi Protected Setup WPS Solid white The...

Страница 10: ...to power on the device 2 Gigabit LAN ports Connect Ethernet devices such as computers switches storage NAS devices and game consoles On Covr Point A LAN port 1 is designated as the WAN port that conn...

Страница 11: ...AC2200 Tri Band Whole Home Wi Fi System using the D Link Wi Fi app To get the D Link Wi Fi app browse the App Store or Google Play and search for D LinkWi Fi You can also scan the QR code on the right...

Страница 12: ...ink COVR 2202 User Manual Section 2 Installation Using The D Link Wi Fi App Continued 1 Open the D Link Wi Fi app and tap InstallYour Device at the bottom 2 Next select COVR 2202 from the list and tap...

Страница 13: ...n existing network choose Create a new Covr network and tap NEXT 4 You will now be guided through a step by step process for setting up the COVR 2202 hardware Simply follow the on screen instructions...

Страница 14: ...ed Wi Fi Configuration Card 1 Position the Covr Point labeled A close to your Internet connected modem Next connect the power adapter and plug the Covr Point into a power outlet G Manual Installation...

Страница 15: ...Covr Wi Fi settings using the free D Link Wi Fi mobile app or the web based user interface Refer to the Configuration section on page 12 for more information on configuring your network using the web...

Страница 16: ...guration utility open a web browser such as Internet Explorer and enter http covr local in the address bar If you want to access the web interface using a wireless connection connect to your Covr Wi F...

Страница 17: ...Covr Wi Fi network in the form of an interactive diagram You can click each icon to display information about each part of the network at the bottom of the screen The menu bar at the top of the page w...

Страница 18: ...splays whether or not Covr Point A is currently connected to the Internet If it is disconnected click Click to repair to bring up the setup wizard refer to Wizard on page 18 for more information Click...

Страница 19: ...VR 2200 icon to view details about the Covr Point s wireless and local network settings This includes IPv4 and IPv6 local network and Wi Fi information This overview is only informational To configure...

Страница 20: ...of the device IP Address Displays the current IP address of this client Reserve IP Enable to reserve an IP address for this client IP Address Reserved Specify an IP address for the DHCP server to assi...

Страница 21: ...the top right of the box of the Covr Point that you want to rename To reboot a Covr Point click the settings icon in the bottom right of the Covr Point s box and click Reboot To remove a Covr Point f...

Страница 22: ...ge click Wizard to open the setup wizard This is the same wizard that appears when you set up the device using the web user interface for the first time This Wizard will also launch when clicking the...

Страница 23: ...tic IP refer to page 21 For PPPoE refer to page 22 For PPTP refer to page 24 For L2TP refer to page 26 For DS Lite refer to page 28 To configure an IPv6 connection click the IPv6 link Refer to page 29...

Страница 24: ...r the primary DNS server IP address assigned by your ISP This address is usually obtained automatically from your ISP Secondary DNS Server Enter the secondary DNS server IP address assigned by your IS...

Страница 25: ...your ISP Primary DNS Server Enter the primary DNS server IP address assigned by your ISP Advanced Settings Secondary DNS Server Enter the secondary DNS server IP address assigned by your ISP MTU Maxi...

Страница 26: ...feature select Always on as the reconnect mode Advanced Settings Address Mode Select Static IP if your ISP assigned you the IP address subnet mask gateway andDNSserveraddresses Inmostcases selectDynam...

Страница 27: ...ervice Name Enter the ISP service name optional Primary DNS Server Enter the primary DNS server IP address assigned by your ISP Secondary DNS Server Enter the secondary DNS server IP address assigned...

Страница 28: ...ch the Internet connection is maintained during inactivity To disable this feature select Always on as the reconnect mode Advanced Settings Address Mode Select Static IP if your ISP assigned you the I...

Страница 29: ...e subnet mask provided by your ISP PPTP Gateway IP Address Enter the gateway IP address provided by your ISP Primary DNS Server Enter the primary DNS server IP address assigned by your ISP Secondary D...

Страница 30: ...he Internet connection is maintained during inactivity To disable this feature select Always on as the reconnect mode Advanced Settings Address Mode Select Static IP if your ISP assigned you the IP ad...

Страница 31: ...e subnet mask provided by your ISP L2TP Gateway IP Address Enter the gateway IP address provided by your ISP Primary DNS Server Enter the primary DNS server IP address assigned by your ISP Secondary D...

Страница 32: ...te Configuration B4 IPv6 Address Enter the B4 IPv4 address value used here WAN IPv6 Address Once connected the WAN IPv6 address will be displayed here IPv6 WAN Default Gateway Once connected the IPv6...

Страница 33: ...IPv6 refer to page 32 For Auto Configuration SLAAC DHCPv6 refer to page 34 For PPPoE refer to page 36 For 6rd refer to page 39 For Local Connectivity Only refer to page 41 My Internet Connection Is C...

Страница 34: ...e following DNS address If Use the following DNS address is selected Primary DNS Server Enter the primary DNS server address Secondary DNS Server Enter the secondary DNS server address LAN IPv6 Addres...

Страница 35: ...ng for a larger address allocation such as 63 Contact your ISP for more information Autoconfiguration Type SelectSLAAC RDNSS SLAAC StatelessDHCP orStatefulDHCPv6 If you selected SLAAC RDNSS or SLAAC S...

Страница 36: ...et prefix length IPv6 Address If Use Link Local Address is disabled enter the address supplied by your ISP Subnet Prefix Length If Use Link Local Address is disabled enter the subnet prefix length sup...

Страница 37: ...ted SLAAC RDNSS or SLAAC Stateless DHCP as the AutoconfigurationType Router Advertisement Lifetime Enter the router advertisement lifetime in minutes If you selected Stateful DHCPv6 as the Autoconfigu...

Страница 38: ...tomatically or Use the following DNS address If Use the following DNS address is selected Primary DNS Server Enter the primary DNS server address Secondary DNS Server Enter the secondary DNS server ad...

Страница 39: ...larger address allocation such as 63 Contact your ISP for more information Autoconfiguration Type SelectSLAAC RDNSS SLAAC StatelessDHCP orStatefulDHCPv6 If you selected SLAAC RDNSS or SLAAC Stateless...

Страница 40: ...username provided by your ISP Password Enter the password provided by your ISP Address Mode Select Static IP if your ISP assigned you an IP address In most cases select Dynamic IP IP Address If you s...

Страница 41: ...er address Secondary DNS Server Enter the secondary DNS server address LAN IPv6 Address Settings Enable DHCP PD Enable or disable prefix delegation services LAN IPv6 Link Local Address Displays Covr P...

Страница 42: ...llowing for a larger address allocation such as 63 Contact your ISP for more information Autoconfiguration Type SelectSLAAC RDNSS SLAAC StatelessDHCP orStatefulDHCPv6 If you selected SLAAC RDNSS or SL...

Страница 43: ...king 6rd Configuration Choose the 6rd DHCPv4 Option to automatically discover and populate the data values or choose Manual Configuration to enter the settings yourself If you selected Manual Configur...

Страница 44: ...elected SLAAC RDNSS or SLAAC Stateless DHCP as the AutoconfigurationType Router Advertisement Lifetime Enter the router advertisement lifetime in minutes If you selected Stateful DHCPv6 as the Autocon...

Страница 45: ...ULA Settings Enable ULA Click here to enable Unique Local IPv6 Unicast Addresses settings Use Default ULA Prefix Enable this option to use the default ULA prefix If you selected Enable ULA and disable...

Страница 46: ...e the Triple Play VLAN feature Priority ID Enable or disable traffic priority ID for the Internet IPTV and VOIP VLANs Higher priority ID traffic takes precedence over traffic with a low priority ID ta...

Страница 47: ...43 D Link COVR 2202 User Manual Section 3 Configuration InterfaceTrafficType Setting LAN Port 1 From the drop down menu select the VLAN for LAN port 1 Click Save when you are done VLAN Continued...

Страница 48: ...icient throughput It is recommend to leave this feature enabled Advanced Settings Wi Fi Name SSID Enter a name for your Covr Wi Fi network Password Create a password for your Covr Wi Fi network Wirele...

Страница 49: ...devices to your Covr Points is withWi Fi Protected Setup WPS WPS PBC Status Enable or disableWPS Push Button Configuration PBC functionality Enabling this feature allows wireless clients to connect t...

Страница 50: ...me SSID Enter a name for your guest wireless network Password Create a password for your guest Wi Fi network Wireless clients will need to enter this password to successfully connect to the network Sc...

Страница 51: ...lick Save you will need to enter the new IP address in your browser to get back into the configuration utility Subnet Mask Enter the subnet mask of the router The default subnet mask is 255 255 255 0...

Страница 52: ...length of time for the IP address lease in minutes Always Broadcast Enable this feature to broadcast your network s DHCP server to LAN WLAN clients Advanced Settings WAN Port Speed You may set the por...

Страница 53: ...her devices on the network In the Advanced menu on the bar on the top of the page click QoS Engine Management Type From the drop down menu select Off to disable or select Manage by Device to enable th...

Страница 54: ...ty If no devices are explicitly assigned with any priority they will all be treated with equal priority If some devices are not assigned with any priority and others are the unassigned devices will be...

Страница 55: ...ats over the Internet and is not recommended in ordinary situations DMZ IP Address If you enabled DMZ enter the IP address of the client you wish to expose or use the drop down menu to quickly select...

Страница 56: ...aving trouble connecting with your corporate network try turning this ALG off Please check with the system administrator of your corporate network whether your VPN client supports NAT traversal RTSP A...

Страница 57: ...reate a new rule click the Add Rule button Click Save when you are done If you edit or create a rule the following options will appear Name Enter a name for the rule Source IP Address Range Entertheso...

Страница 58: ...e the following options will appear Name Enter a name for the rule Local IP Enter the IP address of the device on your local network to which the port will be forwarded Alternatively select the device...

Страница 59: ...ternatively selecttheprotocol Application from the drop down menu Local IP Enter the IP address of the device on your local network to which the external port will forward Alternatively select the dev...

Страница 60: ...of sites to block select DENY client access to ONLY these sites from the drop down menu All other sites will be accessible If you want to specify a list of sites to allow select ALLOW clients access t...

Страница 61: ...e click on its pencil icon in the Edit column If you wish to create a new rule click the Add Route button Click Save when you are done If you edit or create a rule the following options will appear Na...

Страница 62: ...edit or create a rule the following options will appear Name Enter a name for the route DestNetwork This is the IP address of the router used to reach the specified destination PrefixLen Enter the IP...

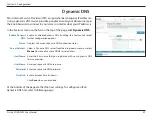
Страница 63: ...ling this feature will reveal further configuration options Status Displays the current dynamic DNS connection status Server Address Select a Dynamic DNS server from the drop down menu or select Manua...

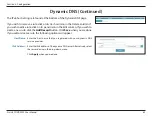
Страница 64: ...edit a rule click on its pencil icon in the Edit column If you wish to create a new rule click the Add Record button Click Save when you are done If you edit or create a rule the following options wil...

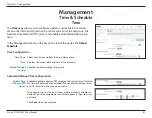
Страница 65: ...nfiguration Time Zone Select your time zone from the drop down menu Time Displays the current date and time of the extender Enable Daylight Saving Enable or disable daylight saving time Automatic Manu...

Страница 66: ...a new rule click the Add Device button Click Save when you are done If you edit or create a rule the following screen will appear First enter the name of your schedule in the Name field Each box repre...

Страница 67: ...eck this box to send the Covr Point logs to a SysLog Server If Logging to the Syslog Server is Enabled Syslog Server IP Address Enter the IP address for the Syslog server If the Syslog server is conne...

Страница 68: ...ccount password E mail Log When Full or On Schedule Send When Log Full If enabled this option will set Covr Point A to automatically send the log when it is full Send on Schedule If enabled this optio...

Страница 69: ...network Advanced Settings Administration Enable HTTPS Server Check to enable HTTPS to connect to the extender securely Instead of using http covr local you must use https covr local in order to conne...

Страница 70: ...p solid white during normal operation and will instead turn off The LED will still light up in the corresponding color and mode in any of the following circumstances Firmware upgrade Device reboot Est...

Страница 71: ...ion file torestoreyourconfigurationsettingsfrom Onceselected clickRestore to apply the settings from the configuration backup Restore To Factory Default Settings Click Restore to restore all configura...

Страница 72: ...versionanddateforCovrPointA master and any additional Covr Points unit extender Check for New Firmware Clickthisbuttontoprompttheextendertoautomaticallycheckforanew firmware version If a newer version...

Страница 73: ...ovrWi Fi network In the Management menu on the bar on the top of the page click Statistics You can view the Internet LAN Wi Fi 2 4GHz and Wi Fi 5GHz by clicking on the respective tabs at the top of th...

Страница 74: ...to Adding more Covr Points is a quick and easy process You can add up to 4 additional units for a combined total of 6 Covr Points Using the D Link Wi Fi App You can easily add additional units using...

Страница 75: ...71 D Link COVR 2202 User Manual Section 4 Adding Additional Extenders 2 From the app menu tap InstallYour Device Using the D Link Wi Fi App Continued 3 Next select COVR 2202 from the list and tap NEXT...

Страница 76: ...an existing network choose Add to existing Covr network and tap NEXT Using the D Link Wi Fi App Continued 5 You will now be guided through a step by step process for setting up the new Covr Point Simp...

Страница 77: ...er to your user manual for the wireless device you want to connect to make sure you understand how to enable WPS After consulting your device s manual follow the steps below Step 2 Within 120 seconds...

Страница 78: ...latest firmware You can upgrade your device s firmware using the web based user interface or on your mobile device using the D Link Wi Fi app 1 When a new firmware is available the device icon on the...

Страница 79: ...new firmware version is available Tap Yes to continue 3 In the Firmware Upgrade window tap Upgrade Now to begin the upgrade process Note Do not power off or reboot the device while the upgrade is in p...

Страница 80: ...setting to factory settings will undo all of your settings To reset the device press and hold down the Reset button on the bottom of the device using an unfolded paper clip until the COVR LED on the f...

Страница 81: ...ireless LANs are used increasingly in both home and office environments and public areas such as airports coffee shops and universities Innovative ways to utilize WLAN technology are helping people wo...

Страница 82: ...t transmit data from one point A to point B But wireless technology has restrictions as to how you can access the network You must be within the wireless network range area to be able to connect your...

Страница 83: ...speakers and other devices that operate on batteries Who uses wireless Wireless technology as become so popular in recent years that almost everyone is using it whether it s for home office business D...

Страница 84: ...etting up a wireless network Tips Here are a few things to keep in mind when you install a wireless network Centralize your router or access point Make sure you place the router access point in a cent...

Страница 85: ...ts auto MDI MDIX IEEE 802 11acWave II IEEE 802 11n IEEE 802 11g IEEE 802 11a Functionality Security 128 bit AES data encryption WPA WPA2 wireless security Advanced Features CovrWi Fi Auto configuratio...

Страница 86: ...e derived from the IEEE 802 11ac and 802 11n standards specifications Actual data throughput will vary Network conditions and environmental factors including volume of network traffic building materia...

Страница 87: ...off and on the user is encouraged to try to correct the interference by one of the following measures Reorient or relocate the receiving antenna Increase the separation between the equipment and recei...

Страница 88: ...ent Caution i the device for operation in the band 5150 5250 MHz is only for indoor use to reduce the potential for harmful interference to co channel mobile satellite systems ii the maximum antenna g...

Страница 89: ...selon le cas iv les pires angles d inclinaison n cessaires pour rester conforme l exigence de la p i r e applicable au masque d l vation et nonc e la section 6 2 2 3 doivent tre clairement indiqu s v...

Страница 90: ...86 D Link COVR 2202 User Manual Appendix C Safety Statements 1 MPE 1mW cm2 40 cm...

Страница 91: ...and Fr quence bande s Bandas de Frecuencia Frequenza e Frequentie s Max Output Power EIRP Max Output Power Consommation d nergie max Potencia m xima de Salida Potenza max Output Max Output Power 5 G 5...

Страница 92: ...a toote p sivara on allalaadimiseks saadaval tootelehel www dlink com English Hereby D Link Corporation declares that this product accessories and software are in compliance with directive 2014 53 EU...

Страница 93: ...k oldal r l t lthet le a www dlink com c men Polski Polish D Link Corporation niniejszym o wiadcza e ten produkt akcesoria oraz oprogramowanie s zgodne z dyrektywami 2014 53 EU Pe en tekst deklaracji...

Страница 94: ...a heild sinni og fastb na v runnar af vefs u v runnar www dlink com Norsk Norwegian Herved erkl rer D Link Corporation at dette produktet tilbeh ret og programvaren er i samsvar med direktivet 2014 53...

Страница 95: ...our product uses 2 4 GHz and or 5 GHz wireless HINWEIS ZUR VERWENDUNG VON DRAHTLOS NETZWERK WLAN IN DER EUROP ISCHEN GEMEINSCHAFT NUR F R EIN DRAHTLOSES PRODUKT Der Betrieb dieses Ger ts in der Europ...

Страница 96: ...de l UE Merci de vous r f rer au guide d utilisation ou de la fiche technique afin de v rifier si votre produit utilise 2 4 GHz et ou 5 GHz sans fil AVISO DE USO DE LA LAN DE RADIO INAL MBRICA EN LA...

Страница 97: ...te per operare a 5 Ghz nell Unione europea Ti invitiamo a fare riferimento al manuale del prodotto o alla scheda tecnica per verificare se il tuo prodotto utilizza le frequenze 2 4 GHz e o 5 GHz KENNI...

Страница 98: ...icherheitsvorschriften dienen als Hilfe zur Gew hrleistung Ihrer eigenen Sicherheit und zum Schutz Ihres Produkts Weitere Details finden Sie in den Benutzeranleitungen zum Produkt Statische Elektrizit...

Страница 99: ...toujours le produit de l alimentation avant de le nettoyer et utilisez uniquement un chiffon sec non pelucheux INSTRUCCIONES DE SEGURIDAD Las siguientes directrices de seguridad general se facilitan p...

Страница 100: ...sempre il prodotto dalla presa elettrica prima di pulirlo e usare solo un panno asciutto che non lasci filacce VEILIGHEIDSINFORMATIE De volgende algemene veiligheidsinformatie werd verstrekt om uw eig...

Страница 101: ...s Symbol auf dem Produkt oder der Verpackung weist darauf hin dass dieses Produkt gem bestehender rtlicher Gesetze undVorschriftennicht berdennormalenHausm llentsorgtwerdensollte sonderneinerWiederver...

Страница 102: ...us sur les produits et emballages respectueux de l environnement veuillez consulter le www dlinkgreen com ESPA OL ES Este s mbolo en el producto o el embalaje significa que de acuerdo con la legislaci...

Страница 103: ...ia e a ridurre le emissioni di anidride carbonica Per ulteriori informazioni sui prodotti e sugli imballaggi D Link a ridotto impatto ambientale visitate il sito all indirizzo www dlinkgreen com NEDER...

Страница 104: ...ci zar wno w przypadku samych produkt w jak i opakowa Firma D Link zaleca aby Pa stwo zawsze prawid owo wy czali z u ytku swoje produkty D Link gdy nie s one wykorzystywane Post puj c w ten spos b poz...

Страница 105: ...takar t s ban s a sz ndioxid kibocs t s nak cs kkent s ben K rnyezetbar t term keinkr l s csomagol sainkr l tov bbi inform ci kat a www dlinkgreen com weboldalon tudhat meg NORSK NO Dette symbolet p p...

Страница 106: ...ducere CO2 udledningerne Du kan finde flere oplysninger om vores milj m ssigt ansvarlige produkter og emballage p www dlinkgreen com SUOMI FI T m symboli tuotteen pakkauksessa tarkoittaa ett paikallis...

Страница 107: ...r mer information om v ra milj ansvariga produkter och f rpackningar www dlinkgreen com PORTUGU S PT Este s mbolo no produto ou embalagem significa que de acordo com as leis e regulamenta es locais e...

Отзывы: