


2
Hardware Installation
System Requirements
•
Web Browser (Java Enabled recommended)
•
CPU: Pentium II, 266 MHz or above
•
Memory Size: 32 MB (64 MB recommended)
•
VGA card resolution: 800x600 or above
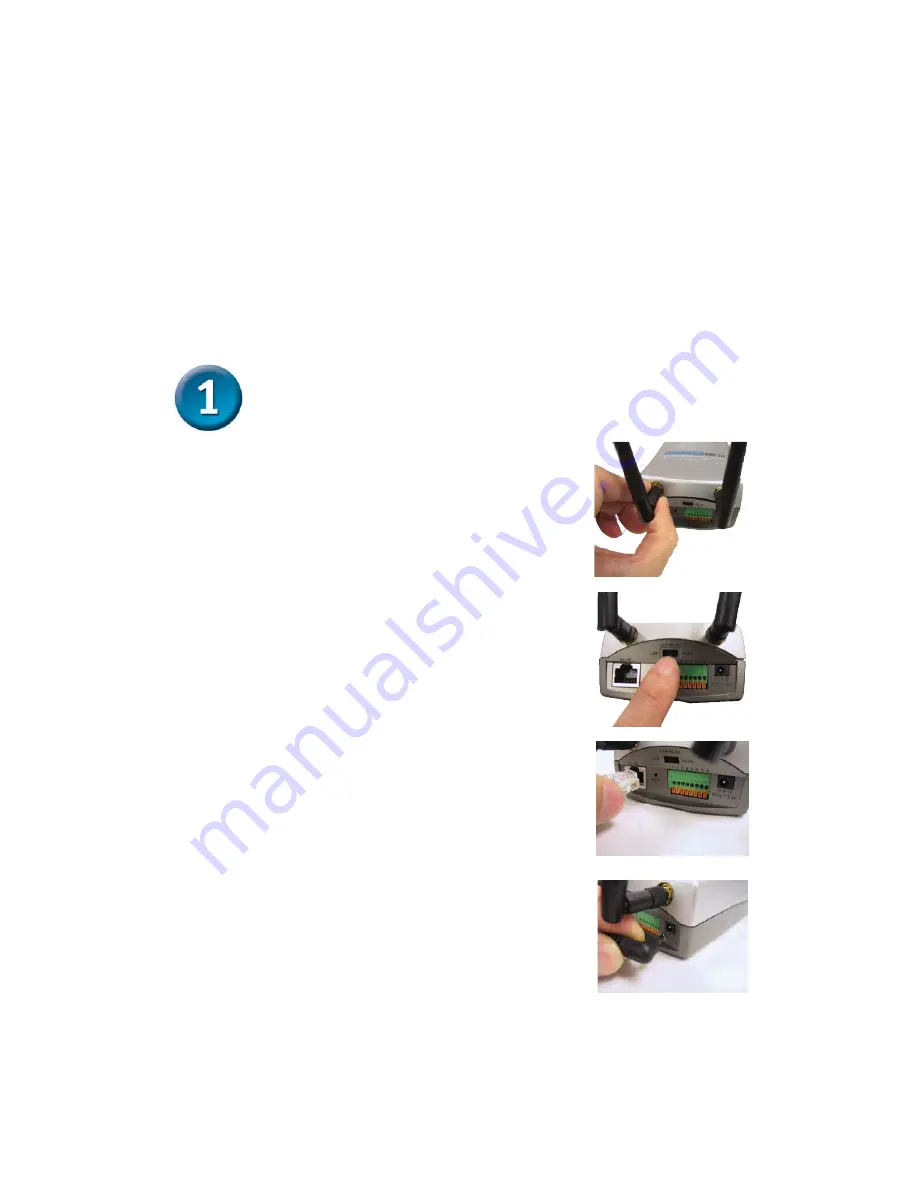
Connect the Ethernet Cable
Connect an Ethernet cable to the network cable connector
located on the DCS-1000W’s rear panel and attach it to
the network.
Note: We suggest using the Ethernet port to configure the
DCS-1000W, then installing the camera in its preferred
location. Doing so will allow easy installation and proper
configuration.
Attach the External Power Supply
Attach the external power supply to the DC power input
connector located on the rear panel of your camera and
connect it to your local power supply.
Note:
Power source
is confirmed when the blue LED Power Indicator on the
Internet Camera is illuminated. Network connection is
indicated by an orange LED.
Install Antennas
Locate the antenna connectors on the rear panel of your
DCS-1000W. Attach the 2 external antennas that came with
the DCS-1000W into the antenna connectors.
Configure Network Communication
Locate the slide switch located on the rear panel of your
DCS-1000W. Position the slide switch to either the LAN,
LAN+WLAN, or WLAN position depending on the type of
network configuration that you are planning to use with
your camera. Position the switch on LAN+WLAN if you
wish to connect to both your wired and wireless network.


