background image

102

D-Link DIR-885L User Manual

Section 4 - Configuration

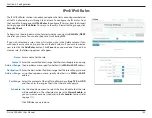
IPv4/IPv6 Rules

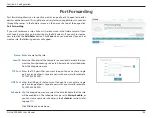
Enter a name for the rule.

Enter the source IP address range that the rule will apply to, and using 

the drop-down menu, specify whether it is a 

WAN

 or 

LAN

 IP address.

Enter the destination IP address range that the rule will apply to, and 

using the drop-down menu, specify whether it is a 

WAN

 or 

LAN

 IP 

address.

Select the protocol of the traffic to allow or deny (

Any

TCP

, or 

UDP

and then enter the range of ports that the rule will apply to.

Use the drop-down menu to select the time schedule that the rule 

will be enabled on. The schedule may be set to 

Always Enable

, or 

you can create your own schedules in the 

Schedules

 section (refer 

to page 111). 

Click 

OK

 when you are done.

The IPv4/IPv6 Rules section is an advanced option that lets you configure what kind 

of traffic is allowed to pass through the network. To configure the IPv4 rules, from 

the Firewall Settings page click 

IPv4 Rules

. To configure IPv6 rules, from the Firewall 

Settings page click 

IPv6


Rules

. To return to the main Firewall Settings page, click 

Security Check

.

To begin, use the drop-down menu to select whether you want to 

ALLOW

 or 

DENY


the rules you create. You can also choose to turn filtering 

OFF

.

If you wish to remove a rule, click on its trash can icon in the Delete column. If you 

wish to edit a rule, click on its pencil icon in the Edit column. If you wish to create a 

new rule, click the 

Add Rules 

button

Click 

Save

 when you are done. If you edit or 

create a rule, the following options will appear:

Name:

Source IP 

Address Range:

Destination IP 

Address Range:

Port Range:

Schedule:

Содержание AC3150

Страница 1: ...Version 1 00 2015 09 03 User Manual DIR 885L AC3150 Ultra Wifi Router ...

Страница 2: ...her countries App StoreSM is a service mark of Apple Inc Chrome browser Google Play and Android are trademarks of Google Inc Internet Explorer Windows and the Windows logo are trademarks of the Microsoft group of companies Copyright 2015 by D Link Corporation Inc All rights reserved This publication may not be reproduced in whole or in part without prior expressed written permission from D Link Co...

Страница 3: ...rePort 23 Using the mydlink SharePort app for iPad iPhone and iPod touch 23 mydlink SharePort Application Setup 23 Main Menu 28 Documents 29 Pictures 31 Videos 33 Music 35 Folders 38 Favorites 41 Using the mydlink SharePort app for Android 42 mydlink SharePort Application Setup 42 Main Menu 47 Documents 48 Pictures 50 Videos 52 Music 54 Folders 57 Favorites 61 Configuration 62 Home 63 Internet 63 ...

Страница 4: ...11 System Log 112 Admin 113 System 114 Upgrade 115 Statistics 116 Connect a Wireless Client to your Router 117 WPS Button 117 Windows 8 118 WPA WPA2 118 Windows 7 120 WPA WPA2 120 WPS 123 Windows Vista 127 WPA WPA2 128 Windows XP 130 WPA WPA2 131 Troubleshooting 133 Wireless Basics 137 What is Wireless 138 Tips 140 Wireless Modes 141 Networking Basics 142 Check your IP address 142 Statically Assig...

Страница 5: ...apowersupplywithadifferentvoltageratingthantheoneincludedwiththeDIR 885Lwillcausedamageandvoidthewarranty for this product If any of the above items are missing please contact your reseller DIR 885L Ethernet Cable Power Adapter Wi Fi Configuration Card Quick Installation Guide Wi Fi Configuration Note ...

Страница 6: ...er 9 or higher Firefox 20 or higher Safari 5 1 or higher Chrome 25 or higher Windows Users Make sure you have the latest version of Java installed Visit www java com to download the latest version mydlink Requirements iPhone iPad iPod touch iOS 6 0 or higher Android device 2 3 or higher Computer with the following browser requirements Internet Explorer 9 or higher Firefox 20 or higher Safari 5 1 o...

Страница 7: ... need for a PC The DIR 885L is also mydlink enabled which gives you access to your home network no matter where you go Now you can monitor and manage your home network right from your laptop iPhone iPad or Android device mydlink enabled routers canbeconfiguredtosendanemailtokeepyouinformedanywhere anytimewhennewdevicesareconnectingtoyournetwork or unwanted access is detected Monitor in real time w...

Страница 8: ...ices as well as PCI USB and CardBus network adapters Advanced Firewall Features The web based user interface displays a number of advanced network management features including ContentFiltering EasilyappliedcontentfilteringbasedonMACaddress URL and ordomainname Scheduling The Firewall wireless and port forwarding features can be scheduled to be active on certain days or for a duration of a set num...

Страница 9: ...etup The DIR 885L is designed to give you the fastest most stable network connection possible In order to maximize performance orient the antennas at an angle pointing outward and away from the base unit NOTE Attach the antennas to the router before powering it on 45 ...

Страница 10: ...e factory default settings 3 WPS Button Press to start the WPS process and automatically create a secure connection to a WPS client 4 USB 3 0 Port Connect a USB flash drive to share content or connect it to a USB printer to share it on your network 5 Gigabit LAN Ports 1 4 Connect Ethernet devices such as computers switches storage NAS devices and game consoles 6 Gigabit Internet Port Using an Ethe...

Страница 11: ...olid light indicates connection on the Internet port If the LED is orange the connection is good but the router cannot connect to the Internet 3 Wireless 2 4 GHz LED A solid white light indicates that the 2 4 GHz wireless band is enabled 4 Wireless 5 GHz LED A solid white light indicates that the 5 GHz wireless band is enabled 5 USB 3 0 LED A solid white light indicates that a USB device detected ...

Страница 12: ...This router only supports Internet connectivity though the wired Internet Ethernet port If you were using a USB connection on your computer to access the Internet before using the router then you must turn off your modem disconnecttheUSBcableandconnectanEthernetcabletotheInternetportontherouter andthenturnthemodem back on In some cases you may need to call your ISP to change connection types USB t...

Страница 13: ...5 meters at a 45 degree angle appears to be almost 3 feet 1 meter thick At a 2 degree angle it looks over 42 feet 14 meters thick Position devices so that the signal will travel straight through a wall or ceiling instead of at an angle for better reception 3 Building materials make a difference A solid metal door or aluminum studs may have a negative effect on range Try to position access points w...

Страница 14: ...outer close to your modem and a computer Place the router in an open area of your intended work area for better wireless coverage 3 UnplugtheEthernetcablefromyourmodem orexistingrouterifupgrading thatisconnectedtoyourcomputer Plug it into the LAN port labeled 1 on the back of your router The router is now connected to your computer Modem 4 DIR 885L Computer ...

Страница 15: ...roadband modem and wait for two minutes 6 Connect the supplied power adapter into the power receptor on the back of the router and then plug it into a power outlet or surge protector Press the power button and verify that the power LED is lit Allow 1 minute for the router to boot up Note This unit is to be used with power supply model WA 36A12R 7 Ifyouareconnectingtoabroadbandservice youmaybeonlin...

Страница 16: ... Internet and connect to your clients D Link Setup Wizard This wizard will launch when you log into the router for the first time Refer to page 13 QRS Mobile App Use your iPhone iPad or iPod touch to configure your router Refer to page 18 Manual Setup Log into the router and manually configure your router Refer to page 62 Getting Started ...

Страница 17: ...If this is your first time installing the router open your web browser and enter http dlinkrouter local in the address bar Alternatively enter the IP address of the router default http 192 168 0 1 Please refer to page 62 Please wait while your router detects your Internet connection type If the router detects your Internet connection you may need to enter your ISP information such as username and ...

Страница 18: ...btained from your Internet service provider and click Next to continue IftherouterdetectedoryouselectedPPPoE enteryourPPPoEusername and password and click Next to continue Note Make sure to remove your PPPoE software from your computer The software is no longer needed and will not work through a router IftherouterdetectedoryouselectedStatic entertheIPandDNSsettings supplied by your ISP Click Next ...

Страница 19: ...to connect to your wireless network Click Next to continue In order to secure the router please enter a new password You will be prompted for this password every time you want to use the router s web configuration utility Click Next to continue The Summary window will display your settings Click Next if you are satisfied or click Back to make changes to them DIR 885L DIR 885L DIR 885L ...

Страница 20: ...ick Next to continue If you do not want to register at this time click Skip If you clicked Yes enter your mydlink account name email address and password Click Next to register your mydlink account with the router If you clicked No fill out the requested information and click Next to create your mydlink account At the end of the wizard you will be presented with a final summary of your settings Cl...

Страница 21: ...eceive notices browse network users and configure your router from an iPhone iPad iPod touch iOS 6 0 or higher or Android device 2 3 or higher Todownloadthe mydlinkLite app visittheAppleStore AndroidMarket or http mydlink com Lite PC and Mac users can use the mydlink portal at http mydlink com ...

Страница 22: ...going to your wireless utility on your device Scan for the Wi Fi name SSID as listed on the supplied info card Select and then enter your Wi Fi password Step 3 Once wirelessly connected to the router launch the QRS Mobile app from the Home screen of your device Note The following steps show the Android interface of the QRS Mobile app IfyouareusinganiPhone iPad oriPodtouch theappearancemaybe differ...

Страница 23: ...vice password and tap Log In Tap Next once the Operation Mode screen appears Step 5 Atthispoint pleaseensurethatyoutherouterisconnectedtoamodem Plug one end of the provided Ethernet cable into your DSL or cable modem and plug the other end into the port marked INTERNET on the DIR 885L Tap Next to automatically detect your Internet connection and proceed to the next step ...

Страница 24: ... of at least 8 characters Any device trying to connect to the router wirelessly will need to enter this password the first time it connects Tap Next to proceed Step 7 Enter the administrator password of your choice Unlike the Wi Fi password thispasswordisonlyrequiredwhenyouneedtoconfigurethe router See Configuration onpage62fordetailsofwhenthispassword is used Tap Next to proceed ...

Страница 25: ...select No I want to create a new mydlinkaccount EnteryourE mailaddress chooseamydlinkpassword and check the I accept the mydlink terms and conditions box Finally tap Register account to create your new mydlink account If you do not want to configure your router with mydlink at this stage tap Skip to proceed Step 9 Ifyouwishtoreceivepushnotificationswheneveranewfirmwareupdate is available check the...

Страница 26: ...mplete the setup Your device has now been successfully configured You can share this information by tapping Share By NFC Share By E mail or tap Finish to exit the app If you tap Share By NFC you can now touch the tag with your other device until the confirmation message appears Note NFC is not supported by iPhone iPad and iPod touch devices ...

Страница 27: ...net connection Streaming performance will vary depending on the quality of your Internet connection Note If you choose to skip the mydlink SharePort registration during the initial setup of your DIR 885L you may begin the registration process any time by accessing the mydlink SharePort feature from within the router configuration Please see page 93 for details on how to begin the mydlink shareport...

Страница 28: ...can scan the code for mydlink SharePort to the right 4 Tap the mydlink SharePort icon and the app will load 5 Tap Set up to go to Settings and enter the Admin password and your mydlink Account Login information when the pop up displays Tap Done when your information is entered The Admin password is only for local access if you can connect through the Internet then you can leave the Admin password ...

Страница 29: ... Access If you need to change your settings tap the gear icon at the top right corner to enter the settings page 7 If you have more than one device registered to your mydlink account you can tap Device List in the top left corner and you will be prompted to select the device you wish to use Note A red wireless icon indicates that your router s network environment may not be optimal for streaming m...

Страница 30: ...and catalog your files 2 Use your iPhone iPad or iPod touch to search for and download the free mydlink SharePort app from the App Store If you have a QR code reader you can scan the code for mydlink SharePort to the right 3 On your mobile device go to your Wi Fi settings and connect to your router s wireless network using the default Wi Fi settings Locate the Wi Fi name SSID and password for your...

Страница 31: ...nterface to stream media and access files stored on your removable drive The wireless icon at the bottom will be lit blue to indicate a Local Access connection If you need to change your settings tap the gear icon at the top right corner to enter the settings page Note A red wireless icon indicates that your router s network environment may not be optimal for streaming media and you may experience...

Страница 32: ...iles in a folder view Tap on the star icon to access your favorite files The mydlink SharePort main menu has different sections that let you see all the documents photos movies or music stored on your removable storage Tap or or swipe left or right to move between the different sections The Wi Fi icon at the bottom indicates an active local network connection blue or remote connection green red Ta...

Страница 33: ...orage Tap to mark files for deletion Tap the star icon next to each file to download it to your device and add it into your Favorites section Tapping this icon gives you additional options Mail Tap to e mail the file iCloud Tap to store the file on iCloud AirPrint Tap to print the file Open In Tap to use a third party app to open the file The bottom menu bar includes these options Search Bar Tap t...

Страница 34: ...ual Section 3 Getting Started Tap on a file to start the document viewer In the viewer Tap to add remove the file from your Favorites Tap to bring up the same options as Note Some files may require a third party app to view them ...

Страница 35: ...and add it into your Favorites section Tapping this icon gives you additional options Mail Tap to e mail the image iCloud Tap to store the image on iCloud AirPrint Tap to print the image Facebook Tap to upload the image to your Facebook account Twitter Tap to upload the image to your Twitter account Open In Tap to use a third party app to open the file Search Bar Tap to go back to the main menu Ta...

Страница 36: ...885L User Manual Section 3 Getting Started Tap on a file to start the photo viewer In the viewer Tap to add remove the current image from your Favorites Tap to start the slideshow Tap to bring up the same options as ...

Страница 37: ... for a specific file Tap to mark files for deletion Tap the star icon next to a file to download it to your device and add it into your Favorites section Tapping this icon gives you additional options Mail Lets you e mail the file iCloud Lets you store the file on iCloud Open In Lets you use a third party app to open the file Search Bar The bottom menu bar includes these options Tap to go back to ...

Страница 38: ...You can scroll to any time on the time line by holding and sliding your finger Tap to enter exit fullscreen mode Tap to add remove the file from your Favorites Tapping this icon gives you additional options Mail Lets you e mail the video iCloud Lets you store the video on iCloud Open In Lets you use a third party app to open the file ...

Страница 39: ...ter a filename here to search your storage Tap to create a playlist and mark files for deletion Tap the star icon next to each file to download it to your device and add it into your Favorites section Tapping this icon gives you additional options Mail Lets you e mail the file iCloud Lets you store the file on iCloud Open In Lets you use a third party app to open the file Search Bar Tap to go back...

Страница 40: ...n the player Tap to repeat all Tap again to repeat a single song Tap to skip to the previous next song Tap to enable disable shuffle mode To create a playlist Tap Edit Add Playlist Enter a name for the playlist then tap Save The name of the playlist will appear in the browser next to the icon ...

Страница 41: ...add songs to a playlist Tap the playlist in the browser Tap Add Music to add songs to the current playlist Tick the songs you wish to add and tap Done To delete songs from the playlist Tap Edit in the playlist browser and mark the files to be deleted Tap Delete ...

Страница 42: ...Enter a filename here to search your storage Tap to take you to the editing screen where you can add a folder and mark files for deletion or copying Tap the star icon next to each file to download it to your device and add it into your Favorites section Tapping the icon gives you additional options depending on the file type Search Bar The bottom menu bar includes these options Tap to go back to t...

Страница 43: ...lder Browse to the directory you wish to create a new folder in Tap Edit at the top right Tap Add Folder to add a new folder Enter the name of the new folder then tap Save Tap OK to confirm folder creation To copy files Tap on Copy to bring up a window where you can select the folder to copy to Browse to the directory you want to copy the marked files to and tap Paste You can also tap Add Folder t...

Страница 44: ... device Browse to the folder you wish to upload to Tap Upload at the bottom Select the photos videos you wish to upload Tap Done During the upload process the size of the file and the upload progress will be displayed To upload more files tap the icon at the top right and repeat the steps listed above ...

Страница 45: ...cal storage in Favorites The file will still be accessible in other mydlink SharePort sections Tapping this icon gives you additional options depending on the file type The bottom menu bar includes these options Tap on a file to start the file viewer In the viewer Tap to add remove the file from your Favorites Tap to bring up additional options Note The file options available will vary depending o...

Страница 46: ... need a minimum of 2 Mbit s upload bandwidth for your router s Internet connection Streaming performance will vary depending on the quality of your Internet connection Note If you choose to skip the mydlink SharePort registration during the initial setup of your DIR 885L you may begin the registration process any time by accessing the mydlink SharePort feature from within the router configuration ...

Страница 47: ... scan the code for mydlink SharePort to the right 4 Tap the mydlink SharePort icon and the app will load 5 Tap Set up to go to Settings and enter the Admin password and your mydlink Account Login information when the pop up displays Tap Apply when your information is entered The Admin password is only for local access if you can connect through the Internet then you can leave the Admin password bl...

Страница 48: ...ss files stored on your removable drive The wireless icon at thebottomwillbelitgreentoindicateyouareconnectedtotherouter through Remote Access 8 If you have more than one device registered to your mydlink account you can tap Device List in the top left corner and you will be prompted to select the device you wish to use Note A red wireless icon indicates that your router s network environment may ...

Страница 49: ...log your files 2 Use your Android mobile device to search for and download the free mydlink SharePort app from Google Play If you have a QR code reader you can scan the code for mydlink SharePort to the right 3 On your mobile device go to your Wi Fi settings and connect to your router s wireless network using the default Wi Fi settings Locate the Wi Fi name SSID and password for your device as pri...

Страница 50: ...akenbacktothedevicelistwhereyoucanselectthedevice for use with mydlink SharePort 7 You can now use the mydlink SharePort app interface to stream media and access files stored on your removable drive The wireless icon at the bottom will be lit blue to indicate a Local Access connection Note A red wireless icon indicates that your router s network environment may not be optimal for streaming media a...

Страница 51: ...favorite files Note Available features may differ depending on the Android OS version of your device Main Menu The mydlink SharePort main menu has different sections that let you see all the documents photos movies or music stored on your removable storage Tap or or swipe left or right to move between the different sections The Wi Fi icon at the bottom indicates an active local network connection ...

Страница 52: ...files on your mobile device Type in the name of a file to search for it Tap to return to the main menu Tap to refresh sort or mark files for deletion Tap the star icon next to each file to download it to your device and add it into your Favorites section Search Bar Tap for additional options Tap to return to the main menu Tap to update the list of files Tap to sort the files by name size type or d...

Страница 53: ...start the document viewer In the viewer Tap the screen to bring up zoom in out buttons Drag the screen up or down to scroll between pages Tap to perform File Find Zoom Reading View Go To Page and Bookmarks actions Note Available actions may differ depending on your Android OS ...

Страница 54: ...ble storage Type in the name of a file to search for it Tap to return to the main menu Tap to start a slideshow Tap to refresh sort or mark files for deletion Tap the star icon next to each file to download it to your device and add it into your Favorites section Search Bar Tap to return to the main menu Tap to update the list of files Tap to sort the files by name size type or date Check a file t...

Страница 55: ... download it to your device and add it into your Favorites section Tap to start a slideshow Tap the image to stop the slideshow Tap to delete the current image Tap OK to confirm Tap to bring up additional options using other applications Tap to access the image editor Note This function may vary depending on the version of your Android OS ...

Страница 56: ...removable storage Type in the name of a file to search for it Tap to return to the main menu Tap to refresh sort or mark files for deletion Tap the star icon next to a file to download it to your device and add it into your Favorites section Search Bar Tap to return to the main menu Tap to update the list of files Tap to sort the files by name size type or date Check a file then tap this icon to d...

Страница 57: ...arted Tap on a file to start playing it Tap on the screen to bring up the scroll bar pause button and play button Tap to resume playback Tap to pause the video Note Available features may vary depending on the Android OS version installed on your device ...

Страница 58: ...ap to return to the main menu Tap to update the list of files Tap to sort the files by name size type or date Check a file then tap this icon to delete it Type in the name of a file to search for it Tap to return to the main menu Tap to refresh sort or mark files for deletion Tap to browse your playlists Tap the star icon next to a file to download it to your device and add it into your Favorites ...

Страница 59: ...ols Tap to repeat all Tap again to repeat a single song Tap to skip to the previous next song Tap to play or pause the song Tap to enable disable shuffle mode To create a playlist Tap Tap Add new playlist Enter a name for the playlist then tap OK The name of the playlist will appear in the browser next to the icon You can tap then to refresh the playlist page ...

Страница 60: ...o a playlist Tap a playlist to see its contents Tap Add Music to add songs to the current playlist Tick the songs you wish to add and tap to save To delete songs from the playlist Tap Edit in the playlist browser and mark the files to be deleted Tap then tap OK to confirm ...

Страница 61: ...o return to the main menu Tap to upload files Tap to refresh sort create a new folder or mark files for deletion and copying You can browse your removable storage in a folder view in the folders section Tapping the filename will open the viewer player for that file type as described in the previous pages You can also upload files from your mobile device to the removable storage attached to your ro...

Страница 62: ...tination Tap to select files and perform the following actions Tap to update the list of files Tap to sort the files by name size type or date Tap to create a new folder Mark a file then tap this icon to delete it Mark a file then tap this icon to copy it To delete files Tap on and tick the box next to a file for deletion Tap on to delete your selected files Tap OK to confirm ...

Страница 63: ...arted To create a new folder Browse to the directory you wish to create a new folder in Tap then Enter the name of the folder in the box then tap OK Tap Paste or Cancel You can also tap New Folder if you wish to create a folder in the current directory ...

Страница 64: ...u wish to upload to Tap and browse to the file or files you wish to upload from the local device Tick the box next to each of the files you wish to upload Tap Upload During the upload process the size of the file and the upload progress will be displayed under the file name To remove a file from the upload queue tap the X next to it ...

Страница 65: ... Files added to the Favoritessectionwillbecopiedhereforplaybackinacentralizedlocation Type in the name of a file to search for it Tap to return to the main menu Tap to refresh sort or mark files for deletion Search Bar Tap to return to the main menu Tap to update the list of files Tap to sort the files by name size type or date Check a file then tap to delete it Tap for additional options ...

Страница 66: ...re the router to its default settings To access the configuration utility open a web browser such as Internet Explorer and enter http dlinkrouter local Windows and Mac users may also connect by typing the IP address of the router by default this is http 192 168 0 1 in the address bar The router s home page will open displaying its current connection status The bar at the top of the page has quick ...

Страница 67: ... other pages The Home page displays whether or not the router is currently connected to the Internet If it is disconnected click Click to repair to bring up the setup wizard see page 13 To bring up more details about your Internet connection click on the Internet icon Click IPv4 or IPv6 to see details of the IPv4 connection and IPv6 connection respectively Click Release to disconnect from the Inte...

Страница 68: ...s MAC address and IPv4 IPv6 addresses To reconfigure the network settings either click Go to settings on the lower left or click Settings at the top of the page and then Network on the menu that appears Refer to page 94 To reconfigure the wireless settings either click Gotosettings on the lower right or click Settings at the top of the page and then Wireless on the menu that appears Refer to page ...

Страница 69: ...nd their IP addresses To edit each client s settings click the pencil icon on the client you want to edit Enter a custom name for this client Displays the vendor of the device Displays the MAC address of the device Enter a specific IP address for this client Enable to reserve this IP address for this client Allow or Block access to the router Click Save when you are done Name Vendor MAC Address IP...

Страница 70: ... icon to view details about the currently connected USB device DLNA media server SharePort and Windows File Sharing If you have a USB device connected you can see its name and how much free space it has To configure your SharePort settings click Go to settings and refer to page 96 DIR 885L ...

Страница 71: ...ge click Internet to see the Internet configuration options Choose your Internet connection type from the drop down menu You will be presented with the appropriate options for your connection type Click Advanced Settings to expand the list and see all of the options My Internet Connection Is For Dynamic IP DHCP refer to page 68 For Static IP refer to page 69 For PPPoE refer to page 70 For PPTP ref...

Страница 72: ... MaximumTransmission Unit you may need to change the MTU for optimal performance with your ISP ThedefaultMACaddressissettotheInternetport sphysicalinterface MAC address on the router You can use the drop down menu to replace the Internet port s MAC address with the MAC address of a connected client Click Save when you are done Host Name Primary DNS Server Secondary DNS Server MTU MAC Address Clone...

Страница 73: ...ISP MaximumTransmission Unit you may need to change the MTU for optimal performance with your ISP ThedefaultMACaddressissettotheInternetport sphysicalinterface MAC address on the router You can use drop down menu to replace theInternetport sMACaddresswiththeMACaddressofaconnected client Click Save when you are done IP Address Subnet Mask Default Gateway Primary DNS Server Secondary DNS Server MTU ...

Страница 74: ...onal Enter the primary DNS server IP address assigned by your ISP Enter the secondary DNS server IP address assigned by your ISP MaximumTransmission Unit you may need to change the MTU for optimal performance with your ISP ThedefaultMACaddressissettotheInternetport sphysicalinterface MAC address on the router You can use drop down menu to replace theInternetport sMACaddresswiththeMACaddressofaconn...

Страница 75: ...ss subnet mask gateway andDNSserveraddresses Inmostcases selectDynamicIP Enter the IP address provided by your ISP Static IP only Enter the subnet mask provided by your ISP Static IP only Enter the gateway IP address provided by your ISP Static IP only Enter the primary DNS server IP address assigned by your ISP PPTP Server IP Address Username Password Reconnect Mode Maximum Idle Time Address Mode...

Страница 76: ...ection 4 Configuration Enter the secondary DNS server IP address assigned by your ISP MaximumTransmission Unit you may need to change the MTU for optimal performance with your ISP Click Save when you are done Secondary DNS Server MTU ...

Страница 77: ... IP address subnet mask gateway andDNSserveraddresses Inmostcases selectDynamicIP Enter the IP address provided by your ISP Static IP only Enter the subnet mask provided by your ISP Static IP only Enter the gateway IP address provided by your ISP Static IP only Enter the primary DNS server IP address assigned by your ISP L2TP Server IP Address Username Password Reconnect Mode Maximum Idle Time Add...

Страница 78: ...ection 4 Configuration Enter the secondary DNS server IP address assigned by your ISP MaximumTransmission Unit you may need to change the MTU for optimal performance with your ISP Click Save when you are done Secondary DNS Server MTU ...

Страница 79: ...enter the AFTR IPv6 address used here Enter the B4 IPv4 address value used here Once connected the WAN IPv6 address will be displayed here Once connected the IPv6 WAN default gateway address will be displayed here Click Save when you are done DS Lite Configuration AFTR IPv6 Address B4 IPv6 Address WAN IPv6 Address IPv6 WAN Default Gateway DS Lite is an IPv6 connection type After selecting DS Lite ...

Страница 80: ...ith the appropriate options for your connection type Click Advanced Settings to expand the list and see all of the options My Internet Connection Is For Auto Detection refer to page 77 For Static IPv6 refer to page 79 For Auto Configuration SLAAC DHCPv6 refer to page 81 For PPPoE refer to page 83 For IPv6 in IPv4 Tunnel refer to page 85 For 6 to 4 refer to page 87 For 6rd refer to page 88 For Loca...

Страница 81: ...ble or disable the Automatic IPv6 Address Assignment feature Enable or disable DHCP PD for other IPv6 routers connected to the LAN interface Note Thisfeaturerequiresasmallersubnetprefixthan 64 i e allowing for a larger address allocation such as 63 Contact your ISP for more information DNS Type Primary DNS Server Secondary DNS Server Enable DHCP PD LAN IPv6 Address LAN IPv6 Link Local Address Enab...

Страница 82: ...ser Manual Section 4 Configuration Select Stateful DHCPv6 SLAAC RDNSS or SLAAC Stateless DHCPv6 Enter the IPv6 address lifetime in minutes Click Save when you are done Auto Configuration Type Router Advertisement Lifetime ...

Страница 83: ...on Enter the primary DNS server address Enter the secondary DNS server address Enter the LAN local IPv6 address for the router Displays the router s LAN link local address Check to enable the Automatic IPv6 Address Assignment feature Use Link Local Address IPv6 Address Subnet Prefix Length Default Gateway Primary DNS Server Secondary DNS Server LAN IPv6 Address LAN IPv6 Link Local Address Enable A...

Страница 84: ...ser Manual Section 4 Configuration Select Stateful DHCPv6 SLAAC RDNSS or SLAAC Stateless DHCPv6 Enter the IPv6 address lifetime in minutes Click Save when you are done Auto Configuration Type Router Advertisement Lifetime ...

Страница 85: ...dress Enable or disable the Automatic IPv6 Address Assignment feature Enable or disable DHCP PD for other IPv6 routers connected to the LAN interface Note Thisfeaturerequiresasmallersubnetprefixthan 64 i e allowing for a larger address allocation such as 63 Contact your ISP for more information DNS Type Primary DNS Server Secondary DNS Server Enable DHCP PD LAN IPv6 Address LAN IPv6 Link Local Add...

Страница 86: ...ser Manual Section 4 Configuration Select Stateful DHCPv6 SLAAC RDNSS or SLAAC Stateless DHCPv6 Enter the IPv6 address lifetime in minutes Click Save when you are done Auto Configuration Type Router Advertisement Lifetime ...

Страница 87: ...nter the IP address provided by your ISP Static IP only MaximumTransmission Unit you may need to change the MTU for optimal performance with your ISP Select either ObtainDNSserveraddressautomatically orUsethe following DNS address If you selected Use the following DNS address above enter the primary DNS server address If you selected Use the following DNS address above enter the secondary DNS serv...

Страница 88: ... the Automatic IPv6 Address Assignment feature Enable or disable DHCP PD for other IPv6 routers connected to the LAN interface Note Thisfeaturerequiresasmallersubnetprefixthan 64 i e allowing for a larger address allocation such as 63 Contact your ISP for more information Select Stateful DHCPv6 SLAAC RDNSS or SLAAC Stateless DHCPv6 Enter the IPv6 address lifetime in minutes Click Save when you are...

Страница 89: ...ou selected Use the following DNS address above enter the secondary DNS server address Enable or disable DHCP PD for other IPv6 routers connected to the LAN interface Note Thisfeaturerequiresasmallersubnetprefixthan 64 i e allowing for a larger address allocation such as 63 Contact your ISP for more information Remote IPv4 Address Remote IPv6 Address Local IPv4 Address Local IPv6 Address Subnet Pr...

Страница 90: ...rs connected to the LAN interface Note Thisfeaturerequiresasmallersubnetprefixthan 64 i e allowing for a larger address allocation such as 63 Contact your ISP for more information Select Stateful DHCPv6 SLAAC RDNSS or SLAAC Stateless DHCPv6 Enter the IPv6 address lifetime in minutes Click Save when you are done LAN IPv6 Address LAN IPv6 Link Local Address Enable Automatic IPv6 Address Assignment E...

Страница 91: ...ful DHCPv6 SLAAC RDNSS or SLAAC Stateless DHCPv6 Enter the IPv6 address lifetime in minutes Click Save when you are done 6 to 4 Address 6 to 4 Relay Primary DNS Server Secondary DNS Server LAN IPv6 Address LAN IPv6 Link Local Address Enable Automatic IPv6 Address Assignment Auto Configuration Type Router Advertisement Lifetime In this section the user can configure the IPv6 6 to 4 connection setti...

Страница 92: ...tion to enter the settings yourself Enter the 6rd IPv6 prefix and mask length supplied by your ISP manual configuration only Enter the 6rd border relay IPv4 address settings supplied by your ISP manual configuration only Enter the LAN local IPv6 address for the router Displays the router s LAN link local address Assign IPv6 Prefix Primary DNS Server Secondary DNS Server Enable Hub and Spoke Mode 6...

Страница 93: ...the Automatic IPv6 Address Assignment feature Select Stateful DHCPv6 SLAAC RDNSS or SLAAC Stateless DHCPv6 Enter the IPv6 address lifetime in minutes Click Save when you are done Enable Automatic IPv6 Address Assignment Auto Configuration Type Router Advertisement Lifetime ...

Страница 94: ...cally configure the ULA prefix for the default setting If you wish to choose your own ULA prefix enter it here This section will display the current settings for your IPv6 ULA Click Save when you are done Enable ULA Use Default ULA Prefix ULA Prefix Current IPv6 ULA Settings Local Connectivity Only allows you to set up an IPv6 connection that will not connect to the Internet ...

Страница 95: ...s will depend on the wireless frequency band as well as the currently selected security mode Select the desired channel The default is Auto recommended Select the desired wireless transmission power Select Auto 20 40 if you are using both 802 11n and non 802 11n wireless devices or select 20 MHz if you are not using any 802 11n wireless clients Smart Connect Status Wi Fi Name SSID Password Securit...

Страница 96: ...ot want to broadcast the SSID of your wireless network Use the drop down menu to select the time schedule that the rule will be enabled on The schedule may be set to Always Enable or you can create your own schedules in the Schedules section refer to page 111 Click Save when you are done Visibility Status Schedule ...

Страница 97: ...from accessing other local network devices Click Save when you are done Status Wi Fi Name SSID Password Internet Access Only In the Settings menu on the bar on the top of the page click Wireless then click the Guest Zone link Click Advanced Settings to expand the list and see all of the options The following options apply to both the 2 4 GHz and the 5 GHz wireless frequency bands The guest zone fe...

Страница 98: ...transfer the DNS server information from your ISP to your computers If enabled your computers will use the router for a DNS server Enable or disable the DHCP server Enter the starting and ending IP addresses for the DHCP server s IP assignment Note Ifyoustatically manually assignIPaddressestoyourcomputers or devices make sure the IP addresses are outside of this range or you may have an IP conflic...

Страница 99: ...tworks DHCP server to LAN WLAN clients Enable or disable Universal Plug and Play UPnP UPnP provides compatibilitywithnetworkingequipment softwareandperipherals You may set the port speed of the Internet port to 10 Mbps 100 Mbps 1000 Mbps or Auto recommended Enable to allow IPv4 multicast traffic to pass through the router from the Internet Enable to allow IPv6 multicast traffic to pass through the...

Страница 100: ...This area will display the HTTP and HTTPS links to connect to your SharePort drive through a web browser from a device on your network Note You may only use these link in local network Click Save when you are done Status DLNA Media Server Windows File Sharing SAMBA Web File Access Direct Links This page will allow you to set up access to files on an external USB device plugged into the router You ...

Страница 101: ...o the list of user accounts To save the new list click Save To return to the SharePort page click SharePort User Name Password Permission Folder TheCreateUserpageallowsyoutomanageyourSharePortuseraccounts Thecurrent listofuseraccountswillbedisplayed alongwiththeircurrentpermissionsandaccess path If they do not have an account set up users will be restricted to guest access only having access to th...

Страница 102: ...gs menu on the bar on the top of the page click mydlink If you do not already have a mydlink account click No I want to create a new mydlink account Fill out your email address which will also function as your username choose a password and enter your first and last name Then click Sign Up to create your new mydlink account If you already have a mydlink account click Yes I have a mydlink account E...

Страница 103: ...f some are off screen you can use the and buttons to scroll through the cards A maximum of one device can be assigned Highest priority A maximum of two devices can be assigned High priority A maximum of eight devices can be assigned Medium priority If no devices are explicitly assigned a priority they will all be treated with equal priority If some devices are not assigned a priority and others ar...

Страница 104: ...ough the session conforms to the protocol Enable this feature to protect your network from certain kinds of spoofing attacks Enable or disable IPv6 simple security Enable or disable IPv6 ingress filtering Allows multiple machines on the LAN to connect to their corporate network using the PPTP protocol Enable DMZ DMZ IP Address Enable SPI IPv4 Enable Anti Spoof Checking IPv6 Simple Security IPv6 In...

Страница 105: ...se check with the system administrator of your corporate network whether your VPN client supports NAT traversal Allows applications that uses Real Time Streaming Protocol RTSP to receive streaming media from the Internet Allows devices and applications using VoIP Voice over IP to communicate across NAT SomeVoIP applications and devices have the ability to discover NAT devices and work around them ...

Страница 106: ...11 Click OK when you are done The IPv4 IPv6 Rules section is an advanced option that lets you configure what kind of traffic is allowed to pass through the network To configure the IPv4 rules from the Firewall Settings page click IPv4 Rules To configure IPv6 rules from the Firewall Settings page click IPv6 Rules To return to the main Firewall Settings page click Security Check To begin use the dro...

Страница 107: ...chedule that the rule will be enabled on The schedule may be set to Always Enable or you can create your own schedules in the Schedules section refer to page 111 Click OK when you are done Name Local IP TCP Port UDP Port Schedule Port forwarding allows you to specify a port or range of ports to open for specific devices on the network This might be necessary for certain applications to connect thr...

Страница 108: ...ble or you can create your own schedules in the Schedules section refer to page 111 Click OK when you are done The virtual server allows you to specify a single public port on your router for redirection to an internal LAN IP Address and Private LAN port To configure the virtual server from the Port Forwarding page click Virtual Server To return to the main Port Forwarding page click Port Forwardi...

Страница 109: ...ock select DENY computers access to ONLY these sites from the drop down menu All other sites will be accessible If you want to specify a list of sites to allow select ALLOW computers access to ONLY these sites from the drop down menu All other sites will be blocked You may specify a maximum of fifteen web sites To add a new site to the list click Create New Rule Next underWebsite URL Domain enter ...

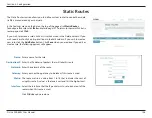
Страница 110: ...ed Click OK when you are done The Static Routes section allows you to define custom routes to control how data traffic is moved around your network In the Features menu on the bar on the top of the page click Static Routes ToconfigureIPv6rules clickIPv6andrefertopage107 ToreturntothemainIPv4static routes page click IPv4 If you wish to remove a rule click on its trash can icon in the Delete column ...

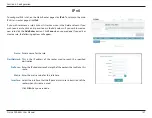
Страница 111: ...t out of the router when this route is used Click OK when you are done Name DestNetwork PrefixLen Metric Interface IPv6 To configure IPv6 rules on the Static Routes page click IPv6 To return to the main IPv4 static routes page click IPv4 If you wish to remove a rule click on its trash can icon in the Delete column If you wish to edit a rule click on its pencil icon in the Edit column If you wish t...

Страница 112: ...dynamic DNS will reveal further configuration options Displays the current dynamic DNS connection status Enter the address of your dynamic DNS server or select one from the drop down menu Enter the host name that you registered with your dynamic DNS service provider Enter your dynamic DNS username Enter your dynamic DNS password Enter a timeout time in hours Click Save when you are done Enable Dyn...

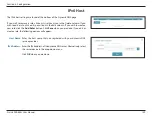
Страница 113: ...enu Click OK when you are done Host Name IPv6 Address The IPv6 host settings are found at the bottom of the Dynamic DNS page If you wish to remove a rule click on its trash can icon in the Delete column If you wish to edit a rule click on its pencil icon in the Edit column If you wish to create a new rule click the Add Rules button Click Save when you are done If you edit or create a rule the foll...

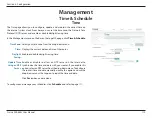
Страница 114: ... time zone from the drop down menu Displays the current date and time of the router Enable or disable daylight saving time Enable or disable to allow an NTP server on the Internet to synchronize the time and date with your router If you enable this option selectanNTPserverfromthedrop downmenu Toconfigure the router stime and date manually disable this option and use the drop down menus that appear...

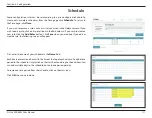
Страница 115: ...s pencil icon in the Edit column If you wish to create a new rule click the Add Rules button Click Save when you are done If you edit or create a rule the following screen will appear First enter the name of your schedule in the Name field Each box represents one hour with the time at the top of each column To add a time period to the schedule simply click on the start hour and drag to the end hou...

Страница 116: ...s enabled this option will set the router to send the log by email when the log is fully This option can be enabled to send an email according to a pre configured schedule See below If you enable On Schedule is enabled use the drop down menu to select the time schedule that the rule will be enabled on The schedule may be set to Always Enable or you can create your own schedules in the Schedules se...

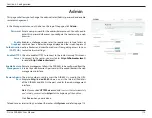
Страница 117: ...connect to the router securely This means to connect to the router you must enter https dlinkrouter local instead of http dlinkrouter local Remote management allows the DIR 885L to be configured from the Internetbyawebbrowser Apasswordisstillrequiredtoaccesstheweb management interface The port number used to access the DIR 885L is used in the URL Example http x x x x 8080 where x x x x is the Inte...

Страница 118: ...e button above You may configure the router to automatically reboot at a set time Pleasenote therouterwillbetemporarilyunavailablewhilerebooting Click to reboot the router immediately You may select Never Daily or Weekly Choose the day of the week to automatically reboot the router Choose the time of day to automatically reboot the router Click Save when you are done Save Settings To Local Hard Dr...

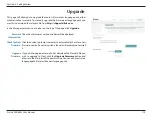
Страница 119: ...he top of the page click Upgrade The current firmware s version and date will be displayed Clickthisbuttontoprompttheroutertoautomaticallycheckforanew firmwareversion Ifanewerversionisfound itwillpromptyoutoinstall it If you wish to upgrade manually first download the firmware file you wish to upgrade to Next click the Upgrade Firmware button and browse to the file to install the new firmware You ...

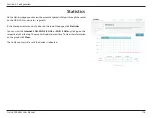
Страница 120: ...AN LAN and wireless segments In the Management menu on the bar on the top of the page click Statistics You can view the Internet LAN Wi Fi 2 4 GHz or Wi Fi 5 GHz by clicking on the respective tabs at the top The graph will update in real time To clear the information on the graph click Clear The traffic counter will reset if the device is rebooted ...

Страница 121: ...Blu ray DVD players wireless printers and cameras will have a WPS button or a software utility with WPS that you can press to connect to the DIR 885L router Please refer to your user manual for the wireless device you want to connect to make sure you understand how to enableWPS Once you know follow the steps below Step 1 Press the WPS button on the DIR 885L for about 1 second The 2 4 GHz and 5 GHz...

Страница 122: ...o knowthesecurity key Wi Fi password beingused 1 To join an existing network locate the wireless network icon in the taskbar next to the time display Wireless Icon 2 Clicking on this icon will display a list of wireless networks that are within connecting proximity of your computer Select the desired network by clicking on the network name You will then be prompted to enter the network security ke...

Страница 123: ...rotectedSetup WPS toconnecttotherouter you can also press the WPS button on your router during this step to enable the WPS function 4 When you have established a successful connection to a wireless network the word Connected will appear next to the name of the network to which you are connected to ...

Страница 124: ... on your wireless router or access point before configuring your wireless adapter If you are joining an existing network you will need to know the security key or passphrase being used 1 Click on the wireless icon in your system tray lower right corner 2 The utility will display any available wireless networks in your area Wireless Icon WPA WPA2 ...

Страница 125: ... name SSID you would like to connect to and click the Connect button IfyougetagoodsignalbutcannotaccesstheInternet checkyourTCP IP settings for your wireless adapter Refer to the Networking Basics section in this manual for more information 4 The following window appears while your computer tries to connect to the router ...

Страница 126: ...assword that is on your router and click Connect You can also connect by pushing the WPS button on the router It may take 20 30 seconds to connect to the wireless network If the connection fails please verify that the security settings are correct The key or passphrase must be exactly the same as the one on the wireless router ...

Страница 127: ...Wireless Network WPS The WPS feature of the DIR 885L can be configured using Windows 7 Carry out the following steps to use Windows 7 to configure the WPS feature 1 Click the Start button and select Computer from the Start menu 2 Click Network on the left side ...

Страница 128: ...k DIR 885L User Manual Section 5 Connecting to a Wireless Network 3 Double click the DIR 885L 4 InputtheWPSPINnumber ontherouterlabel intheSetup Wireless Setup menu in the Router s Web UI and click Next DIR 885L ...

Страница 129: ...125 D Link DIR 885L User Manual Section 5 Connecting to a Wireless Network 5 Type a name to identify the network 6 To configure advanced settings click the icon Click Next to continue ...

Страница 130: ... Router is being configured Wait for the configuration to complete 8 The following window informs you that WPS on the router has been set up successfully Makeanoteofthesecuritykeyasyoumayneedtoprovidethissecurity key if adding an older wireless device to the network in the future 9 Click Close to complete WPS setup ...

Страница 131: ...s Vista utility as seen below Right clickonthewirelesscomputericoninyoursystemtray lower right corner next to the time Select Connect to a network If you receive the Wireless Networks Detected bubble click on the center of the bubble to access the utility or The utility will display any available wireless networks in your area Click on a network displayed using the SSID and click the Connect butto...

Страница 132: ...efore configuring your wireless adapter If you are joining an existing network you will need to know the security key or passphrase being used 2 Highlight the Wi Fi name SSID you would like to connect to and click Connect 1 Open the Windows Vista Wireless Utility by right clicking on the wireless computer icon in your system tray lower right corner of screen Select Connect to a network ...

Страница 133: ...rity key or passphrase Wi Fi password that is on your router and click Connect It may take 20 30 seconds to connect to the wireless network If the connection fails please verify that the security settings are correct The key or passphrase must be exactly the same as the one on the wireless router ...

Страница 134: ...similar to theWindows XP utility as seen below Right click on the wireless computer icon in your system tray lower right corner next to the time Select View AvailableWireless Networks If you receive the Wireless Networks Detected bubble click on the center of the bubble to access the utility or The utility will display any available wireless networks in your area Click on a Wi Fi network displayed...

Страница 135: ...guring your wireless adapter If you are joining an existing network you will need to know the WPA key being used 2 Highlight the Wi Fi network SSID you would like to connect to and click Connect 1 OpentheWindows XPWirelessUtilitybyright clickingonthewireless computericoninyoursystemtray lower rightcornerofscreen Select View AvailableWireless Networks WPA WPA2 ...

Страница 136: ...Network Connection box will appear Enter the WPA PSK Wi Fi password and click Connect It may take 20 30 seconds to connect to the wireless network If the connection fails please verify that theWPA PSK settings are correct The Wi Fi password must be exactly the same as on the wireless router ...

Страница 137: ...e device itself Your computer must be on the same IP subnet to connect to the web based utility Make sure you have an updated Java enabled web browser We recommend the following Microsoft Internet Explorer 9 or higher Mozilla Firefox 20 or higher Google Chrome 25 or higher Apple Safari 5 1 or higher Verify physical connectivity by checking for solid link lights on the device If you do not get a so...

Страница 138: ...uter in the address bar This should open the login page for your web management If you still cannot access the configuration unplug the power to the router for 10 seconds and plug back in Wait about 30 seconds and try accessing the configuration If you have multiple computers try connecting using a different computer 2 What can I do if I forgot my password If you forgot your password you must rese...

Страница 139: ...ering the MTU in increments of ten Ex 1492 1482 1472 etc To find the proper MTU Size you ll have to do a special ping of the destination you re trying to go to A destination could be another computer or a URL Click on Start and then click Run Windows 95 98 and Me users type in command Windows NT 2000 XP Vista and 7 users type in cmd and press Enter or click OK Once the window opens you ll need to ...

Страница 140: ...th 1452 28 1480 Once you find your MTU you can now configure your router with the proper MTU size To change the MTU rate on your router follow the steps below Open your browser enter the IP address of your router 192 168 0 1 and click OK Enter your username admin and password blank by default Click OK to enter the web configuration page for the device Click on Setup and then click Manual Configure...

Страница 141: ... wires Wireless LANs are used increasingly in both home and office environments and public areas such as airports coffee shopsanduniversities InnovativewaystoutilizeWLANtechnologyarehelpingpeoplework andcommunicatemoreefficiently Increased mobility and the absence of cabling and other fixed infrastructure have proven to be beneficial for many users Wireless users can use the same applications they...

Страница 142: ...t transmit data from one point A to point B But wireless technology has restrictions as to how you can access the network You must be within the wireless network range area to be able to connect your computer There are two different types of wireless networksl Wireless Local Area Network WLAN and Wireless Personal Area Network WPAN Wireless Local Area Network WLAN In a wireless local area network ...

Страница 143: ...s laptops speakers and other devices that operate on batteries Who uses wireless Wirelesstechnologyasbecomesopopularinrecentyearsthatalmosteveryoneisusingit whetherit sforhome office business D Link has a wireless solution for it Home Uses Benefits Gives everyone at home broadband access Surf the web check email instant message etc Gets rid of the cables around the house Simple and easy to use Sma...

Страница 144: ... a task not knowing where to start That s why we ve put together a few setup steps and tips to help you through the process of setting up a wireless network Tips Here are a few things to keep in mind when you install a wireless network Centralize your router or access point Make sure you place the router access point in a centralized location within your network for the best performance Try to pla...

Страница 145: ... wireless clients will connect to an access point or wireless router Ad hoc Directly connecting to another computer for peer to peer communication using wireless network adapters on each computer such as two or more DIR 885L wireless network CardBus adapters An Infrastructure network contains an access point or wireless router All the wireless devices or clients will connect to the wireless router...

Страница 146: ...fy your IP address please follow the steps below Click on Start Run In the run box type cmd and click OK Windows 7 Vista users type cmd in the Start Search box At the prompt type ipconfig and press Enter This will display the IP address subnet mask and the default gateway of your adapter Iftheaddressis0 0 0 0 checkyouradapterinstallation security settings and the settings on your router Some firew...

Страница 147: ...k on the Local Area Connection which represents your network adapter and select Properties Step 3 Highlight Internet Protocol TCP IP and click Properties Step 4 Click Use the following IP address and enter an IP address that is on the same subnet as your network or the LAN IP address on your router Example If the router s LAN IP address is 192 168 0 1 make your IP address 192 168 0 X where X is a ...

Страница 148: ...n 802 11i and uses Advanced Encryption Standard AES instead of TKIP User authentication which is generally missing in WEP through the extensible authentication protocol EAP WEP regulates access to a wireless network based on a computer s hardware specific MAC address which is relatively simple to be sniffed out and stolen EAP is built on a more secure public key encryption system to ensure that on...

Страница 149: ...ating Humidity 10 to 95 maximum non condensing Certifications FCC Class B CE Class B C Tick IC IPv6 Ready Wi Fi Protected Setup WPS Wi Fi Multimedia WMM Compatible with Windows 8 Dimensions L 289 29 mm 11 39 inches W 191 05 mm 7 52 inches H 74 47 mm 2 93 inches 1 Maximum wireless signal rate derived from IEEE Standard 802 11a 802 11g 802 11n and 802 11ac specifications Actual data throughput will ...

Страница 150: ...erence to radio or television reception which can be determined by turning the equipment off and on the user is encouraged to try to correct the interference by one of the following measures Reorient or relocate the receiving antenna Increase the separation between the equipment and receiver Connect the equipment into an outlet on a circuit different from that to which the receiver is connected Co...

Страница 151: ...d to USA operational channels only RF Frequency Requirements This device is for indoor use only when using all channels in the 5 150GHz 5 250GHz 5 250GHz 5 350GHz 5 470GHz 5 725GHz 5 725GHz 5 850GHz frequency range High power radars are allocated as primary users of the 5 150GHz 5 250GHz 5 250GHz 5 350GHz 5 470GHz 5 725GHz 5 725GHz 5 850GHz bands These radar stations can cause interference with an...

Страница 152: ...erference to co channel mobile satellite systems Le présent appareil est conforme aux CNR d Industrie Canada applicables aux appareils radio exempts de licence L exploitation est autorisée aux deux conditions suivantes 1 l appareil ne doit pas produire de brouillage et 2 l utilisateur de l appareil doit accepter tout brouillage radioélectrique subi même si le brouillage est susceptible d en compro...

Страница 153: ... présent émetteur radio DIR 885L a été approuvé par Industrie Canada pour fonctionner avec les types d antenne énumérés ci dessous et ayant un gain admissible maximal et l impédance requise pour chaque type d antenne Les types d antenne non inclus dans cette liste ou dont le gain est supérieur au gain maximal indiqué sont strictement interdits pour l exploitation de l émetteur Warning This unit is...

Отзывы: