0110562R4 Page 5 of 8
4. Attach Shelf to Cart
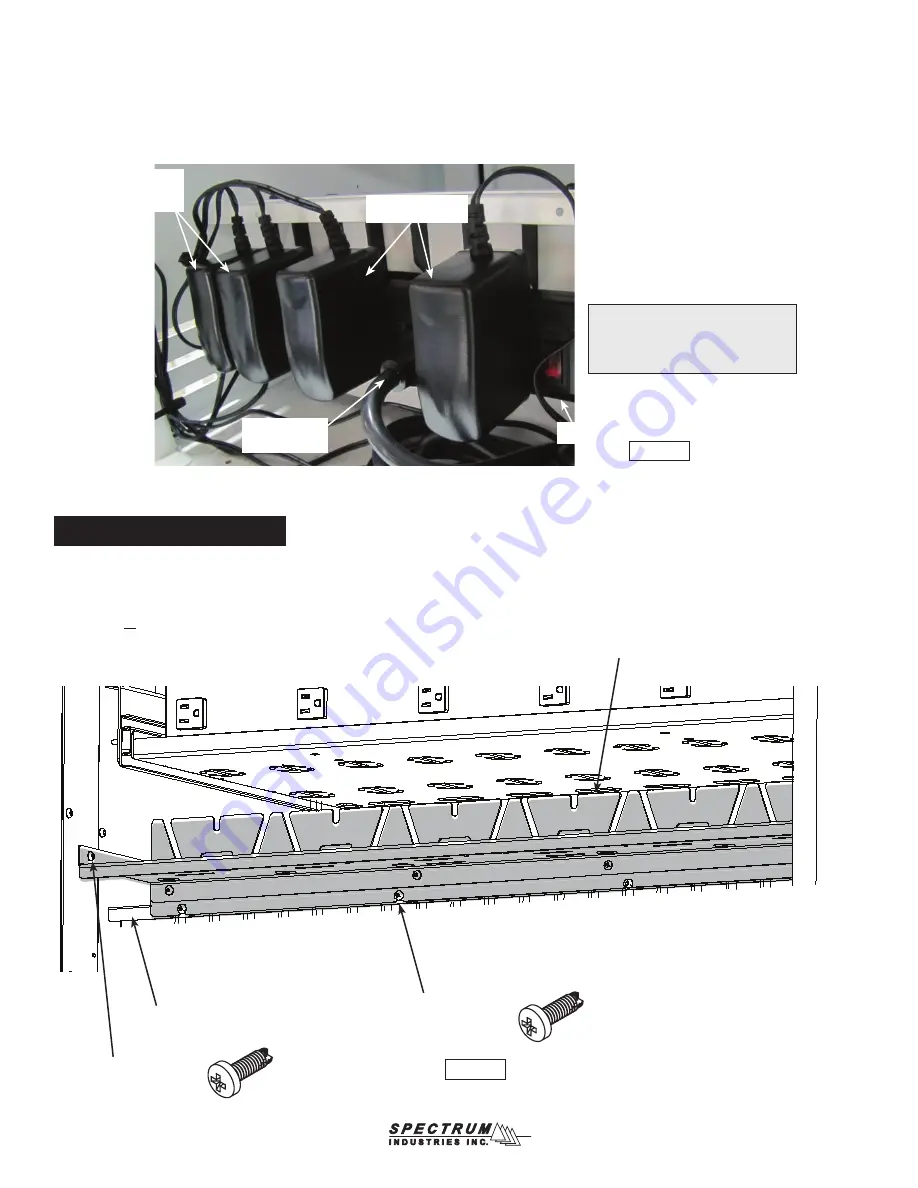
A. Open the Instructor-side doors on the cart (outlet-side) install (4) 8-32 x 1/2” PH thread cutting screws in the divider
panel but do not tighten completely.
Figure 4
.
B. Set the shelf assembly onto the 4 screws as shown. Tipping the shelf slightly will help get it into the cart.
C. Secure the shelf to the side panels using the remaining (2) 8-32 x 1/2” PH thread cutting screws.
D. Tighten all screws securely.
divider panel
8-32 x 1/2” thread cutting
screw (4 req’d to attach
shelf to divider panel)
shelf assembly
8-32 x 1/2” thread cutting
screw (1 per side)
Figure 4
D. Place the 7-outlet power strip at the bottom of the cart. This power strip can be mounted to the the back of the tablet storage panel or
placed in the bottom of the cart. Switch off both power strips.
E. Plug the (7) USB hub power adapters into both power strips. The adapters need to be staggered and plugged in as shown.
Figure 3G
.
Note: 2 hub power adapters can be plugged in next to each other at the end of the power strip opposite the switch.
The remaining hub adapters will be staggered.
Figure 3G.
Figure 3G
staggered power
adapters
2 power
adapters
together
plug plug from
cart power strip
power strip
Note: The 7-outlet power strip shown
is attached to the back of the tablet
storage panel. It can also be located
on the bottom of the cart.


