CY8CKIT-031 PSoC® CapSense® Expansion Board Kit Guide, Doc. # 001-66474 Rev. *H
17
Code Examples
The BMM module has four row sensors and four column sensors. Touching a button activates the
corresponding row and column sensors. The example uses the auto-tuning feature (i.e., the tuning
method is set to Auto (Smart-Sense) in the Capsense component), which sets all CapSense
parameters to best values automatically. The USBFS component is configured as a HID keyboard.
The buttons on the BMM are mapped to keys on the calculator as follows:
The code waits for the USB cable to be connected to the PC from the USB connecter on the board
(USB connector J2 on CY8CKIT-030/CY8CKIT-050LP and USB connector J9 on CY8CKIT-001).
The code proceeds to CapSense sensor scanning only if USB enumeration is successful. When the
USB enumeration is successful, the LED4 on CY8CKIT-030/050 and LED1 on CY8CKIT-001 (a
jumper wire connection to P1_6 is required) on board turns on.
The example is tested to work without any overlay. When an overlay of some thickness is used, the
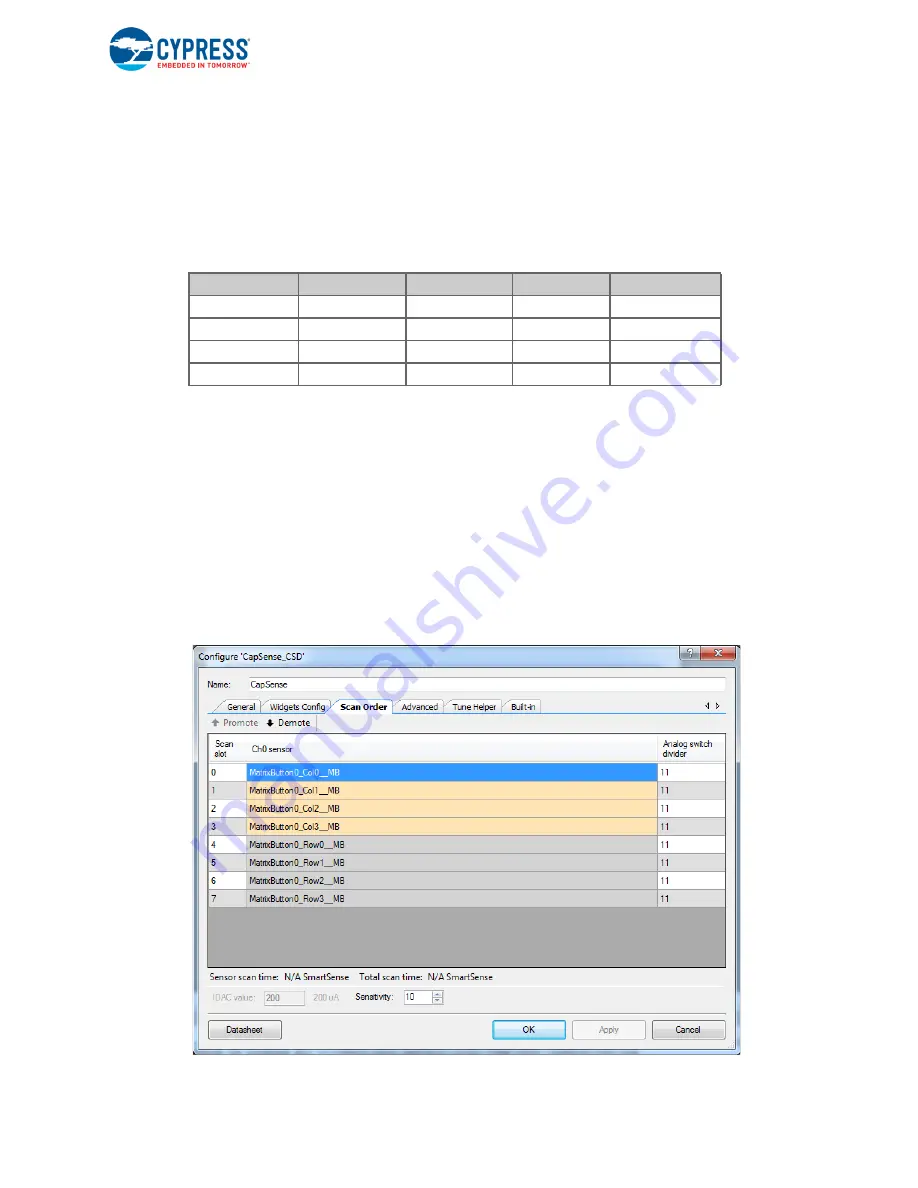
Sensitivity parameter should be changed appropriately for Capsense to work. To configure the
Sensitivity parameter, double-click on the
CapSense_CSD
component. Click on the
Scan Order
tab. Select the individual CapSense sensor and configure sensitivity as required.
The sensitivity parameter indicates the finger capacitance, which depends on the button area,
overlay thickness, and dielectric constant of overlay material.
Figure 4-1. Configuring ‘CapSense_CSD’
Table 4-1. Button - Key Mapping
Col 0
Col 1
Col 2
Col3
Row 0
0
1
2
3
Row 1
4
5
6
7
Row 2
8
9
.
=
Row 3
+
–
*
/


